Virtual queue groups comprise two or more queues across multiple ACD routing systems, all of which send ACD voice interactions to the same pool of agent groups, in order to offer load balancing within the virtual queue.
- When the IVR ports are not on the same PBX as queues, the Virtual Queue Groups work as a load-balancing mechanism. When the call is routed to a Virtual Queue Group, the call is routed to the queue that has the lowest estimated wait time.
- When the IVR ports are on the same PBX as the queues, attempt is made to route the call to the queue on the local ACD routing system, and, if it is closed, then the call is routed to the remaining queues in the virtual queue group using the Lowest Estimated Wait Time algorithm.
The local queue is considered to be in its last known state if the IVR does not get any information from the Enterprise server.
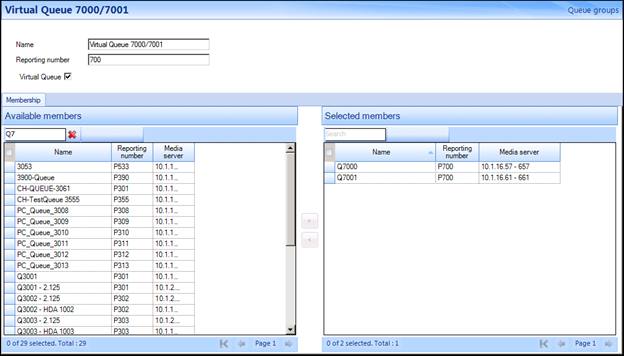
- PBX 1: Queue 7000: reporting number P700, dialable 7000 on PBX1, queue 700, 701, 702 assigned
- PBX 2: Queue 7001: reporting number P700, dialable 7001 on PBX2, queue 700, 701, 702 assigned
Virtual queue groups provide the ability to merge multiple queues into a single visual representation in Interactive Visual Queue and provide callers with an accurate position in queue through the MiContact Center UPiQ Service.
If you are licensed for IVR or Messaging and Routing, virtual queue groups can be used to provide resiliency paths for activities such as Transfer.
- Although Virtual queue groups are added and configured under Queue Groups in YourSite Explorer, a virtual queue group is treated as a singular entity.
- Ring Groups are not supported for virtual queue groups.
- Add a Virtual queue group
- Associate queues to a Virtual queue group
- Remove queues from a Virtual queue group
- Create a virtual queue group using the Virtual Queue Group button
- Click YourSite > Queue groups.
- Click Add > Mitel Virtual.
- Type a Name.
- Type a Reporting number.
- Click Save.
- Click YourSite > Queue groups.
- Select a Virtual queue group from the list.
- On the Membership tab, under Available members, select a queue and click > to move the queue to the Selected members list.
Repeat as necessary.
- Click Save.
- Click YourSite > Queue groups.
- Select a Virtual queue group from the list.
- On the Membership tab, under Selected members, select a queue and click < to move the queue to the Available members list.
Repeat as necessary.
- Click Save.
- Click YourSite > Queues.
- Select the queues you want to be part of the Virtual queue group
Note:
Queues must be identically configured, with the exception of media servers and dialable numbers.
- In the ribbon, click Queue Tools.
- Click Create virtual queue group.
- After Name, enter the name for the virtual queue group
- If you want to change the reporting number of the virtual queue group, after Reporting number, enter the reporting number
By default, the reporting number will be the same as the member queues.
- Click Save.