Configuring security roles
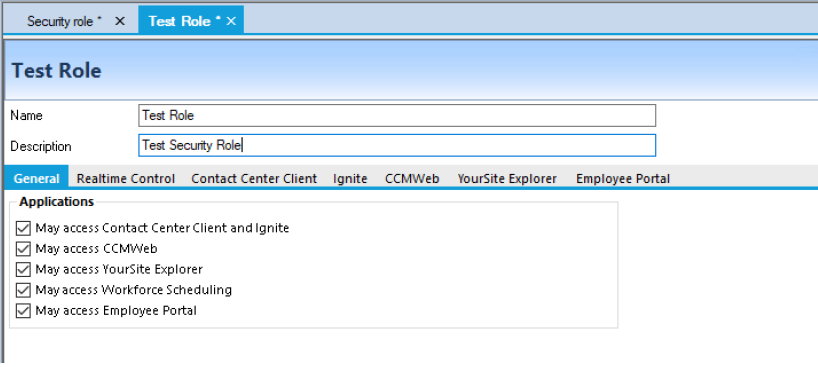
You can configure security to restrict user access to specific areas of CCMWeb and the Contact Center Client, YourSite Explorer, Workforce Scheduling, Employee Portal, and Ignite applications. The following figure shows the security options available under General tab.
For example, if you want to restrict users from accessing Contact Center Client and Enterprise Configuration, then you must create a security role with those characteristics.
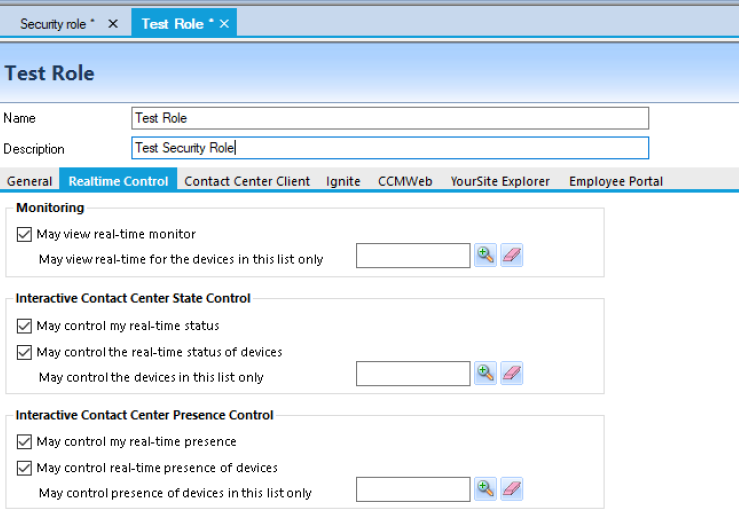
You can further configure seresorcurity options under the specific tabs to restrict access to reports, real time and Interactive Contact Center statistics, Chat, sites, and real-time monitors. These security options often require that appropriate security lists be made. (See the following figure.)
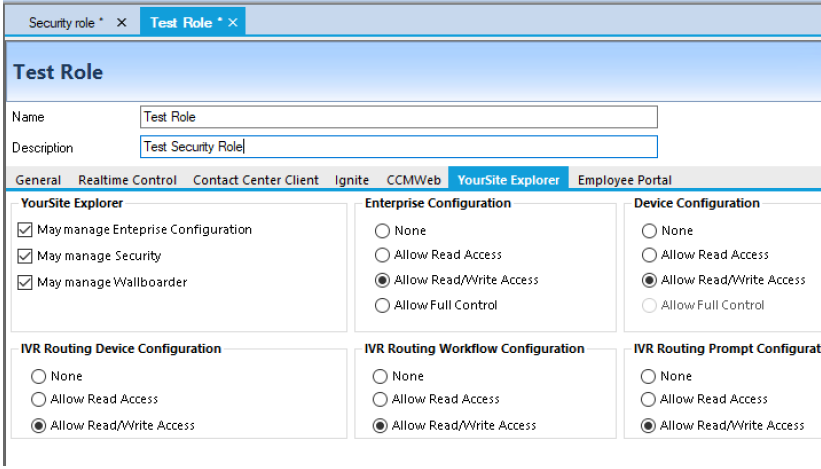
The following table describes the specific setting options for YourSite Explorer synchronization for security.
Option |
Description |
|---|---|
None |
If None is enabled you cannot view or configure Enterprise settings or devices in YourSite Explorer. |
Allow Read Access |
Allow Read Access enables you to read Enterprise and device configuration settings in YourSite Explorer. |
Allow Read/Write Access |
Allow Read/Write Access enables you to read Enterprise and device configuration settings in YourSite Explorer and write them to the YourSite database. |
Allow Full Control |
Allow Full Control enables you to read Enterprise and device configuration settings in YourSite Explorer, write them to the YourSite database, and write back devices programmed in YourSite Explorer to the telephone system ACD Routing System. |
Advanced security role options require the creation of a security list before the role can be configured. Using these lists, you can define a security role's access to devices. See "Creating security lists".
After you create device security lists you can create an advanced security role that restricts access to reports, real-time statistics, ChatLine, sites, and real-time monitors.
Security roles are assigned to employees in their General tab. See "Configuring general employee information".
- Under Internet Options > Security, enable ‘Automatic logon with current user name and password’
- Under Internet Options > Advanced, enable ‘Enable Integrated Windows Authentication’
- In the Enterprise pane, click Security role.
- Click Add.
- Type a role name in Name.
- Type a description in Description.
- On the General tab, clear the check boxes of the items
the user is not permitted to use.
If required, click the specific component tabs and specify advanced security.
- Click Save.
- In the Enterprise pane, click Security role.
- Click the security role for which you want to view properties.
You can assign the security roles to new users and to existing users.
- In the Enterprise pane, click Security role.
- Select the security role and click Edit.
- Make the desired changes to the security role.
- Click Save. Note:
Users who are currently logged on will not be affected by changes made to their associated role until the next time they log on.