Create the Azure Client Application in Azure
The Azure Client application is an enabling mechanism for the MiVoice Business Console to retrieve Active Directory data required for the Calendar Integration feature. Customers can create their own Azure Client application and configure the Azure Client ID in the Calendar Options panel of MiVoice Business Console.
This section describes the procedures for creating an Azure Client application and configuring the Azure Client application.
Following are the steps to create the Azure Client application:
-
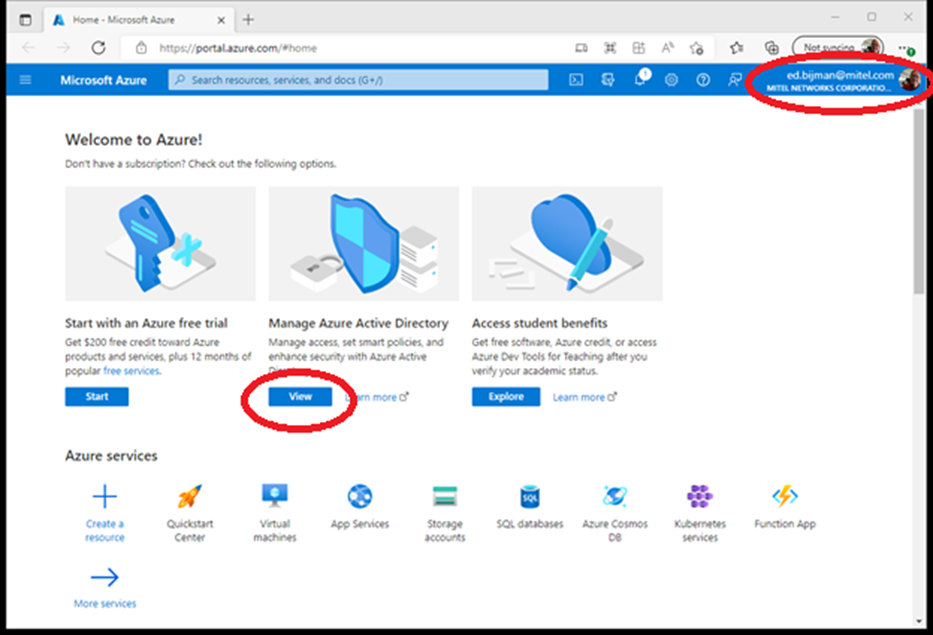
Sign in to the portal.azure.com (Azure portal) using either a work or school account.
-
If your account is present in more than one Azure AD tenant, select your profile at the top right corner in the menu on top of the page, and then switch directory. Change your portal session to the desired Azure AD tenant.
-
Select View in the Manage Azure Active Directory area.
-
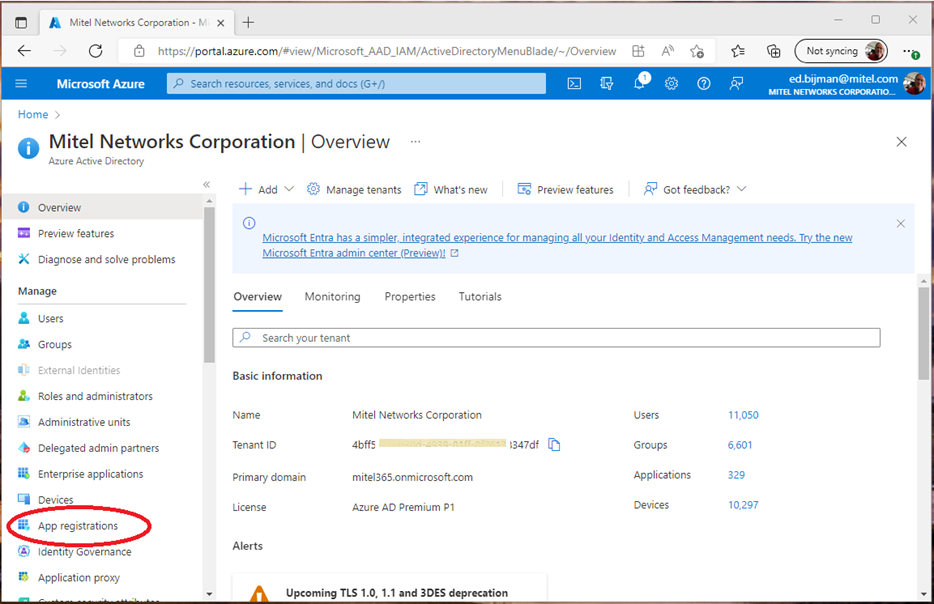
Select App registrations.
Following are the steps to register the Azure Client application:
-
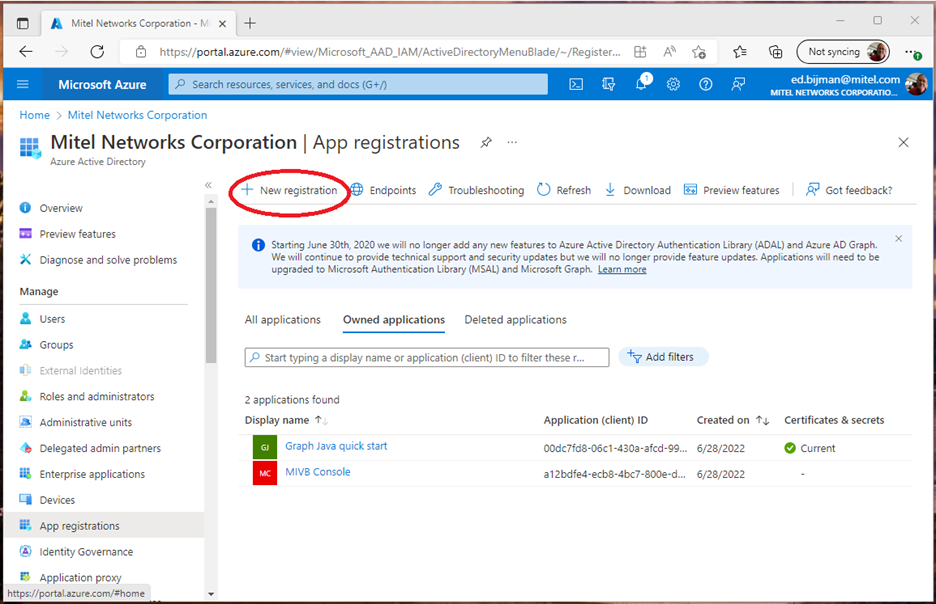
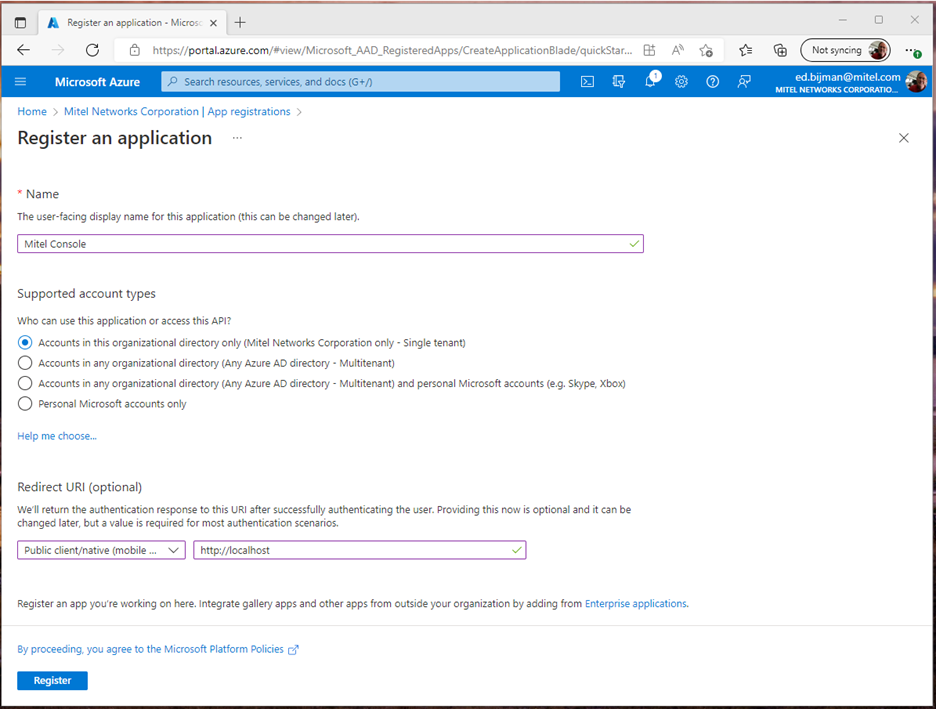
Select New registration.
-
Enter the application name in the Name section, which will be displayed to users of the application, for example Mitel Console.
-
In the Supported account types field, select Accounts in any organizational directory.
-
In the Redirect URL field, select Public Client/native (mobile..) and enter http://localhost in the URL field.
-
Click Register to proceed to register the Azure Client application you created.
-
-
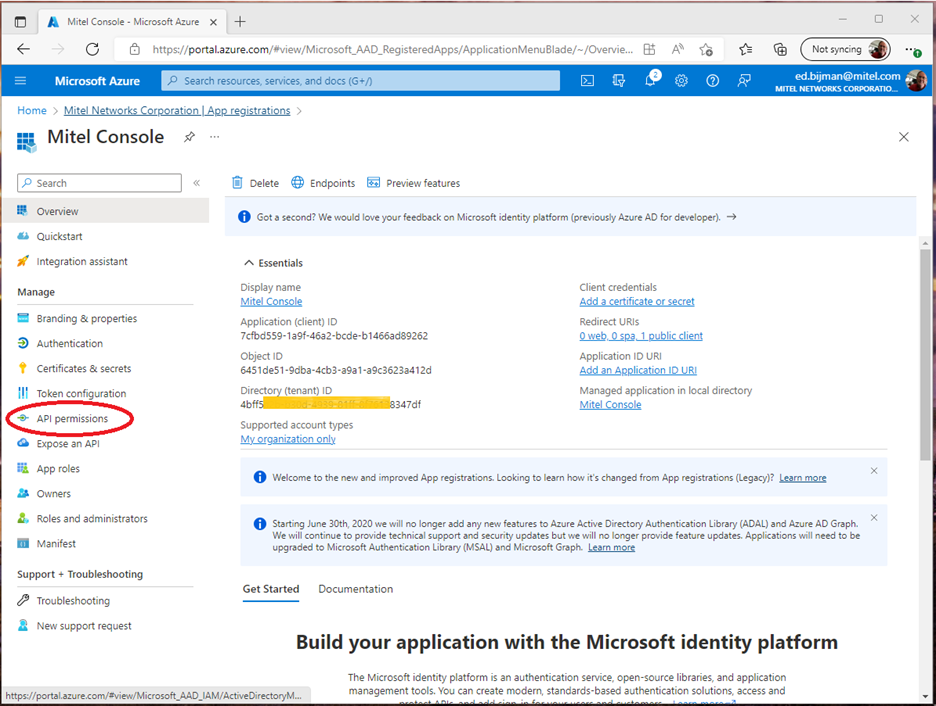
In the Overview page, navigate to Application (client) ID and Directory (tenant) ID values and record these for later use.
-
In the list of pages for the application, select Manifest and:
-
In the manifest editor, set the allowPublicClient property to true.
-
Select Save in the bar above the manifest editor.
-
-
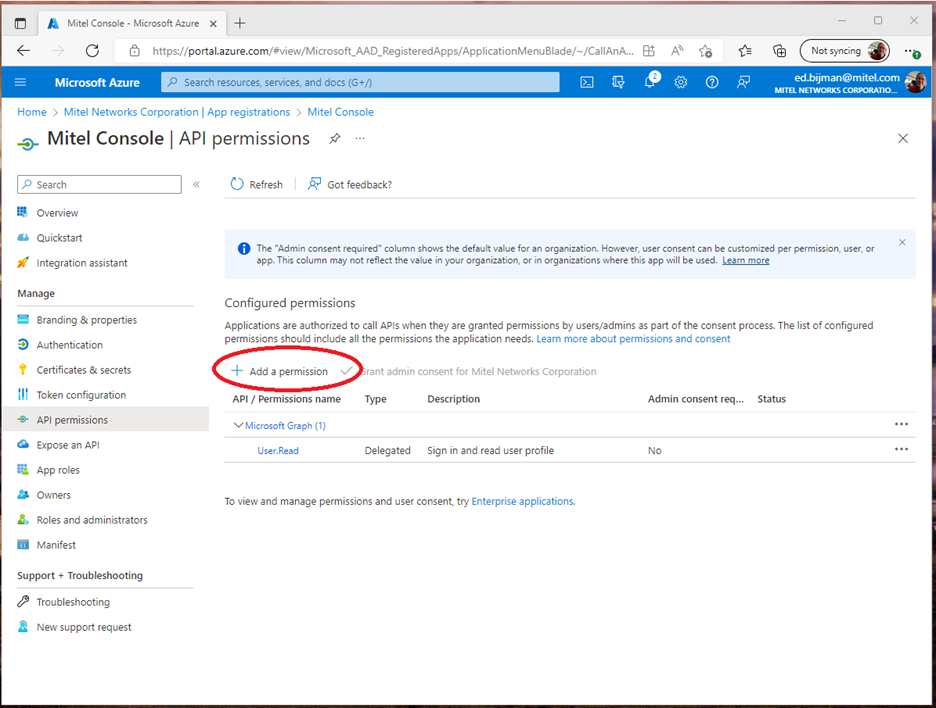
In the list of pages for the application, select API Permissions.
-
Click the Add a permission button.
-
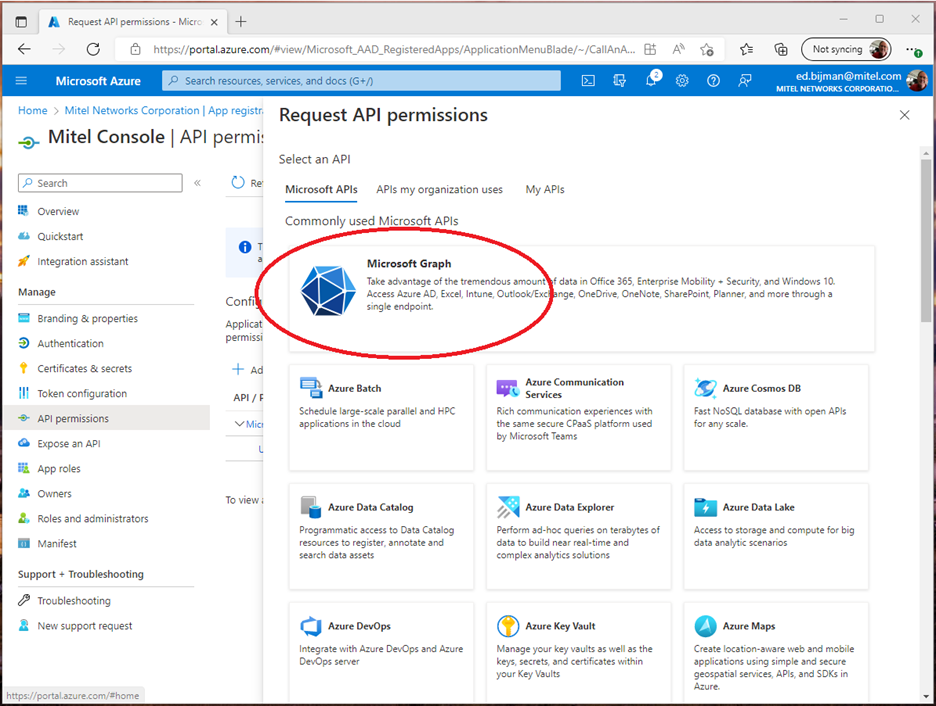
Ensure that the Microsoft APIs tab is selected.
-
In the Commonly used Microsoft APIs section, click Microsoft Graph.
-
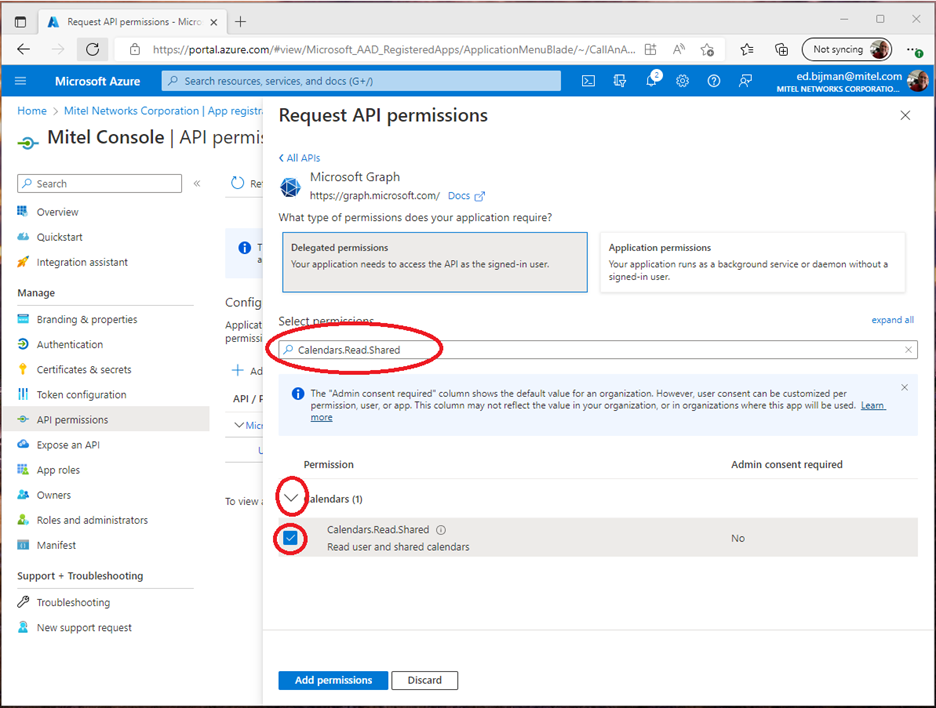
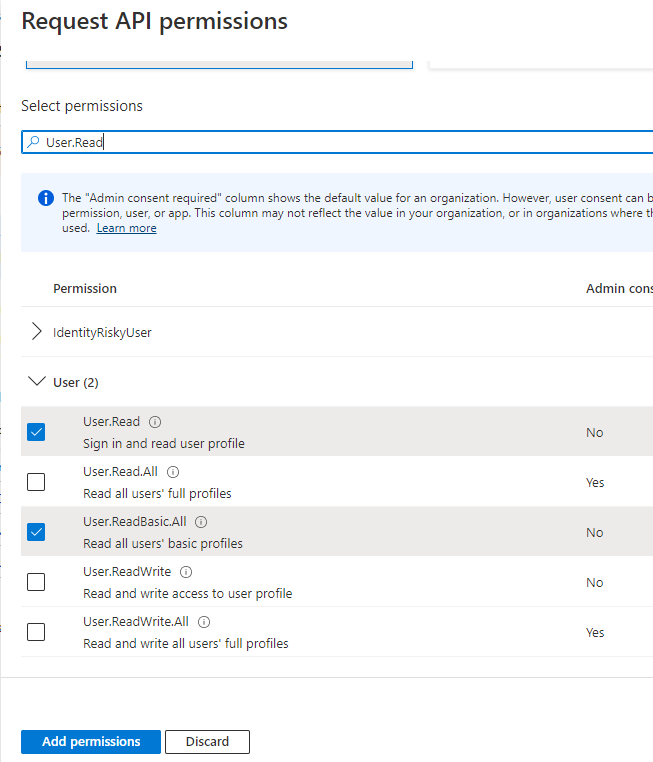
In the Delegated permissions section, ensure that all the following four permissions are selected (use the search box if necessary):
-
User.Read
-
User.ReadBasic.All
-
Calendars.Read.Shared
-
MailboxSetting.Read
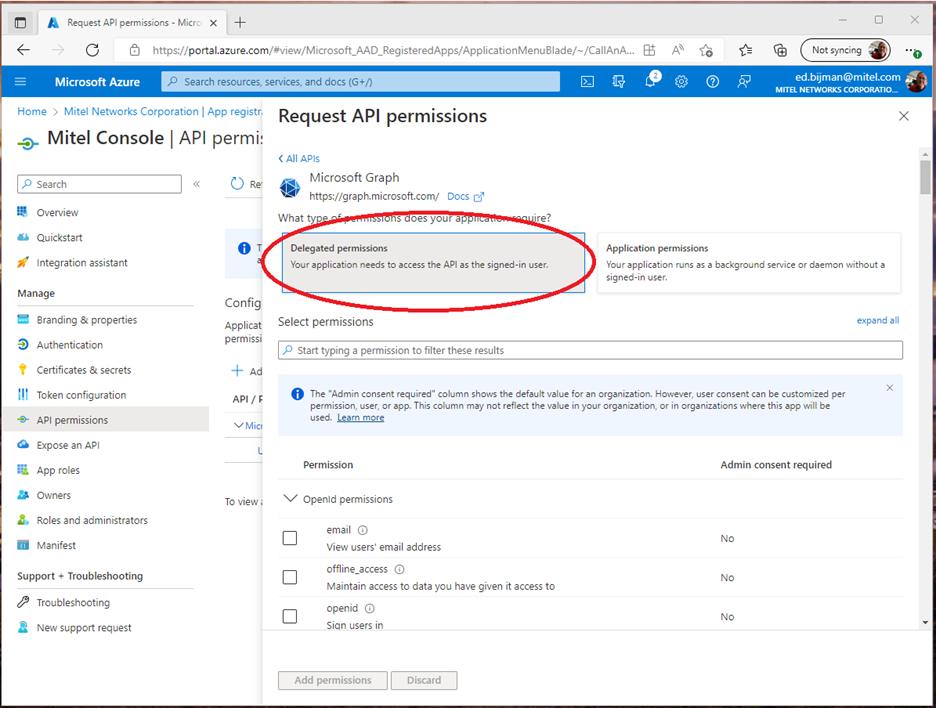
-
-
Click Add permissions.
-
-
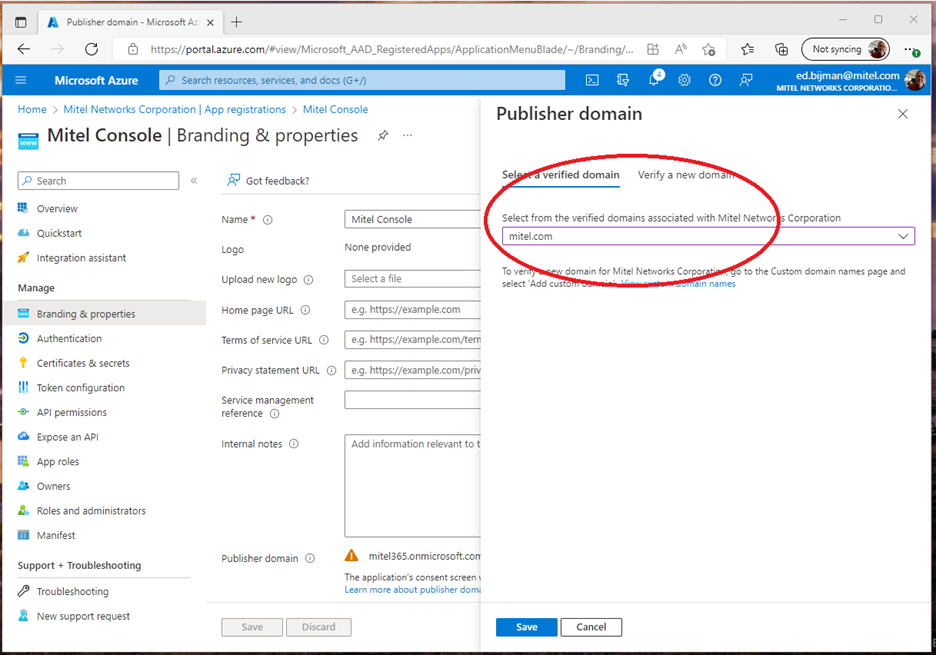
In the list of pages for the application, select Branding & properties.
-
Click Update domain.
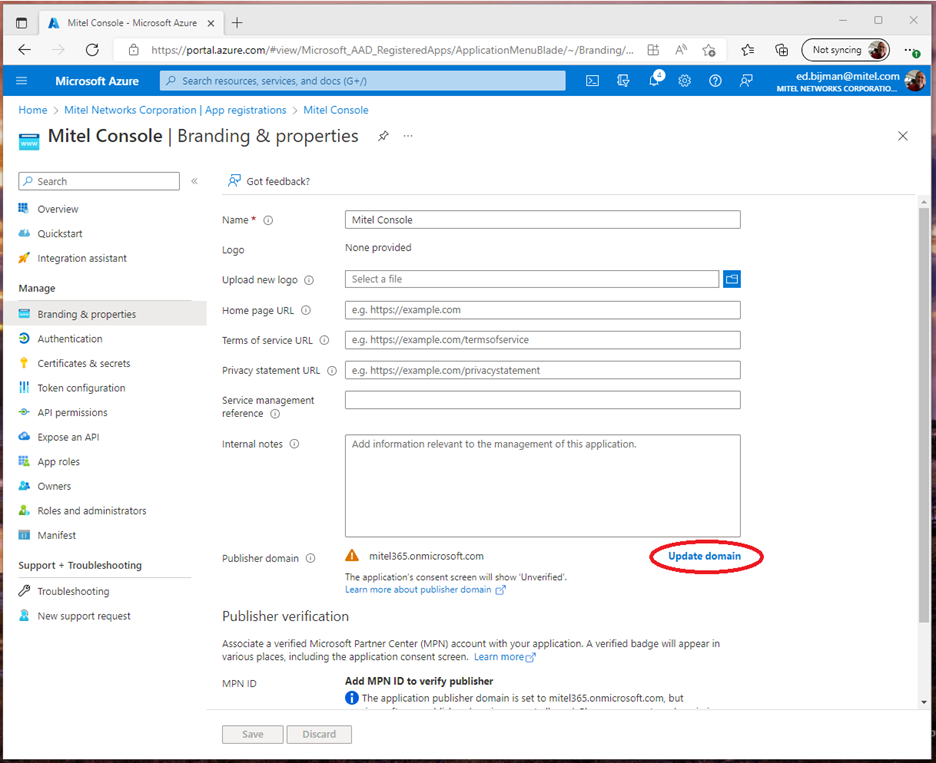
-
-
Select a suitable Publisher for the verified domain field. The Azure Client application is ready for use.