Configure Username Display Format
You can choose how user names appear—such as showing the first or last name first—to keep your directory consistent across Mitel Administration, CloudLink apps, and your connected phone systems.
Role Requirements: You must log in as a Partner Administrator or Customer Account Administrator to view or modify this setting. This control is only accessible to Administrators with the appropriate access permissions.
Feature Dependency: This setting requires an active MiVoice Business Administration integration. If the administration feature is disabled or removed from the account, custom display formatting stops applying, and user names revert to the raw format provided by the PBX.
Microsoft Entra ID (SCIM): User names provisioned and synchronized through Microsoft Entra ID (SCIM) are not modified by CloudLink. To maintain consistent formatting across all users in your organization, ensure that your Entra ID display name attribute is configured to match your selected CloudLink naming convention.
Single Name Profiles: If a user profile contains only a last name or only a first name, the system displays just that single name without adding trailing spaces or punctuation formatting.
Set the Display Format Preference
Log in to Mitel Administration as a Partner Administrator or Customer Account Administrator.
From the left navigation menu, click Integrations & Apps.
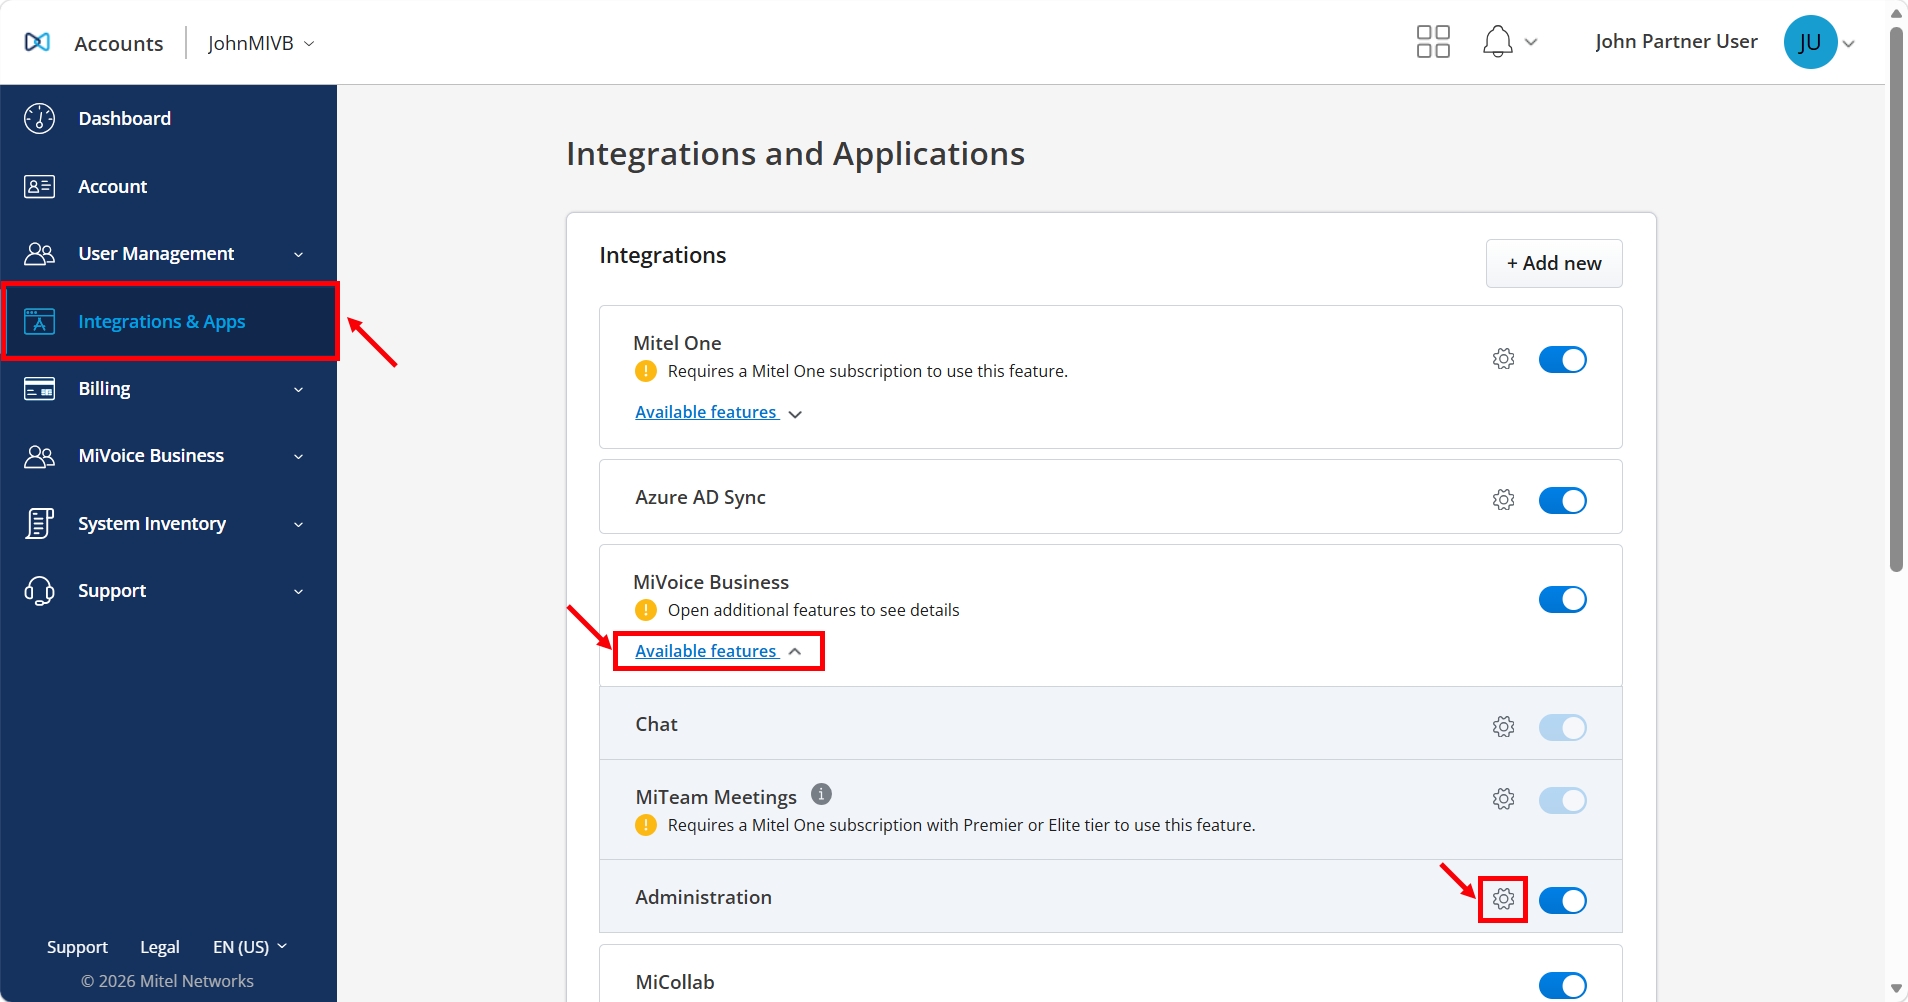
In the MiVoice Business Integration section, click Available features.
Click the gear icon associated with the Administration section. The Account Preferences dialog box appears.
In the Account Preferences dialog box, expand the Name Display Format section.
- Select the radio button corresponding to your preferred naming convention:
System Default: Applies no format preference and preserves the CloudLink name unchanged.
Last First: Displays the last name followed by the first name (for example, Smith John).
Last, First: Displays the last name followed by a comma, a space, and the first name (for example, Smith, John).
First Last: Displays the first name followed by the last name (for example, John Smith).
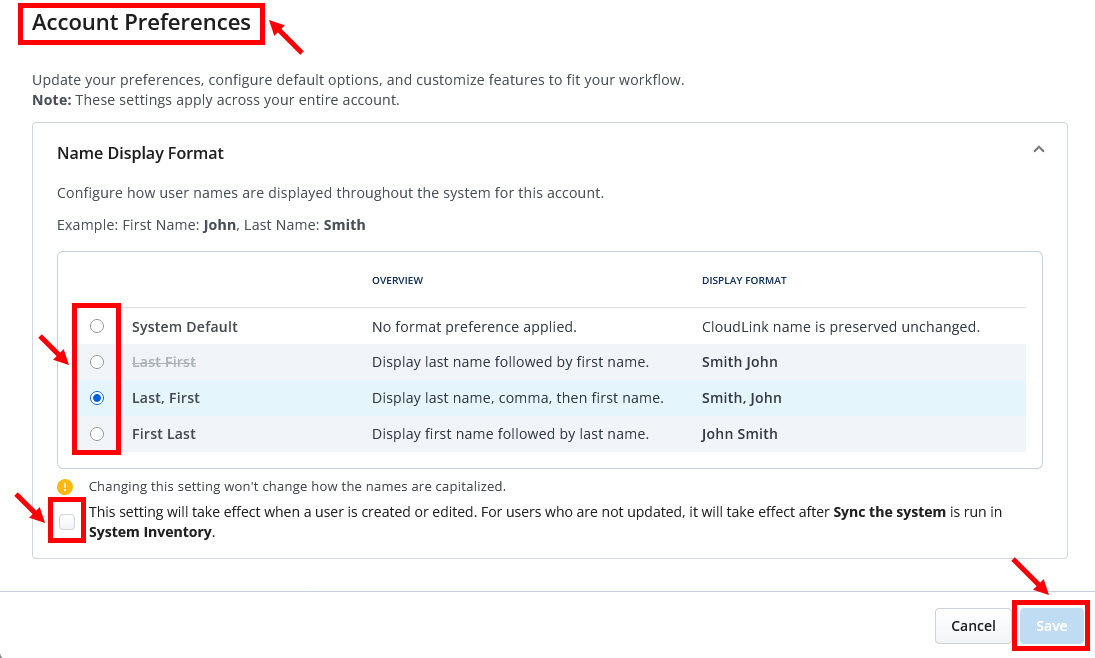
Review the information banner indicating that changing this setting will not change how user names are capitalized.
- Select the This setting will take effect when a user is created or edited. For users who are not updated, it will take effect after Sync the system is run in System Inventory. check box to acknowledge how and when the update applies.Note: In a Traditional CloudLink Gateway deployment, it is not possible to synchronize existing users to the new display format unless those users are subsequently edited. We recommend upgrading to a CloudLink Daemon (CLD) deployment so all users can have their display format synchronized.
Click Save to apply the changes.
Synchronize User Names (CloudLink Daemon Environments Only)
From the left navigation menu, click System Inventory, and then click Applications.
Click the More options icon (three vertical dots) in the top-right corner of the Applications page.
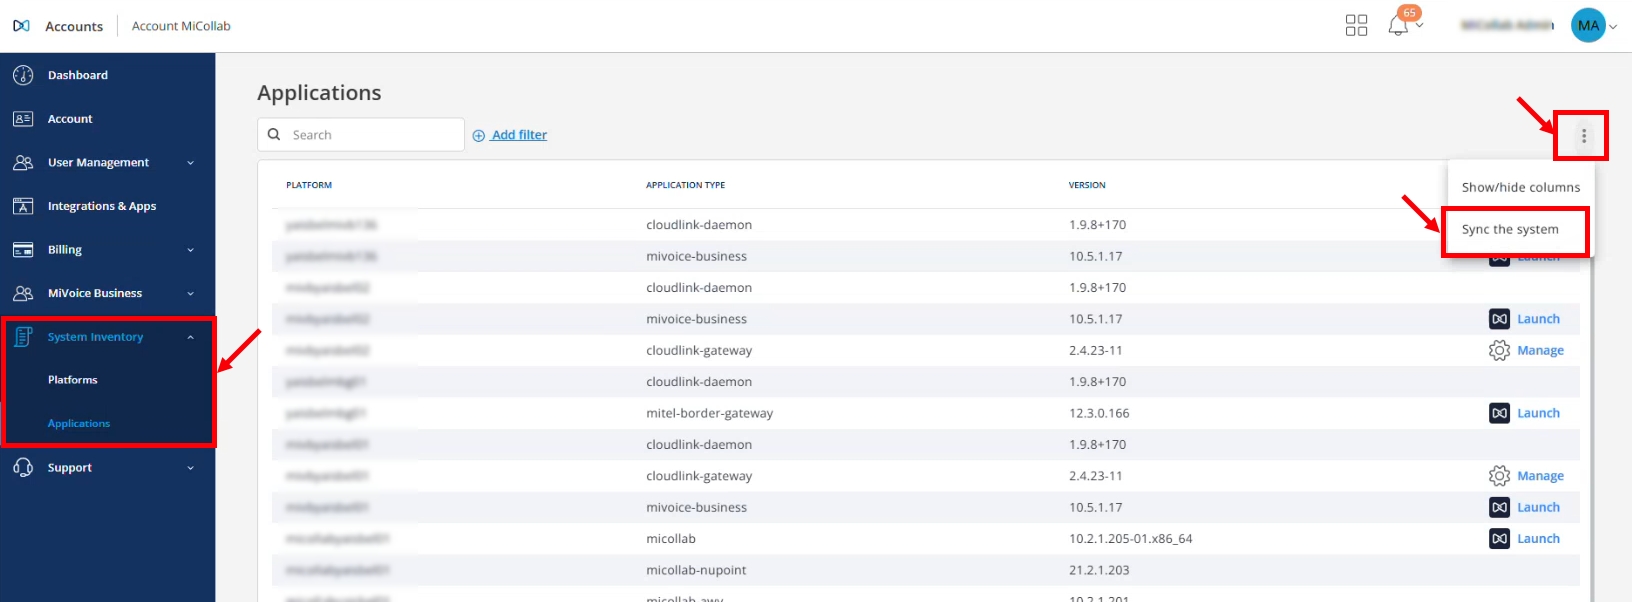
Select Sync the system from the drop-down menu.
In the System Sync – Data Retrieval window, verify that the STATUS for CloudLink and all connected PBX nodes is Online.
Click Continue to start the synchronization.
When the synchronization completes, review the updated counts for Users, Groups, and Contacts in the System Sync – Results Summary window.
Click Done to close the dialog box.
Verify Display Name Formatting
Navigate to User Management > Users from the navigation menu on the left side of the Accounts Console Dashboard.
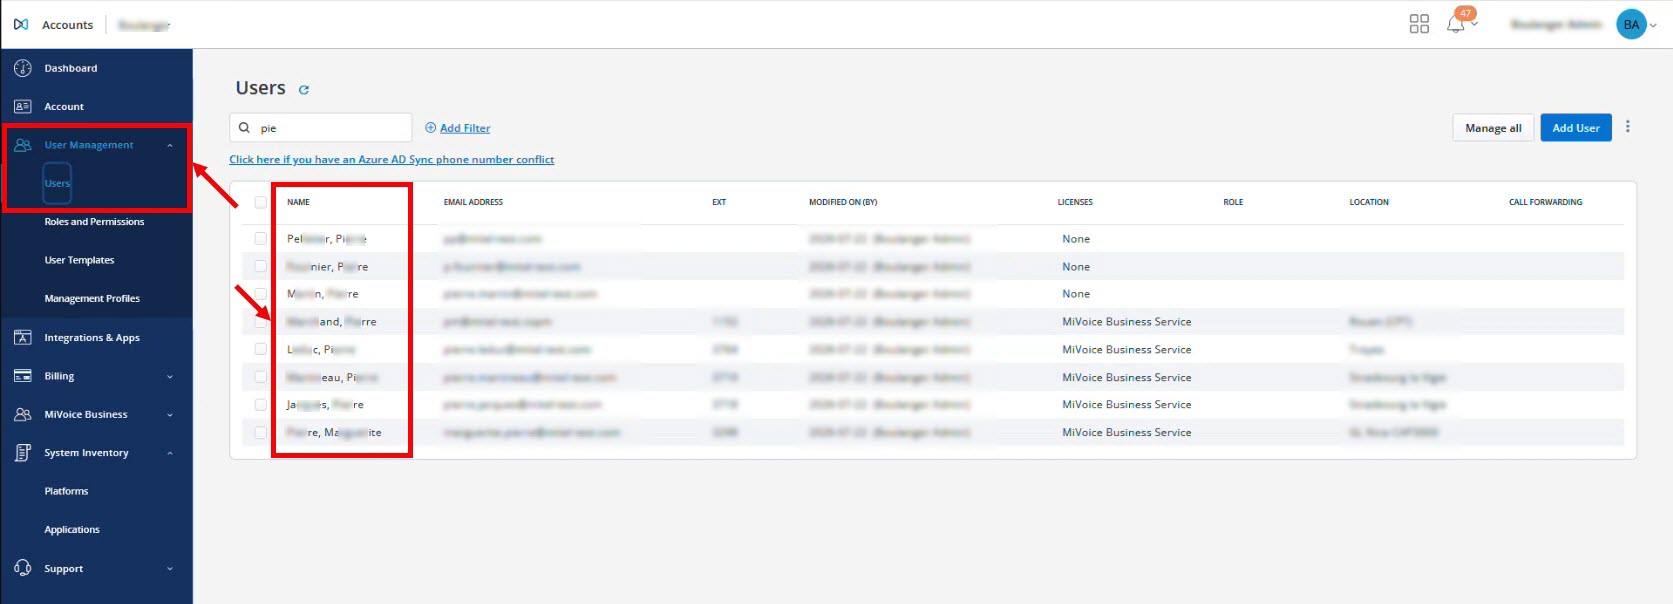
On the Users list page, review the NAME column to verify that user records reflect your selected naming convention.
Click an individual user record to open the User Configuration page, and verify that the profile header displays the user's name in the correct format.