Delegating Partner Account Management
The Mitel Administration portal is enhanced to restrict access to specific Customer Accounts. Previously, the configuration listed all customer accounts managed by the partner admin, which were visible to all account admins within that account.
Converting an Administrator to Account Manager
You need to convert an administrator to an Account Manager to restrict access to specific Customer Accounts.
Complete the following steps to convert the admin to an Account Manager from a Partner account:
-
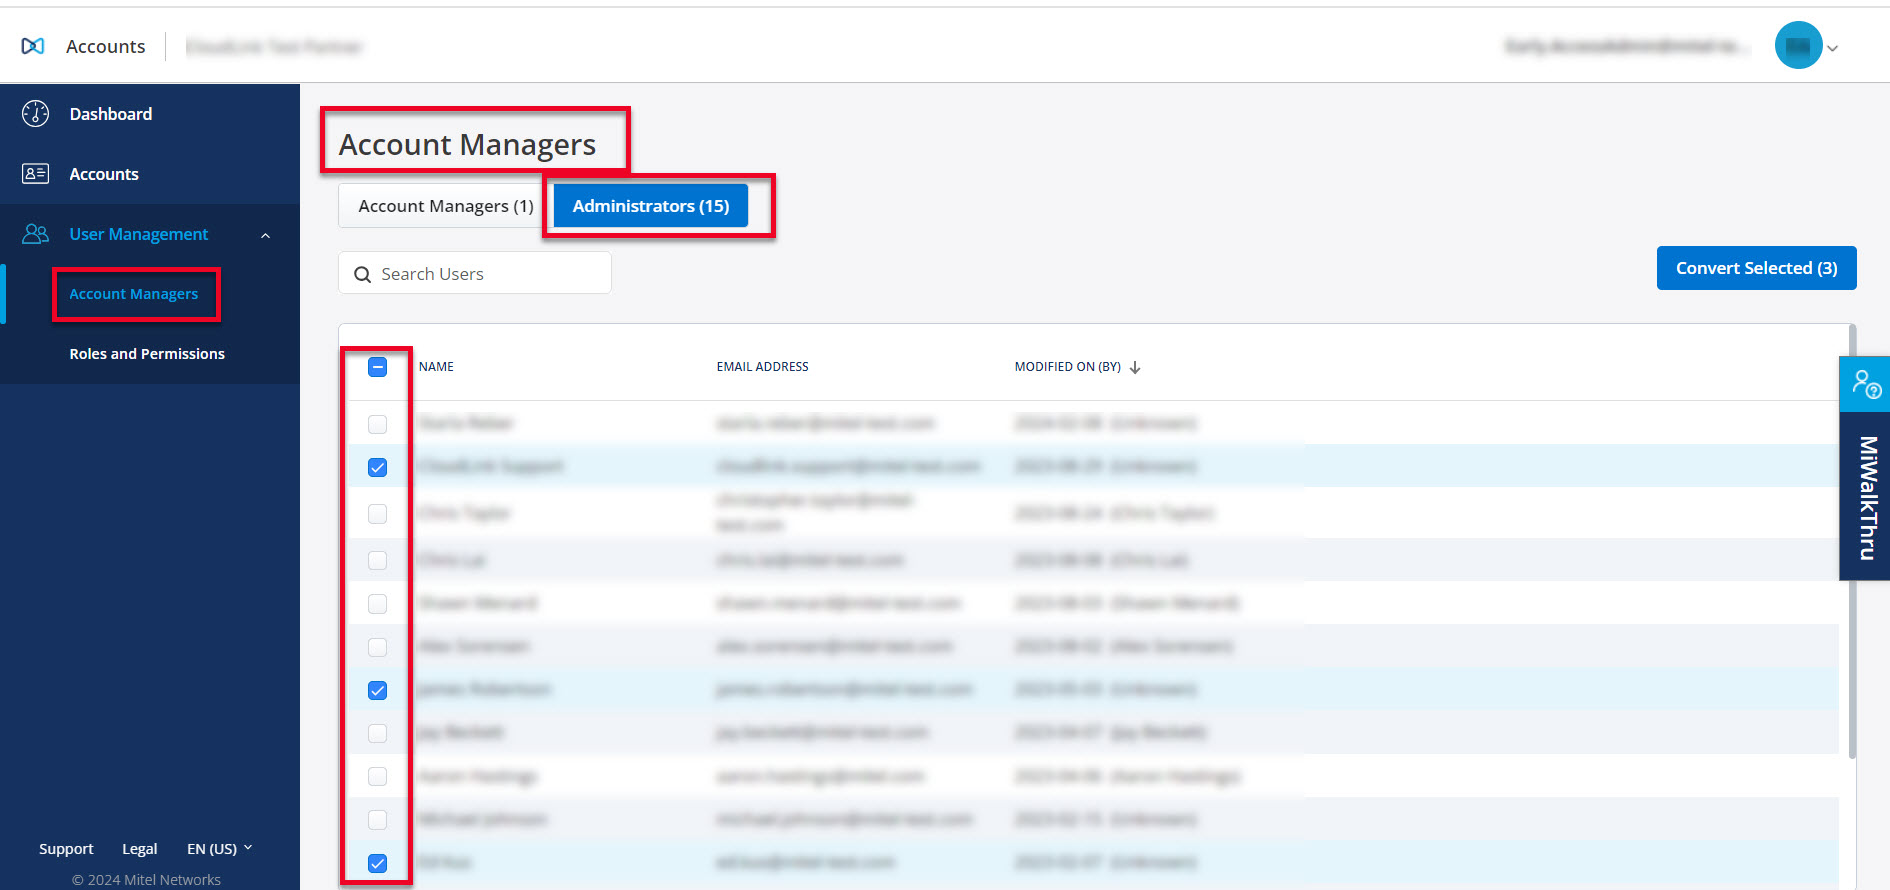
Click User Management > Account Manager from the left menu. The Account Managers page opens.
-
Click and open the Administrators tab. The complete list of Partner Admins in the Partner account are displayed.
-
Choose the Admin(s) to be converted to Account Manager(s) by selecting the checkbox next to their name(s).
-
Click Convert Selected. The confirmation dialog is displayed.
-
Confirm that the information is correct, and click OK to proceed. The progress bar Convert to Account Managers is visible, showing the progress. Click Close when the conversion is completed.
Click Cancel to cancel the operation.
The newly converted Account Managers are displayed are now displayed in the Account Managers tab.
Assigning Account(s) to an Account Manager
As a Partner Administrator, you can assign specific customer accounts to an Account Manager individually, or to multiple Account Managers simultaneously.
-
Click User Management > Account Managers.
-
Select the Account Manager from the list under the Account Managers tab by selecting the checkbox next to their name.
Note: You can also manage an individual Account Manager by clicking their name in the list.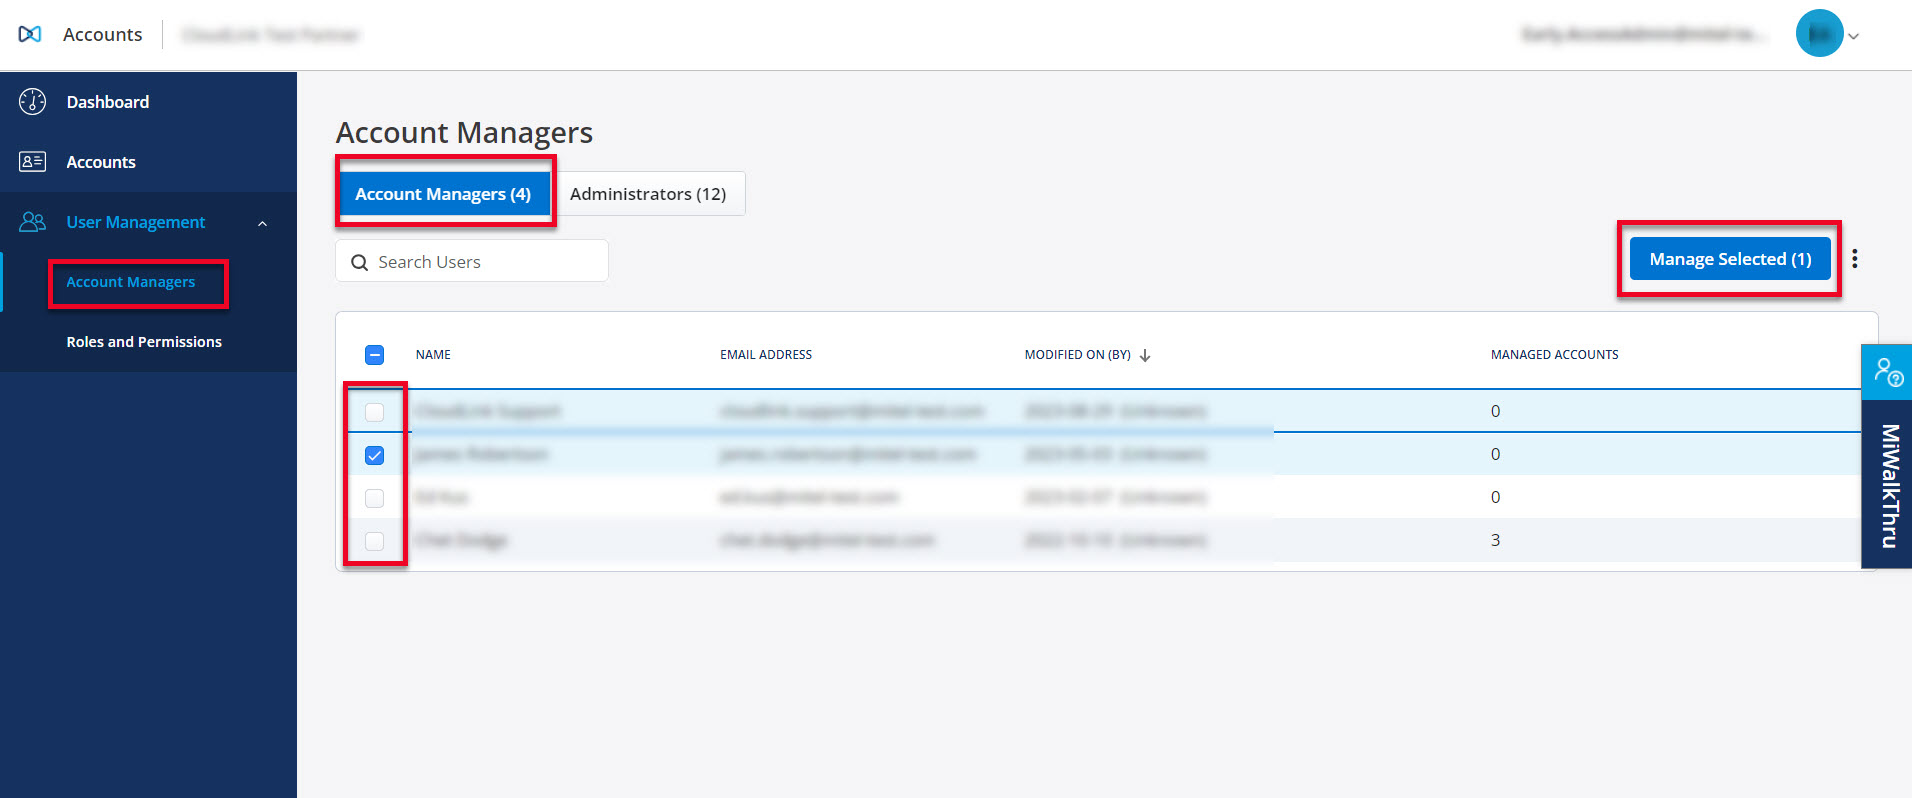
-
Click Manage Selected. The following tabs are displayed.
-
Accounts assigned - This tab displays the accounts already assigned to the Account Manager.
-
Accounts not assigned - This tab displays accounts that are available to be assigned to the Account Manager.
-
-
Click the Accounts not assigned tab, then select the accounts you want to assign to the selected Account Manager using the checkbox.
-
Click Assign. The confirmation dialog is displayed.
-
Confirm that the information is correct, and click Assign to proceed. The progress bar Assign Account(s) is visible, showing the progress. Click Close when the task is completed successfully.
Click Cancel to cancel the operation.
The Accounts assigned tab will now display the newly assigned accounts to the selected Account Manager.
-
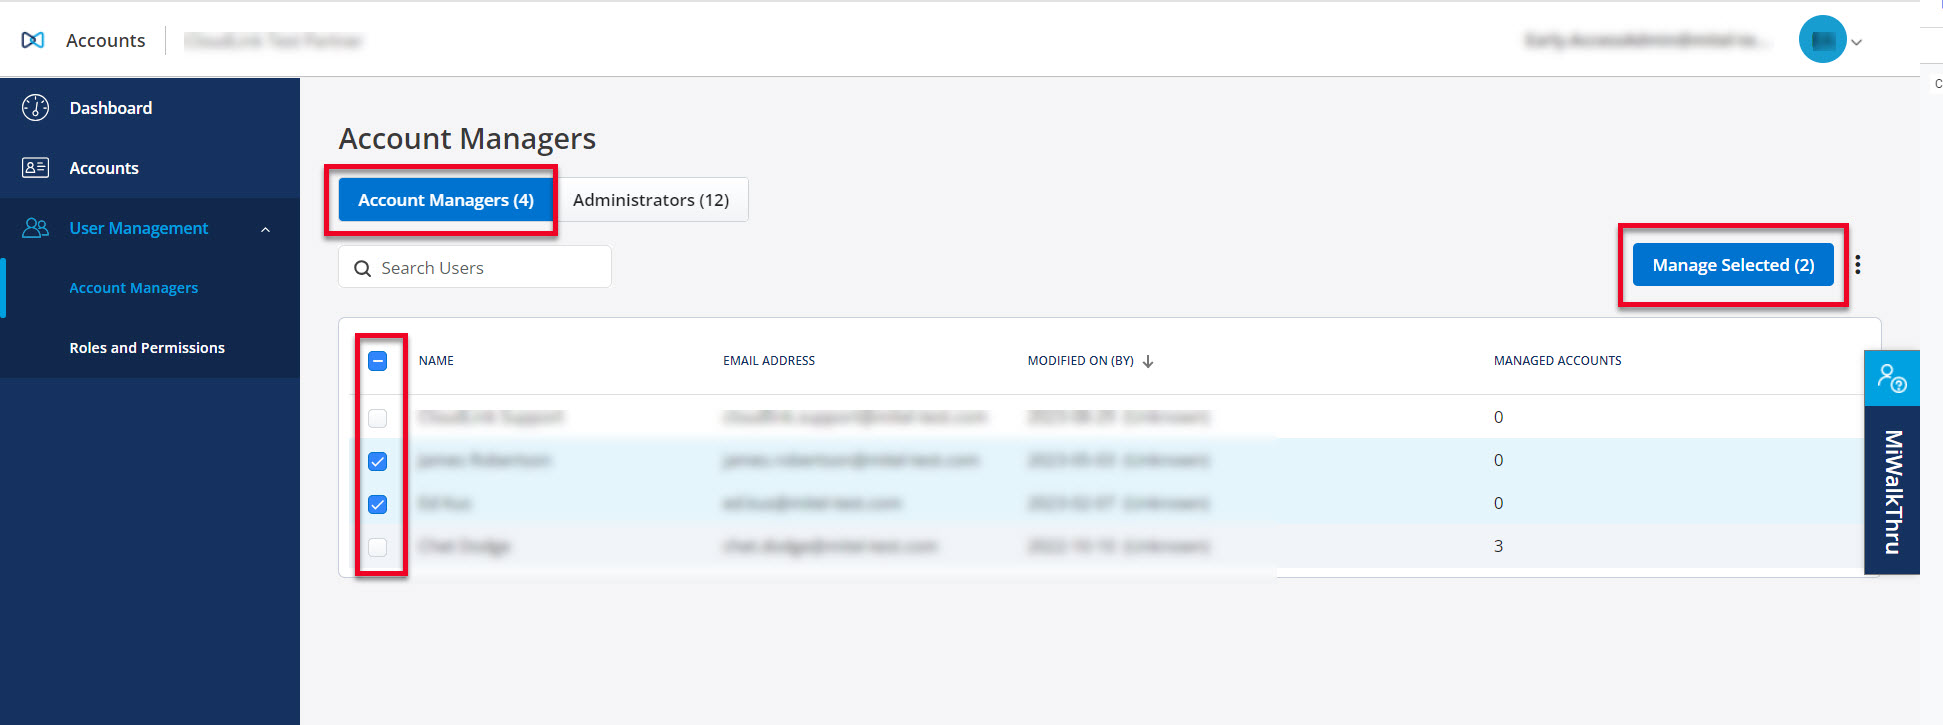
Click User Management > Account Managers.
-
Select the Account Managers from the list under the Account Managers tab by selecting the checkbox next to their names.
-
Click Manage Selected. The following tabs are displayed.
-
Accounts assigned to all - This list displays accounts that are assigned to all the selected account managers.
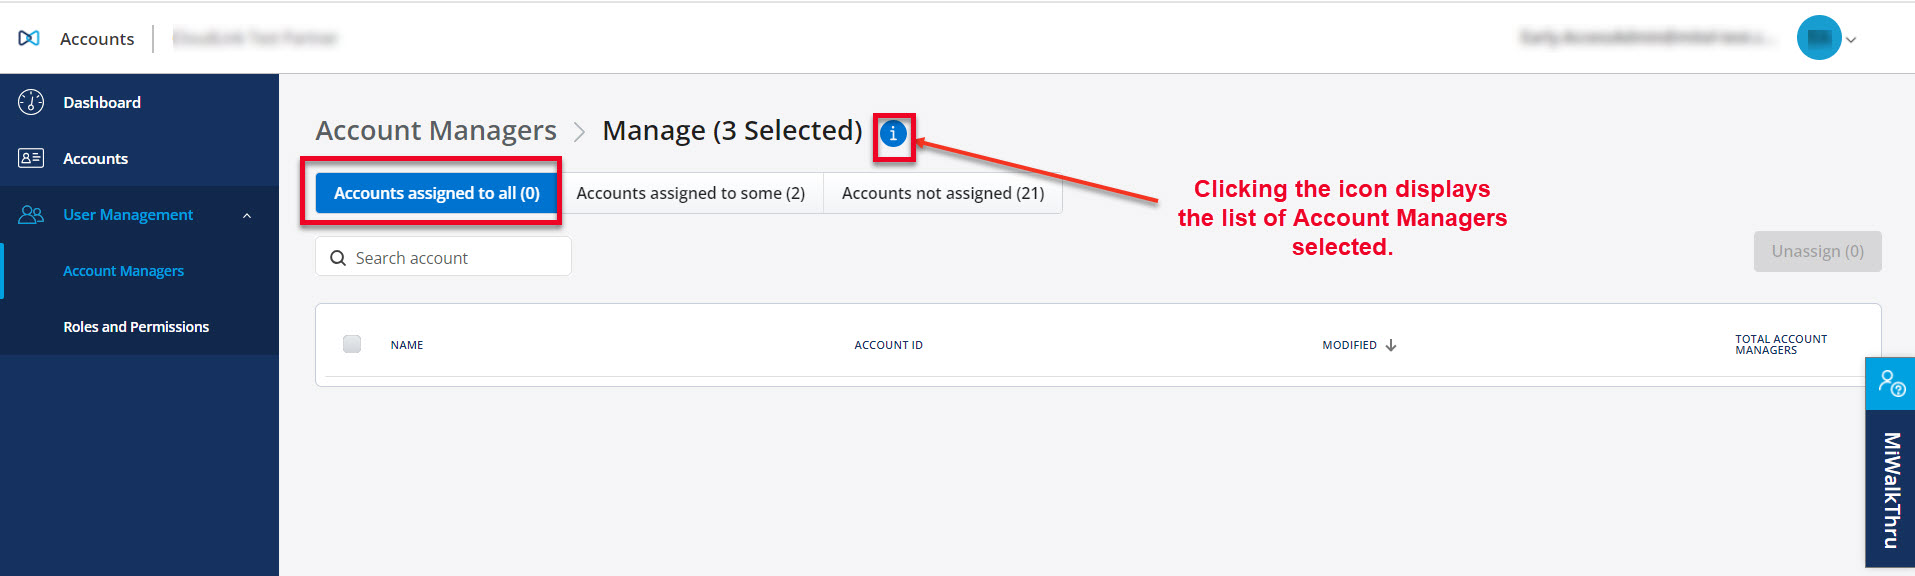
You have the option to select the checkbox and unassign the account from the selected managers.
-
Accounts assigned to some - This list displays accounts that are assigned to one or more of the selected account managers.
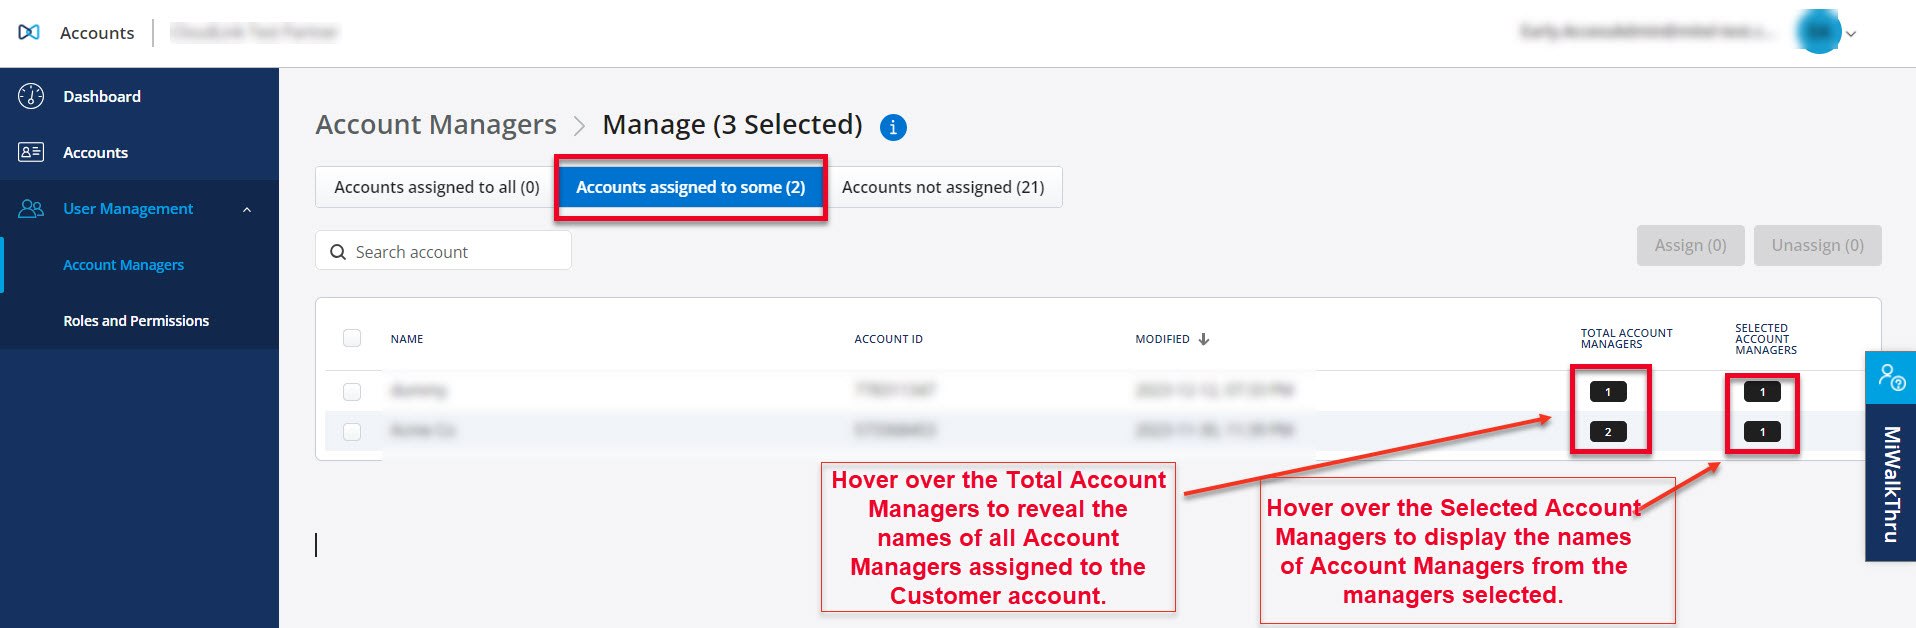
You have the option to select the checkbox and either assign the account to the selected managers or unassign it from the selected managers.
-
Accounts not assigned - This list displays accounts that are not assigned to any of the selected account managers.
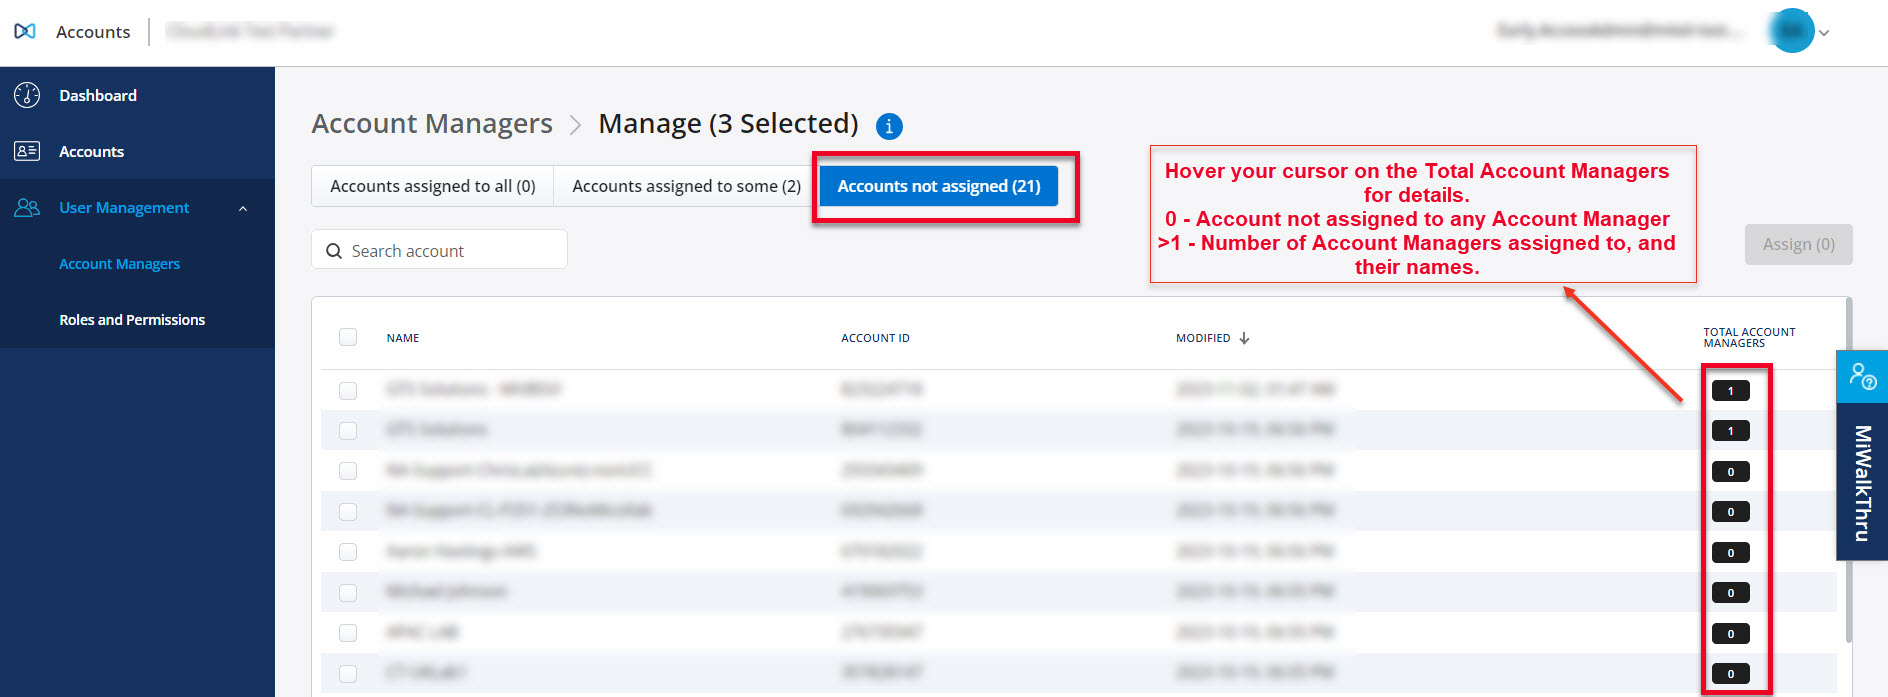
You have the option to select the checkbox and assign the account to the selected managers.
-
The Accounts assigned tab will now display the newly assigned accounts to the selected Account Managers.
Unassigning Account(s) from an Account Manager
As a Partner Administrator, you can unassign specific customer accounts from an Account Manager individually, or from multiple Account Managers simultaneously.
Unassign Individual Account Manager
-
Go to User Management > Account Managers.
-
From the list of Account Managers, choose the manager whose account(s) you wish to unassign by selecting the checkbox next to their name.
-
Click Manage Selected. The following tabs are displayed.
-
From the Account assigned list, choose the account you want to unassign by selecting the checkbox next to it.
-
Click Unassign.
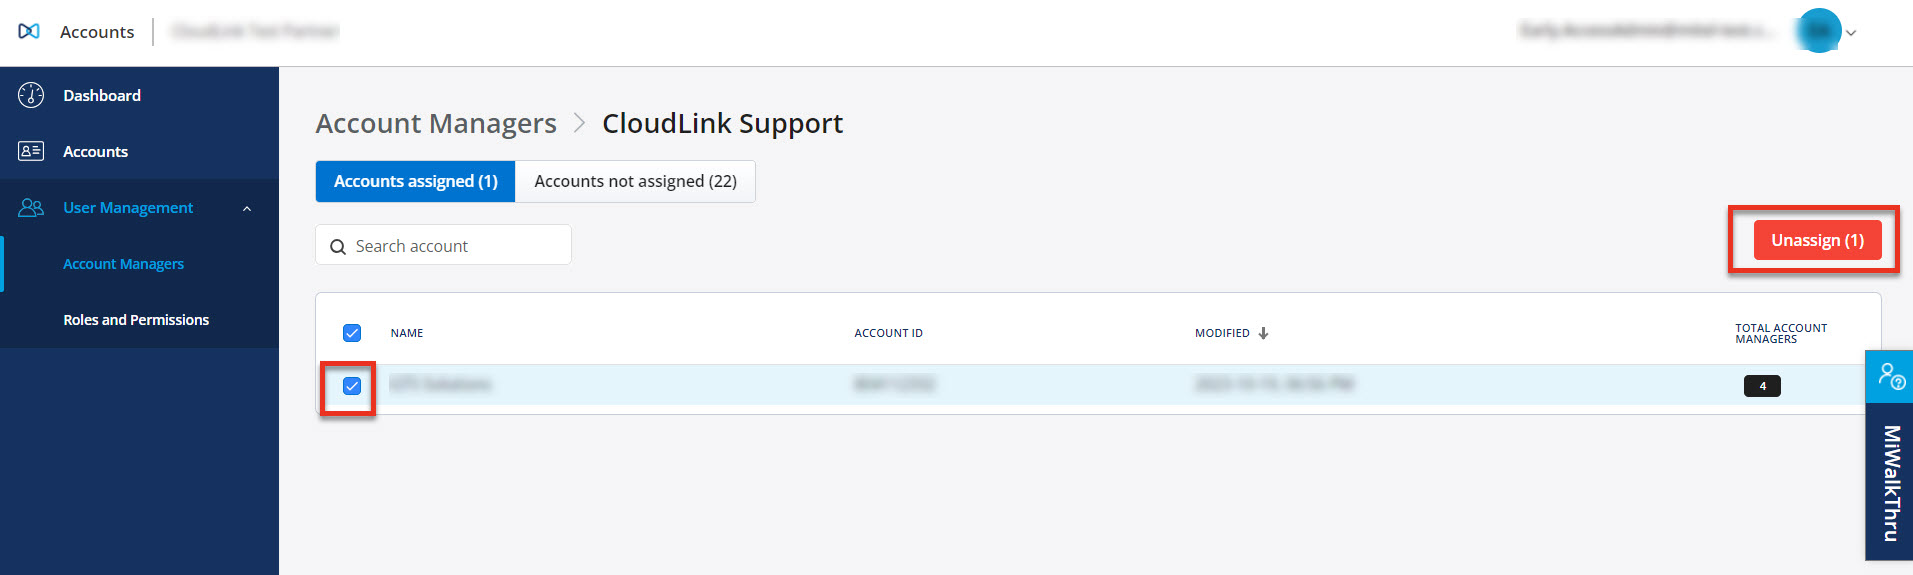
Confirm by clicking Unassign again in the confirmation dialog that opens. The progress bar for unassigning account is visible, showing the progress. Click Close when the account is unassigned successfully.
Click Cancel to cancel the operation.
The Accounts assigned tab will now have removed the unassigned accounts from the selected Account Manager.
Unassign multiple Account Managers
-
Go to User Management > Account Managers.
-
From the list of Account Managers, choose the managers whose accounts you wish to unassign by selecting the checkbox next to their names.
-
Click Manage Selected. The following tabs are displayed.
-
Accounts assigned to all - Select the account(s) checkbox next to it and click Unassign to remove the account from the selected managers.
-
Accounts assigned to some - Select the account(s) checkbox next to it and click Unassign to remove the account from the selected managers.
-
-
Confirm by clicking Unassign again in the Confirmation dialog. The progress bar for unassigning accounts is visible, showing the progress. Click Close when the account is unassigned successfully.
Click Cancel to cancel the operation.
The Accounts assigned tab will now have removed the unassigned accounts from the selected Account Managers.
Upgrading an Account Manager to an Administrator
-
Click User Management > Account Manager from the left menu. The Account Managers page opens.
-
In the Account Managers tab select the manager(s) you wish to upgrade to an Administrator.
-
Click
 , and click Upgrade Selected.
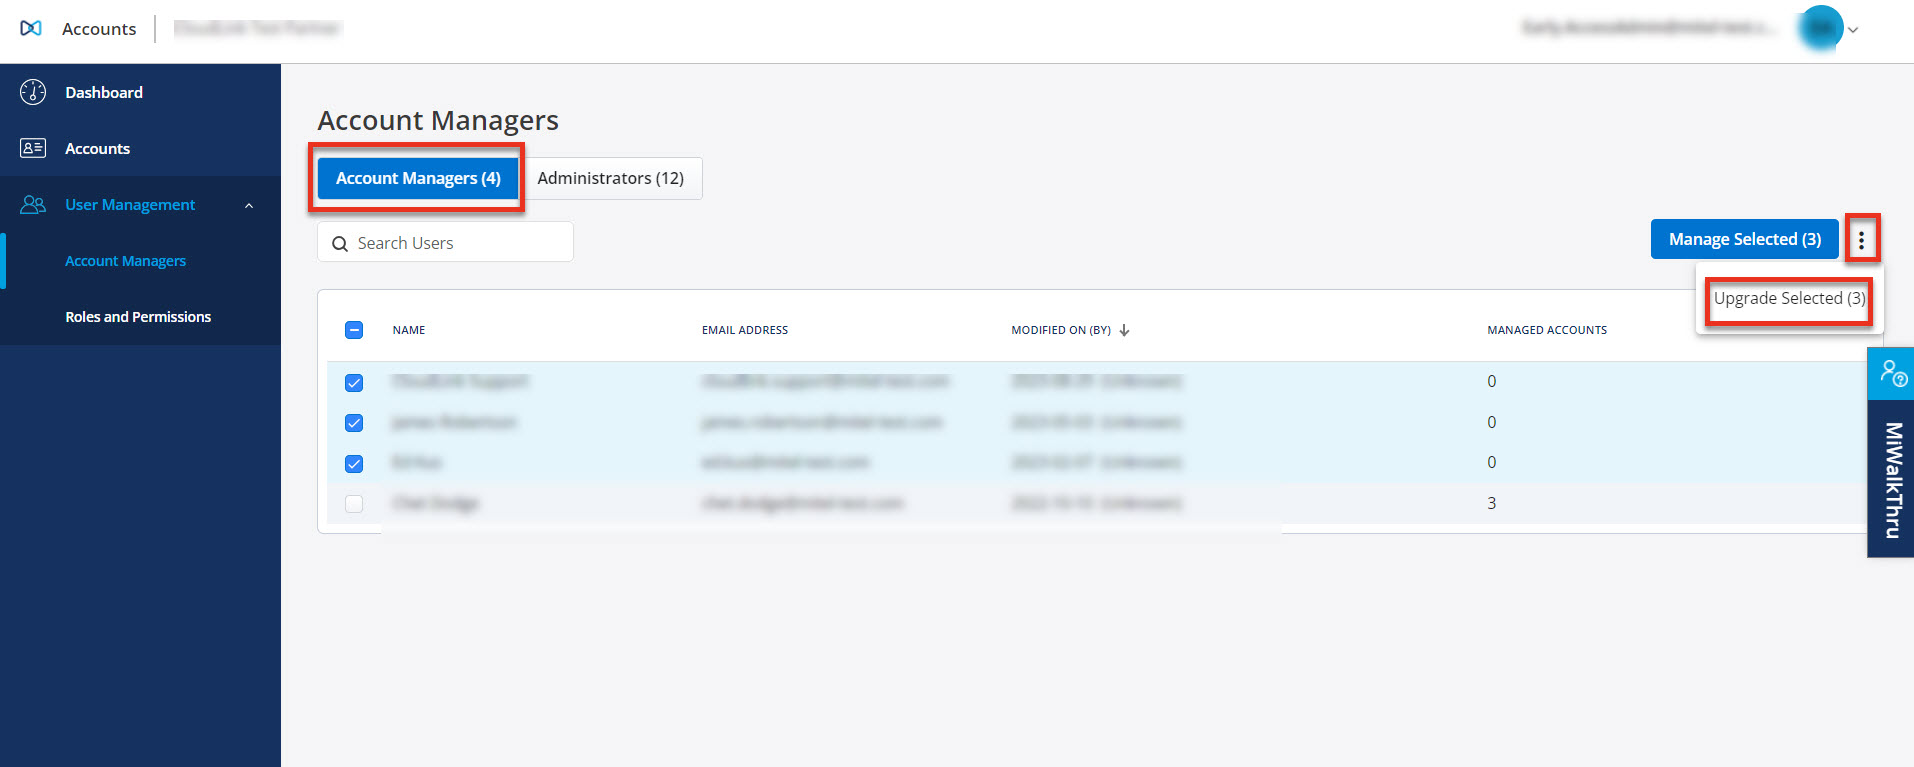
The Confirm Upgrade To Administrator(s)? confirmation dialog is displayed.
-
Click Confirm to upgrade the selected Account Managers to Administrators. The progress bar for upgrade is visible, showing the progress. Click Close after the selected managers are upgraded to Administrators successfully.
Click Cancel to cancel the operation.
The list of Administrators in the Administrators tab will now include the upgraded Account Managers.