Configuring SAML Single Sign-On Integration for CloudLink with Identity Providers (generic instructions)
Following are instructions for setting up SAML Single Sign-On (SSO) integration using a generic identity provider. To configure SSO for CloudLink with Microsoft Azure AD, see Configuring Single Sign-On for CloudLink with Microsoft Azure AD.
Prerequisites
To configure SAML SSO integration with CloudLink platform, you must have:
- An IdP subscription
- Mitel CloudLink account
Procedure
Note: To configure SAML SSO integration, it is recommended that you open the IdP portal and the CloudLink Accounts portal side-by-side as you will need to copy some information from the CloudLink Accounts portal to the IdP portal and vice versa.
- Enable the Single Sign-On integration in the CloudLink Accounts Console.
- Navigate to the Account Information page of the customer account for which you want to enable the integration.
- In the Integrations section, click + Add new. A pop-up screen displays the Integrations panel.
- Click the 3rd party tab. A list of supported third-party applications is displayed. Click the Add button associated with Single Sign-On, and click Done.
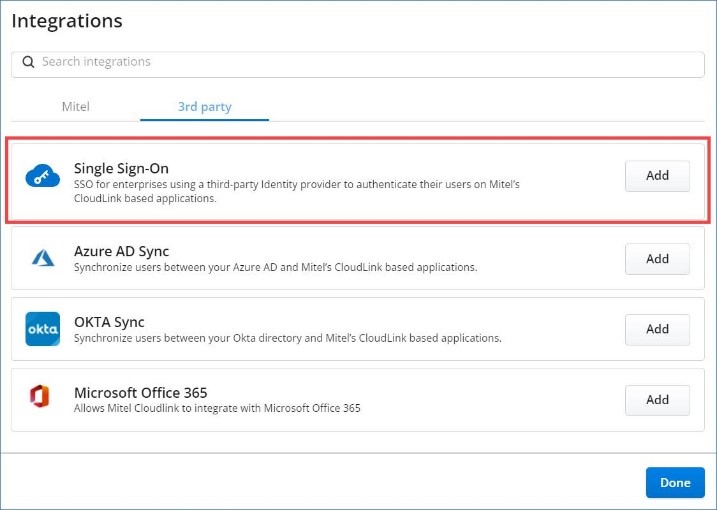
The Single Sign-On is enabled for the customer account and is added to the Integrations section of the Account Information page.
- Accessing the Single Sign-On configuration dialog box.
In the Account Information page, click Complete setup.

The Single Sign-On configuration dialog box opens.
 Note: Mitel recommends that the Enable Mitel Credentials (Optional) check box in the Optional Mitel credentials section is not selected. Select this check box only if you want to enable the user to log in to the CloudLink application using the Mitel credentials in addition to the single sign-on option.
 - Add the CloudLink Platform information into the IdP.
While configuring the SAML application in the IdP portal, enter the following information about the CloudLink Platform into the IdP portal.
- Service Provider Entity ID field: Copy the ID from the Mitel Identifier (Entity ID) field in the CloudLink Accounts portal and paste it into the entity ID field of the IdP portal.
- Service Provider Login URL: Copy the URL from the Reply URL (Assertion Consumer Service URL) field in the CloudLink Accounts portal and paste it into the Login URL field of the IdP portal.
- Add the IdP portal information into CloudLink Accounts Console.
Once you have entered the above mentioned information into the IdP portal, the IdP portal should provide you with the same two pieces of information as above, except on the IdP side of the connection.
- IdP Entity ID - Copy the ID from the entity ID field of the IdP portal and paste it into the IDP Identifier (Entity ID) field in the CloudLink Accounts.
- IdP Login URL - Copy the URL from the Login URL field of the IdP portal and paste it into the Sign-in URL field in the CloudLink Accounts portal.
- Upload the IdP certificate to CloudLink Accounts Console.
To do this, from the IdP portal, download the public certificate X.509 certificate in PEM format provided by IdP and save it on your computer. After saving the certificate, open the certificate file in a text editor, copy all data in the file, and then paste the data into the Signing Certificate field in the CloudLink Accounts Console.Note: If you have more than one certificate, it is recommended that you paste them one after the other.
- Once you have entered the three IdP fields and have uploaded the IdP certificate into CloudLink Accounts Console, click Save to save the SSO settings.
↑