Deploy the CloudLink App (optional)
This optional step of the customer onboarding process enables you to deploy the CloudLink application.
Deploying the Mitel One require sending deployment emails.
Send Deployment Emails
To specify the users to whom deployment emails will be sent, use the Select Users option (see the following figure).

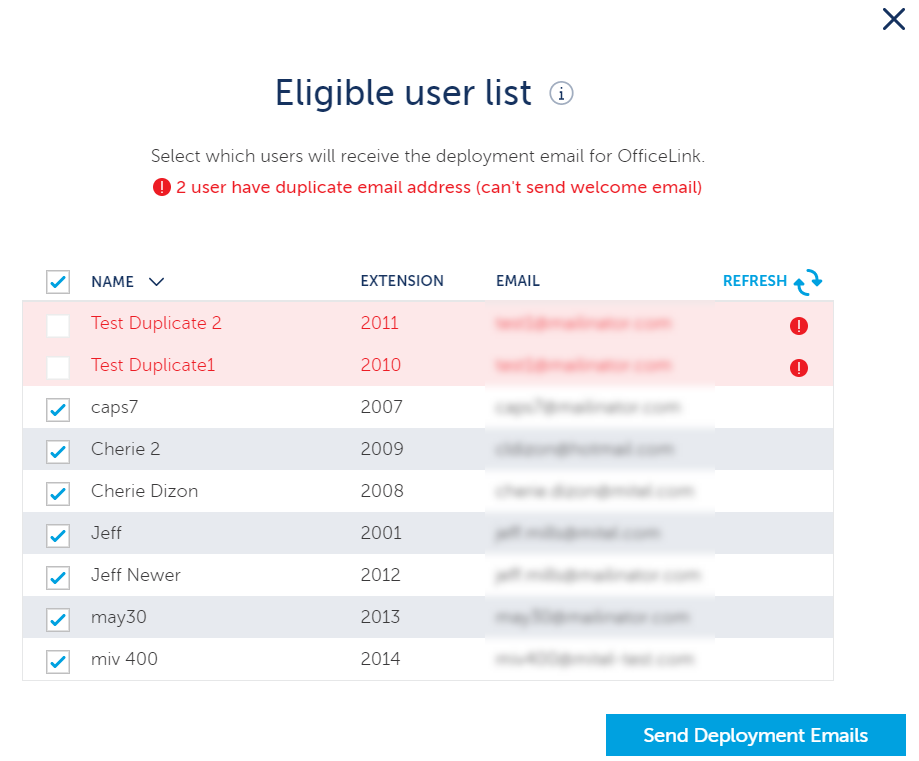
Clicking this option displays the Eligible user list (see the following figure) which lists all users who have a configured email address in the MiVoice Office 250 PBX. To specify users to whom deployment emails (welcome emails) will be sent, select the checkbox beside their name and then click Send Deployment Emails.
For both platforms (standalone and SMBC), see Configure Advanced Settings and Options for information about the next and last (optional) step of the onboarding process (Advanced).
Finish building the Account
Users must click the Finish building your account button in the welcome email they receive to register their information with Mitel and build an account to be able to log in to the Mitel One Application. For more information see, Register and Access the Mitel One Web Application.
Registered Users
To view a list of all users who have successfully completed building their user accounts, click the Show Registered Users option. The Registered user list page opens (see the following figure), listing the name, phone extension number, and the email address of all registered users.

For both platforms (standalone and SMBC), see Configure Advanced Settings and Options for information about the next and last (optional) step of the onboarding process (Advanced).