Mitel One CX is a Cloud-based Contact Center solution that utilizes existing APIs and the CloudLink infrastructure. Mitel One CX is an add-on that you can purchase with Mitel One. Mitel One CX functionality allows users to handle customer interactions of various media types, including voice, email, chat, SMS, and universal media (open media).
- You must add Mitel One integration to the customer account before adding Mitel One CX integration.
- You must remove MiCC integration (if added) from the customer account before adding Mitel One CX integration.
To enable Mitel One CX application to the users in a customer account, a Mitel Partner or the Account Admin of a customer account must add Mitel One CX integration to the customer account and then enable Mitel One CX license for the users in that account. To do this, perform the following steps:
- Log in to the CloudLink Accounts Console.
- Add Mitel One CX integration to the customer account. For information about adding Mitel One CX integration, see CloudLink Accounts Integrations.
After you have added Mitel One CX integration to the customer account, Mitel One CX will be listed in the Integrations panel.
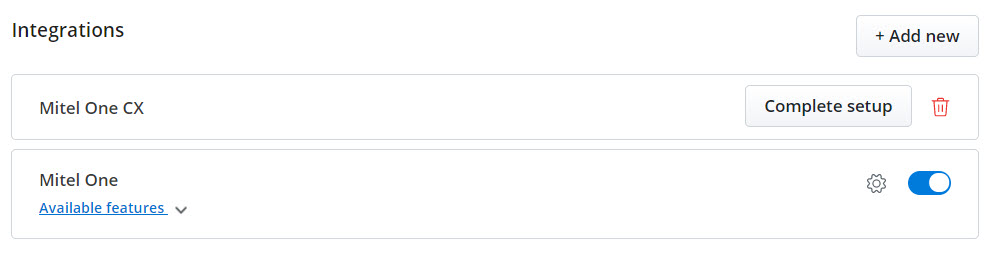
- Click the Complete setup button to proceed with the integration.
- Depending on Mitel One CX subscription of the customer account the following dialog boxes are displayed when you click the Complete setup button.
- If the customer account already has Mitel One CX subscription, the following dialog box is displayed.

- In the Choose your number field, enter the internal Route Point number to allow a call to Mitel One CX from the PBX. You can also choose the DND number which allows a call to be directed to Mitel One CX Auto- Attendant.
- In the Choose a timezone field specify the timezone. Open hours are determined based on the timezone specified and customer calls are evaluated against this timezone.
- Select All users if you want to enable license for all the users in the customer account or select Selected users to enable license for certain users.
- Click Finish Setup to add Mitel One CX integration for all or the selected users in the account.
Note: Concurrent licensing model is used for Mitel One CX users. The maximum number of users who can use the licenses at the same time is equal to the actual number of licenses assigned to the account.
- If the customer account does not have Mitel One CX subscription, depending on the Partner's billing account the following Free Trials dialog boxes are displayed:
- If you have logged in as an Account Admin, and the Mitel Partner does not have a billing account the following dialog box is displayed.
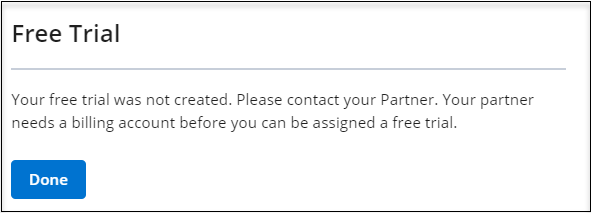
For more information, contact Mitel Partner.
- If you have logged in as an Account Admin and the Mitel Partner and has an existing billing account, the following dialog box is displayed.

Enter the Number of Licenses and agree to the Terms and Conditions. Click Save to save the settings. Mitel One CX integration is now added for the customer account on a free trial basis.
Note: Clicking Cancel cancels the operation and clicking Remove removes the Mitel One CX integration from the customer account. - If you have logged in as the Mitel Partner and does not have an existing billing account, the following dialog box is displayed.

Choose the Currency code from the drop-down menu, enter the Number of Licenses, and agree to the Terms and Conditions. Click Save to save the settings. Mitel One CX integration is now added to the customer account on a free trial basis.
Note: Clicking Cancel cancels the operation and clicking Remove removes the Mitel One CX integration from the customer account.
- If you have logged in as an Account Admin, and the Mitel Partner does not have a billing account the following dialog box is displayed.
- If the customer account already has Mitel One CX subscription, the following dialog box is displayed.
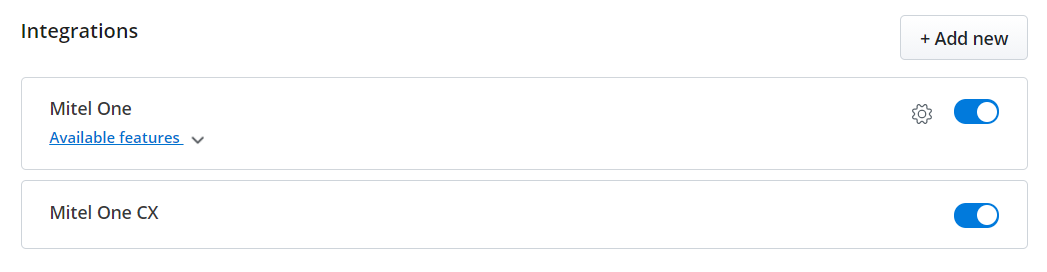
The integration panel indicates that Mitel One CX integration has been successfully added as shown in the following screen capture.
Enabling Mitel One CX to Users
After integrating Mitel One CX with a customer account, Mitel One CX must be enabled for individual users in that customer account. To enable Mitel One CX to a user:
- Navigate to User Management > Users in the left navigation menu of the CloudLink Accounts console. The Users page opens.
- Select the user for whom you want to enable Mitel One CX. The user details page opens.
- Scroll down to the Products and licenses section. Under Mitel One CX , slide the Disabled toggle button to the right. Mitel One CX is Enabled for that user.

- Select a Role, apply Skills, and enable Channels for the user. For more information, see Mitel One CX Deployment and Configuration Guide.
- Click Save to save the changes.
Customer Care
When Mitel One CX is integrated with a customer account, the Customer Care option is displayed on the left navigation menu of the Accounts console.
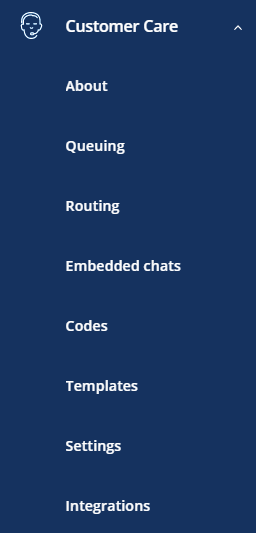
Clicking Customer Care displays the following options:
- Queuing
- Routing
- Embedded chats
- Codes
- Templates
- Settings
- Integrations
- About
For more information about these features and how to configure them, see Mitel One CX Deployment and Configuration Guide.