CloudLink Integration
As a MiCollab administrator, the CloudLink Integration tab in the MiCollab settings panel allows you to connect the MiCollab application to CloudLink and enable CloudLink-based chat. Additionally, you can access the CloudLink panel under the Configuration section to connect your server to CloudLink and manage access to other CloudLink-enabled services, such as Mitel Administration, System Inventory, and Remote Management.
The CloudLink chat integration with MiCollab is a two-step process.
-
Establish a connection to CloudLink and sync users to the CloudLink platform.
-
Activate CloudLink chat.
Enable CloudLink Integration
Prerequisite: As a MiCollab administrator, you can enable CloudLink Integration on MiCollab if you have the credentials for your administrator account on CloudLink. If you do not have the credentials, contact the Mitel channel partner.
In the case where multiple MiCollab servers are peered together they should all be connected to the same CloudLink account.
-
In the MiCollab Administrator portal (Server Manager), under Configuration click MiCollab Settings.
On the right pane, the MiCollab Settings page opens.
-
In the CloudLink Integration tab, tick the checkbox for "I agree to the Mitel CloudLink Services Terms and Conditions" and then click the Connect CloudLink button.
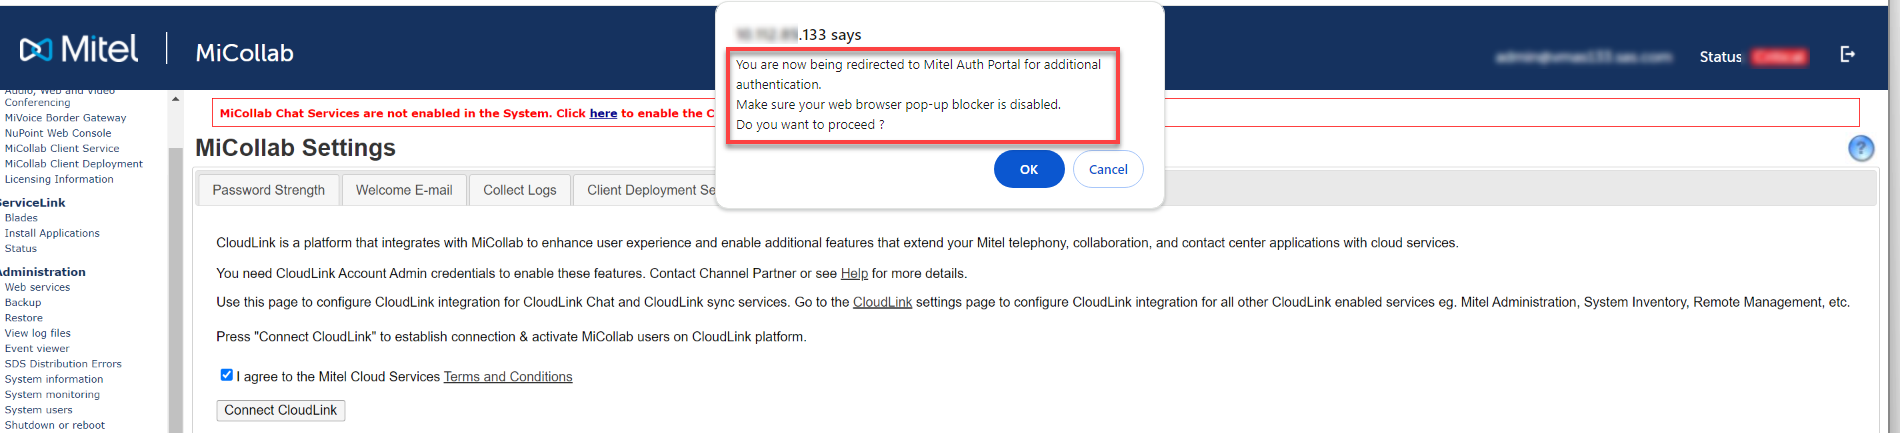
Note: Ensure that the web browser pop-up blocker is disabled. This is mentioned in the confirmation message which redirects to the Auth Portal.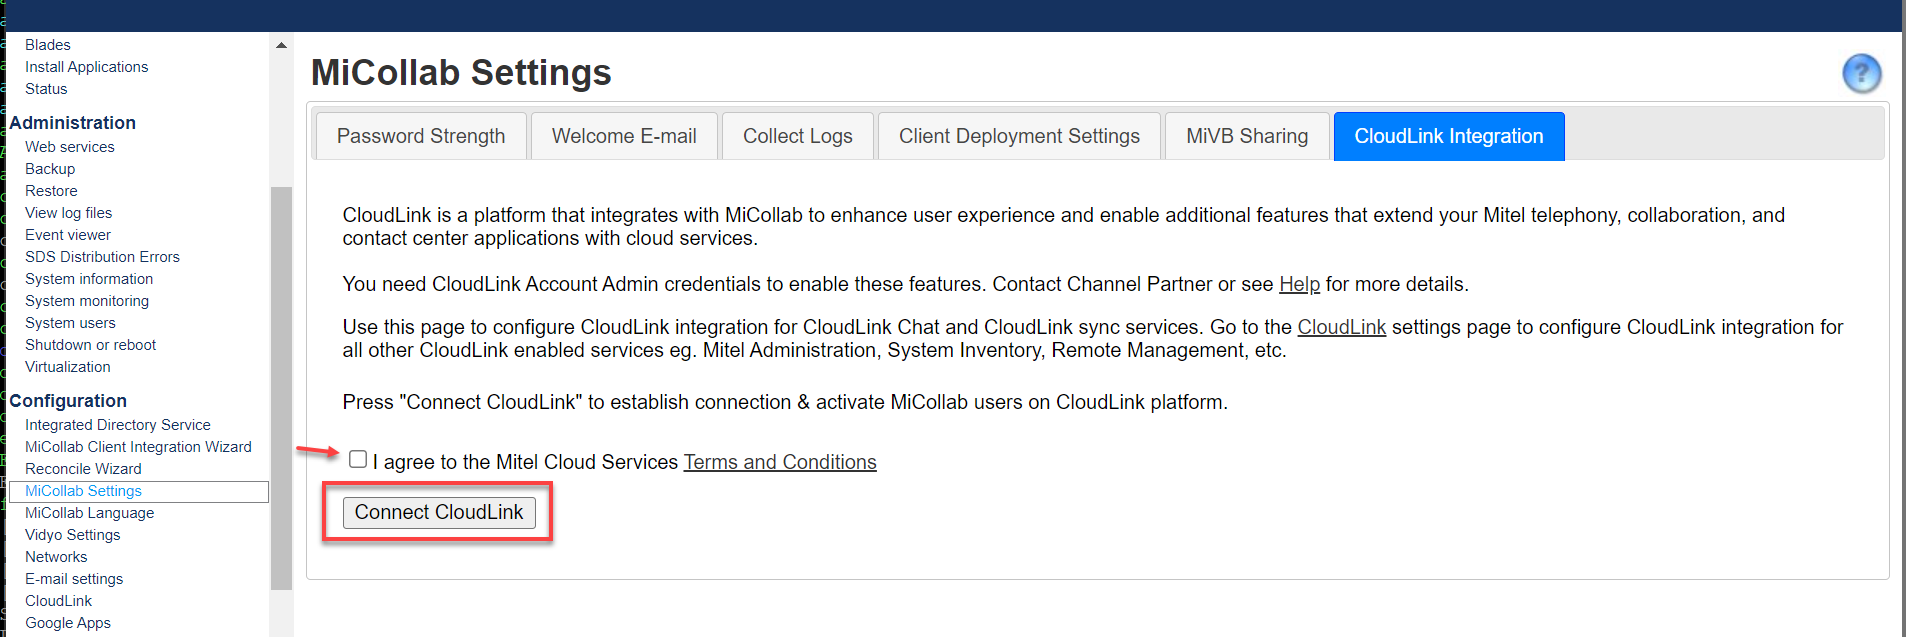
A confirmation message appears that you are being redirected to the Mitel Authentication Portal for authentication.
-
Click OK to proceed.
-
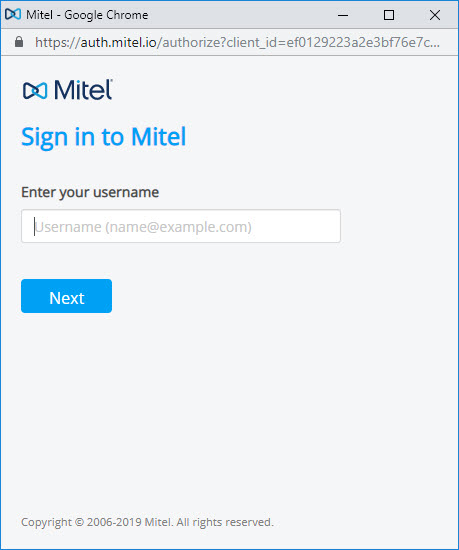
As a CloudLink account administrator, enter your username (typically your Email address) and then click Next.
-
Enter the CloudLink account admin password and click Next.
The authentication process begins.
When the authentication is completed successfully, as indicated by the progress status, MiCollab automatically starts the process of synchronizing all the MiCollab users to CloudLink.
Note: If the authentication fails for any reason, the error status notifies authentication has failed. If this happens, contact Mitel Support. -
When the authentication is completed, MiCollab automatically starts the process of activating all MiCollab users on CloudLink.
The MiCollab admin can monitor the progress on the number of failed and successful users activated from the CloudLink Activation Summary.
Note: Users, who are on two different peered servers, having the same e-mail address, will be treated as a single user on CloudLink.Note: After the integration is complete, the users who are on MiCollab Users and Services but not on MiCollab Client Deployment are not automatically synced (Deployment Profile status Un-Deployed). Import the users into MiCollab Client Deployment by performing a manual import function (MiCollab Client Deployment > Import Users) or deploy the users manually from MiCollab Server Manager > Applications > Users and Services.
Failed User Report
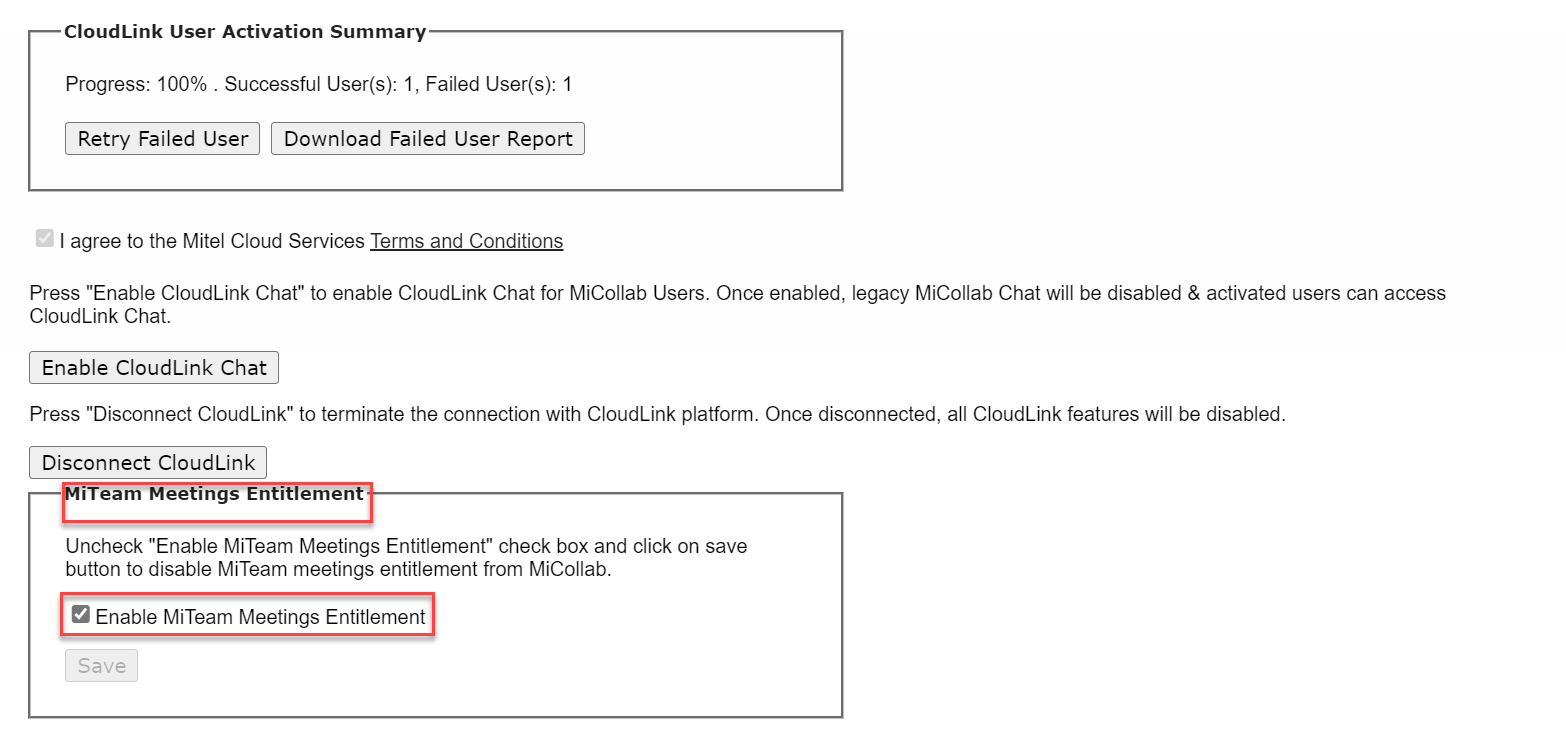
If the activation process fails, the MiCollab administrator can view a list of users for whom it failed and the reasons for the failure by downloading the Failed User Report, from the CloudLink User Activation Summary. After reviewing the report, the admin can apply below steps for resolving the errors.
For CloudLink chat, at network firewall level, certain firewall related exception must be considered. For Network Configuration prerequisites, refer to these sections in the CloudLink Gateway User Guide:
- MiCollab Server
- The MiCollab Server Application for enabling CloudLink integration
- End-user devices where the MiCollab client is running
For successful CloudLink chat integration with MiCollab, it is essential to configure the network firewall and proxy settings correctly. In addition to the previously mentioned, refer to the AWS General Reference documentation that provides information on obtaining the AWS IP address ranges, which might be required for the firewall configuration.
Proxy Exception List
If your organization uses a web proxy, you may need to add the https://*/mitel.io address to your proxy exceptions list. Refer to the MiCollab CloudLink Solution Guide for more information on proxy exception list.
Enable and disable CloudLink Chat
Once the user activation is done, proceed to the next step and click on the Enable CloudLink Chat button to start CloudLink Chat for the activated MiCollab users.
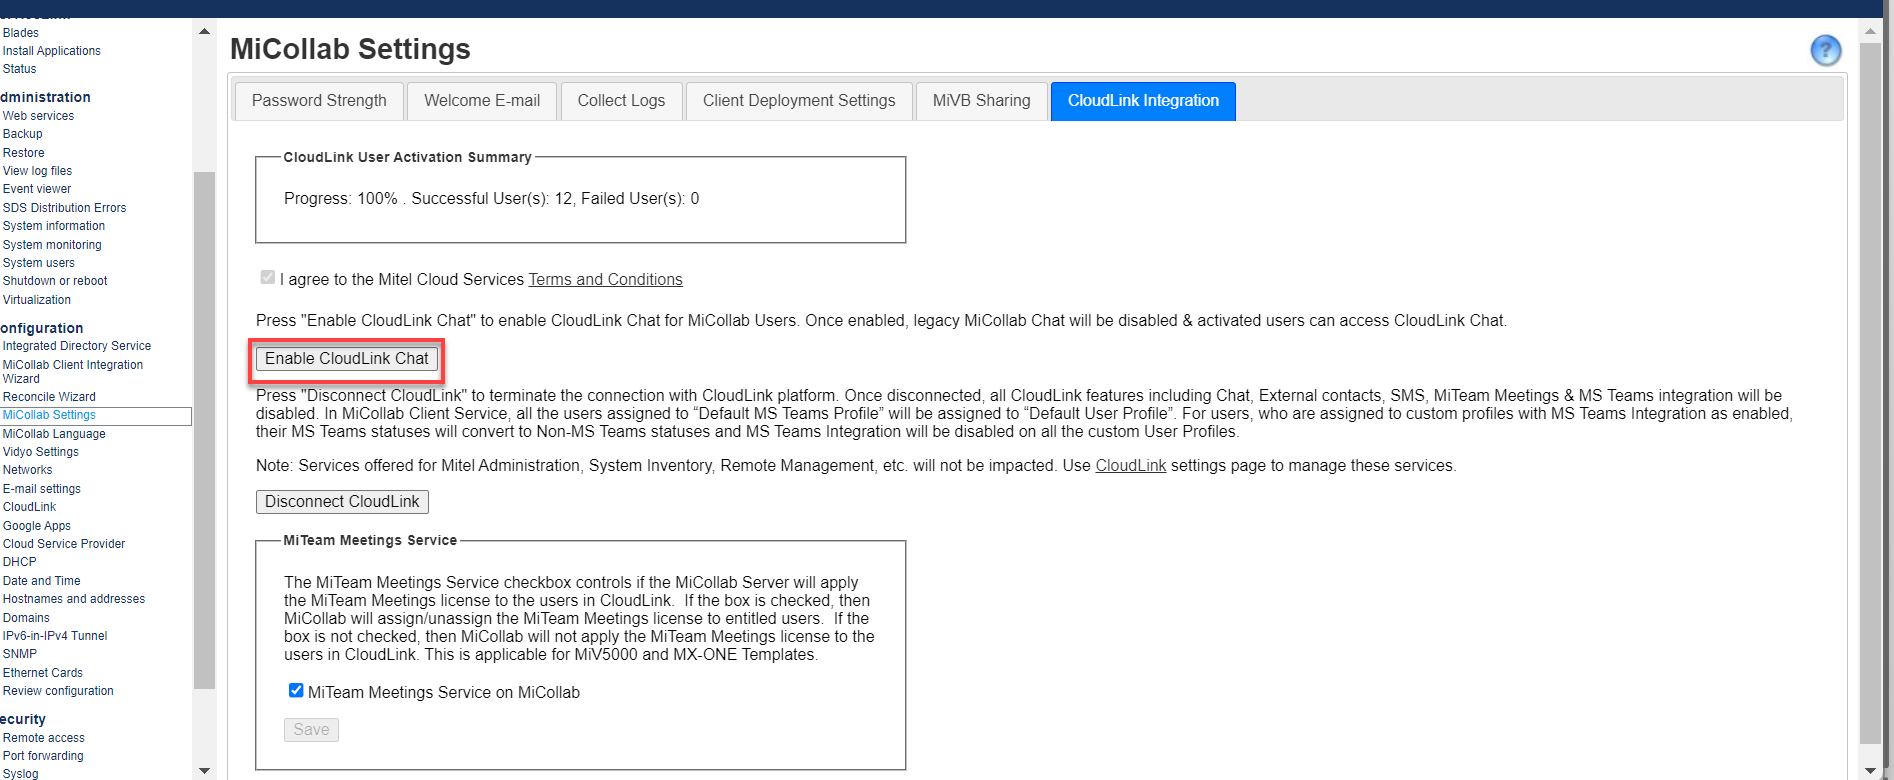
Enabling CloudLink chat automatically disables MiCollab chat. All existing MiCollab chats will be archived and will be available to users as read-only.
CloudLink chat is not supported for failed users (failed due to reasons stated above) or users running with versions of MiCollab client earlier than 9.0.
The Disable CloudLink Chat option disables CloudLink chat for MiCollab users. Disabling CloudLink chat for MiCollab users automatically enables MiCollab chat back for the users.
It is recommended that the operations of enabling or disabling CloudLink chat be done during off hours because the process might impact the server performance.
Deactivate CloudLink Integration
The Disconnect CloudLink option terminates the connection between the CloudLink platform and MiCollab and disables the CloudLink features such as CloudLink chat, External contacts, SMS, MiTeam Meetings, and MS Teams integration will be disabled for all MiCollab users. To re-connect to CloudLink Platform, see, Procedure: To enable CloudLink Integration.
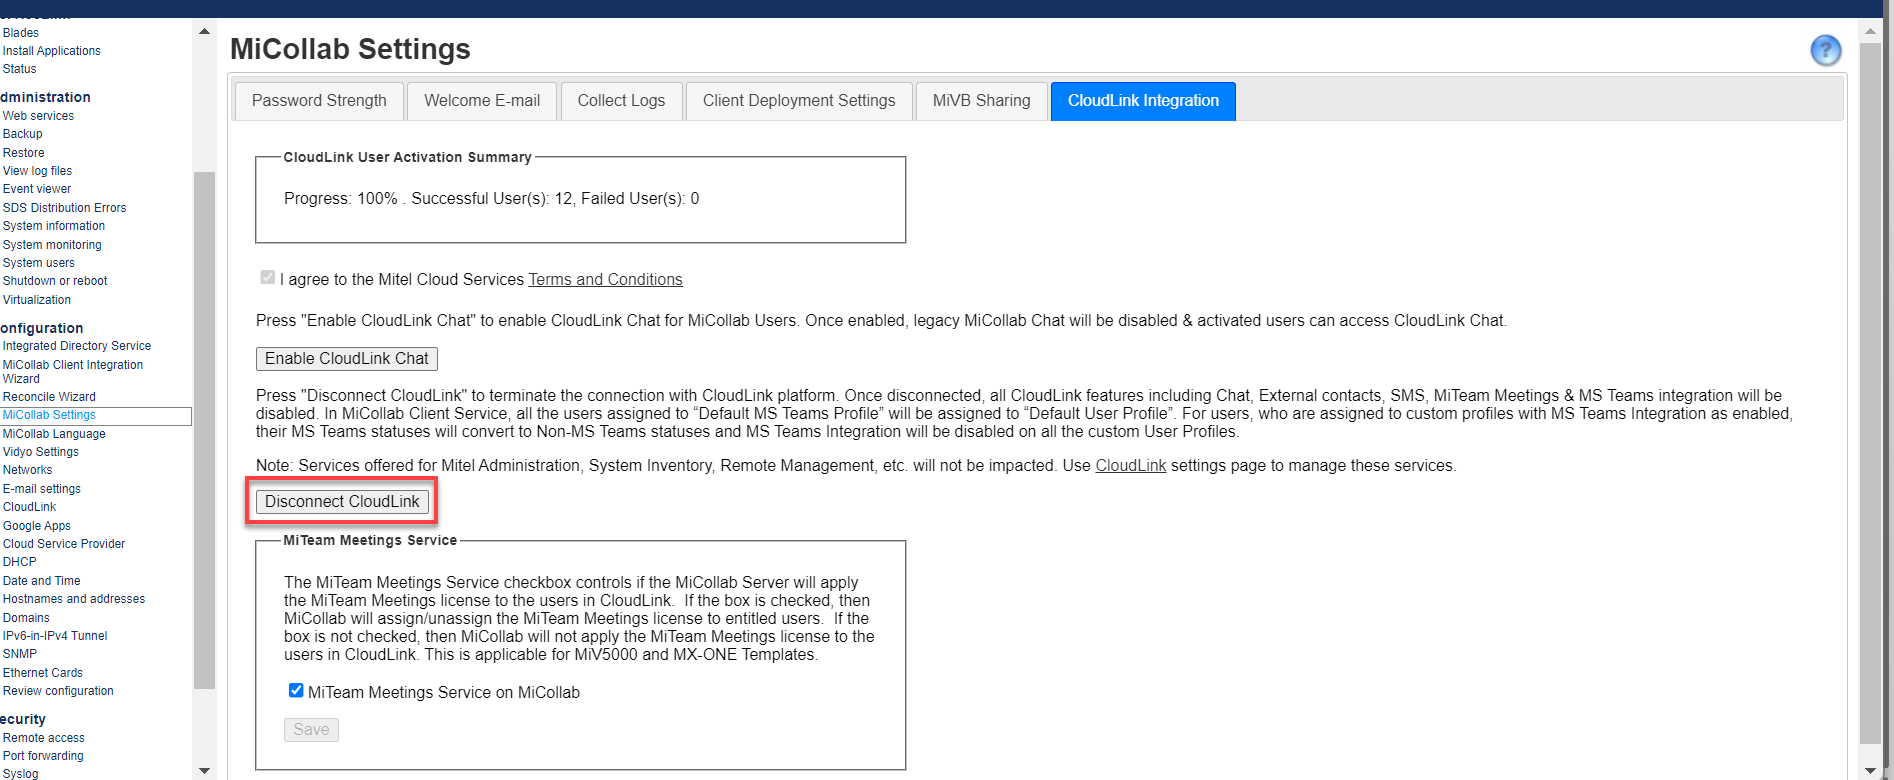
MiTeam Meetings Entitlement
Checking the Enable MiTeam Meetings Entitlement check-box provides the MiTeam Meetings permission from MiCollab, which means the end-users can use the Meetings feature from the MiCollab client. Once this check-box is enabled, the MiTeam Meetings check-boxes appear under the Users and Services > User Templates and Users tab.
Re-establish CloudLink Connection
The CloudLink connection tokens are preserved securely in the MiCollab. In error conditions or when the connection tokens are lost, the following warning message is displayed.

To re-establish the connection, the account administrator must login again using CloudLink administrative account credentials.
Troubleshooting
|
Scenario |
Resolution |
|---|---|
|
When two accounts (for example, personal and IP console) have the same email ids, the users using the IP console would see the chat conversation of the user and vice versa |
Use a separate email id for two different accounts which is not used by any other user in the setup. Accounts with the same email id would be treated as a single chat account. |
|
Multiple user accounts with same primary email id When two user accounts (for example, MiTeam guest user and MiCollab user) have the same primary email id, the second user will be created without a primary email. This impacts all the features (such as, CloudLink Chat, MiTeam, and so on) which depend on primary email and will not work for the user. For example, If a MiTeam guest user exists on MiCollab Client server with primary email (for example, john@xyz.com), then you create a MiCollab user on MiCollab Server with the same primary email. This will create a user on MiCollab Client server but without a primary email for the user. This happens because the same primary email is being used for another account (MiTeam guest user account). |
|
The below section addresses the errors in the failed user report (csv import) and possible corrective action. For any other issues, please contact the Mitel Support with issues and log details.
|
Failure reason/ Error in CSV Report |
Possible correction step to admin |
|---|---|
|
UCA Error - 412,Server not in integrated mode |
The MiCollab server is not in an integrated mode. Change the server to Integrated and retry the process. |
|
UCA Error - 400,Validation Error: User info must not be empty |
Check the user information in MiCollab Client Service. User information must not be null or blank. |
|
UCA Error - 400,Validation Error: Cloud Link GUID missing |
Check the user information in MiCollab Client Service. Try to delete and recreate the user. |
|
UCA Error - 400,Validation Error: Primary Email missing |
Check the user's primary email information in MiCollab Client Service. User’s email id should not be null, and it should be a valid id. |
|
UCA Error - 500,No user found with email: <email_id> |
Check the user's existence with the available email addresses in MiCollab Client Service. |
|
UCA Error - 500,Multiple users found with email: <email_id> |
Check the number of users associated with that particular email address in MiCollab Client Service. Only one user should be associated with one email address. |
|
UCA Error - 500,<THIS STRING WILL VARY BASED ON THE EXCEPTION SCENARIO> |
Unexpected error occurred at MiCollab Client Service. Try restarting the UCA services and retry the process. |
|
SAS Error – User’s Email/UC service not available |
Edit the user from USP and add/update the email address of the user if it is not pre-existing. |
|
Edit the user from USP and provide the login id to enable the user for UCA service. |
|
|
CloudLink Error - 500,Email address is invalid |
Check and update the correct email id of the user from the USP page. Once the correct email id is provided, the MiCollab server will auto-trigger the user activation in CloudLink. |
|
CloudLink Error - 400, Missing Unique Identifier |
Click the Retry Failed User button available under MiCollab Setting > CloudLink Integration |
|
CloudLink Error - 500,Internal server error |
Click the Retry Failed User button available under MiCollab Setting > CloudLink Integration. If the issue still persists, check the public internet connectivity from MiCollab server. |
|
CloudLink Error - 401,Unauthorized |
Click the Retry Failed User button available under MiCollab Setting > CloudLink Integration. |
|
CloudLink Error - 404,Account Not Found |
Click the Retry Failed User button available under MiCollab Setting > CloudLink Integration. Check the accounts existence on Mitel Administration. |
|
CloudLink Error - 409,User Already Exists |
Check whether the user exist in Mitel Administration. |
CloudLink and CloudLink Daemon updates for MiCollab
All the information pertaining to CloudLink Daemon, onboarding procedure, integration details, are available in the CloudLink Daemon Solution Guide.
With the option to integrate CloudLink under CloudLink Integration in the MiCollab Settings panel and the CloudLink connection under CloudLink Daemon settings in the CloudLink panel, MiCollab administrators should take note of the following:
Integration Requirements - The server must be connected to the CloudLink platform using the CloudLink Daemon settings in the Server Manager panel for the following:
System Inventory and SWA Status - When the server is connected to CloudLink platform using the controls in the CloudLink panel, the CloudLink Daemon will send system inventory to the CloudLink panel which can be accessed in the Mitel Administration portal.
Remote management interfaces - When the tunnels for MSL Server Manager, MiCollab administration web interface, and MBG administration web interface are started, the administrator can access these applications remotely in the Mitel Administration portal.
Once enabled, the launch buttons within the Mitel Administration console will open the remote management interfaces.
Note: The procedure to connect the server to CloudLink platform in the CloudLink Daemon dashboard (in the CloudLink panel) is almost identical to the procedure to connect the MiCollab applications to CloudLink platform (in the MiCollab settings panel). The procedure for CloudLink Daemon integration is done in the new CloudLink panel under Configurations, in the Server Manager. See the CloudLink Daemon Solution Guide for the detailed information.
Activation Process- The procedure to connect to the CloudLink platform is identical, and in both cases the account administrator will log into the CloudLink in order to create the connection.
Separate Integration - Although similar, these are two distinct integrations. Both must be completed separately; connecting just one will not enable full functionality.
CloudLink Account - Ensure that the same CloudLink account is used for connecting both integrations.
Single Server Onboarding- Only one MiCollab server should be connected to a CloudLink account. Connecting multiple servers may result in the features not functioning properly.