Configure OAuth 2.0 for Installed Applications
Use this procedure to configure a secure connection between integrated applications such as MiCollab Client and Google Apps such as Google Contacts or Google Calendar using the OAuth 2.0 protocol.
If OAuth 2.0 authorization is successful, then Google will grant an access token to the application on the Mitel Standard Linux server. These tokens can be re-issued when they expire or if the project is changed in any way.
Create an API Project and Client ID in Google
-
Access the Google API console:
-
Open a web browser and navigate to
https://console.developers.google.com/. -
Enter the domain administrator Email and Password to log in.
-
-
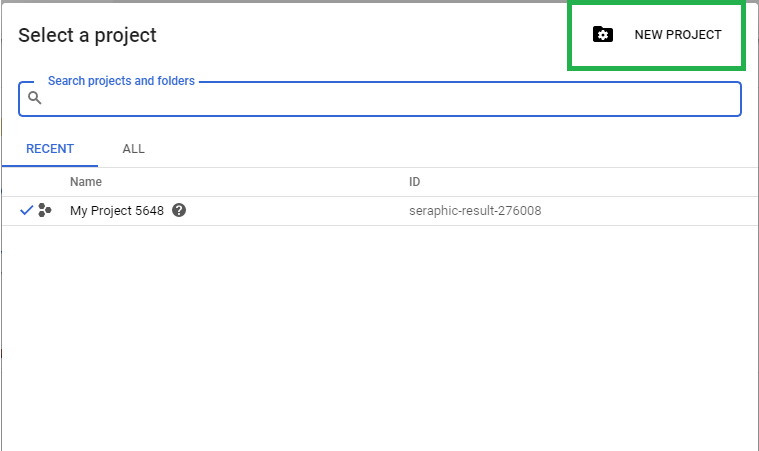
Create a new project and enter a name for the project.Figure 1. Select a project
-
Remain in the project.
-
Enable Google Calendar API from APIs & Services > Library:
-
Open the side menu and select API Manager.
-
Select a API such as "Google Calendar API" and click Enable.
Figure 2. Google Calendar API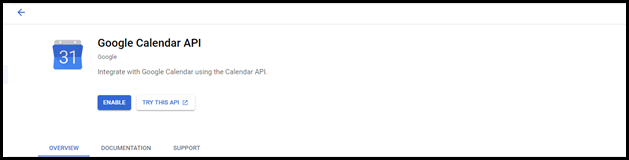
-
-
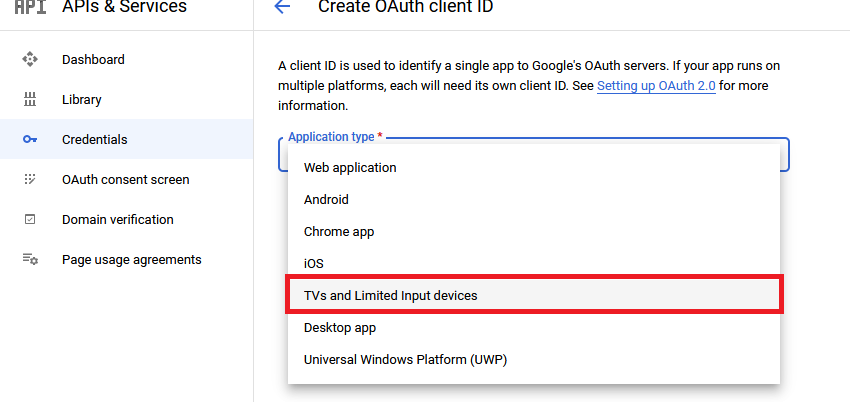
Go to Credentials, click Create OAuth Client ID.
- Select the application type as TV's and Limited Input devices.Figure 3. Create OAuth Client ID
-
Copy the Client ID and Client Secret to a text file for the later use.
Generate Authentication Code
To generate the Authentication Code from MSL which is used to get a Google Access Token for Integration with Google services.
-
Go to Google Apps section in MiCollab, and select the Installed Applications tab.Figure 4. Generate Authorization Code

-
Enter the following information on the respective fields:
-
Product Name - Name of the project as created in Step 2.
-
Client ID - Noted in Step 7
-
Client Secret - Noted in Step 7
-
-
Click Save and Generate Authorization Code.
The authorization code is generated and displayed along with the following link
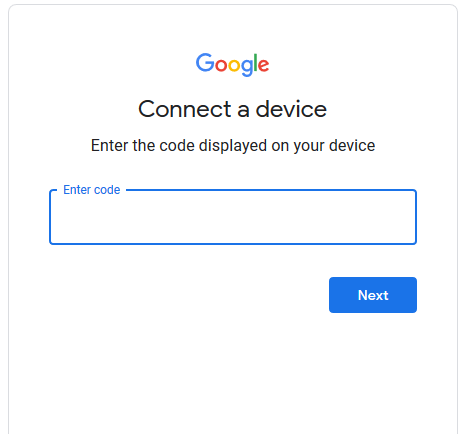
https://www.google.com/device. -
Click on the above link.Figure 5. Connect a device
-
Enter the authorization code and then click Next.
-
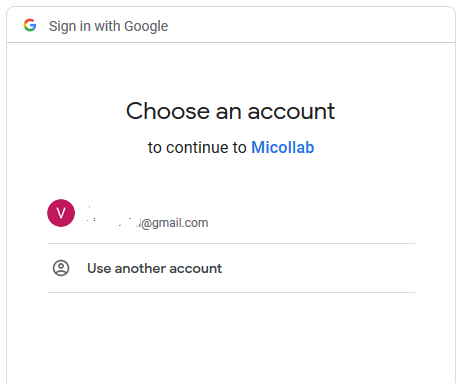
Select the account with which you are connected with/you want to continue sign in.Figure 6. Choose an account
-
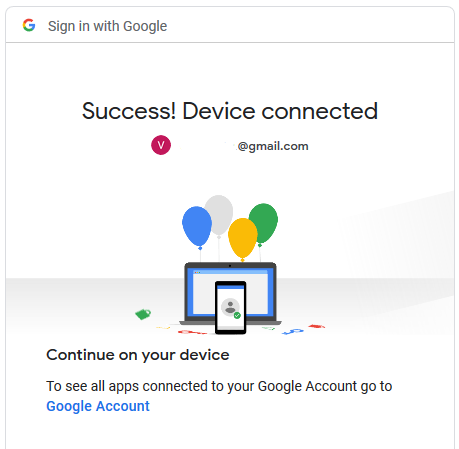
Once the account is selected, the Success message displays.Figure 7. Success! Device connected
-
Go to MiCollab Client, click Configure MiCollab Client Service, and then click Calendar Integration.Figure 8. Calendar Integration

-
In the Calendar Integration screen, select the application as Google from the drop-down list.
-
Select the Enable calendar integration checkbox.
-
Click Test Connection.
The connection success message displays if all the configuration is correct.
-
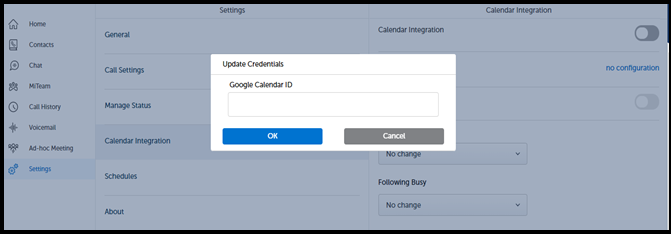
Go to MiCollab Client Settings, and click Calendar Integration.
-
Update the Google Calendar ID, and click OK.Figure 9. Update Credentials
Once the Calendar Integration is successful, the MiCollab Client displays the status of the appointments.