A Mitel Partner or an Account Admin can add users in bulk to a customer account in the CloudLink Accounts Console by using the bulk import feature. This removes the need for a Partner or Account Admin to add users into the Console one at a time. They only need to enter the details of each user in the spreadsheet template provided, and with the click of a button these users will be added to the customer account.
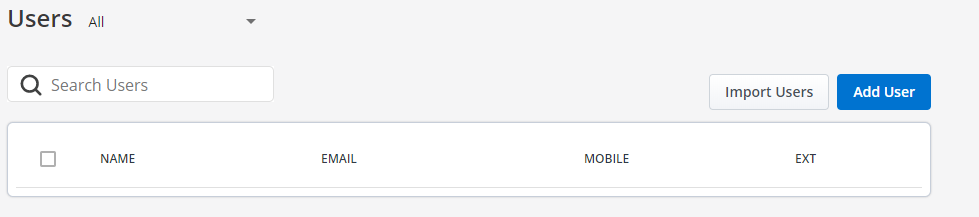
To add users in bulk to a customer account, select the customer account and click Import Users from the Users page of the customer account. The Import Users panel opens.
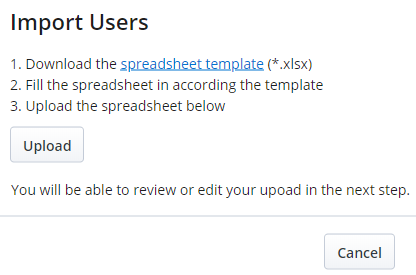
Click the spreadsheet template link. A spreadsheet containing the fields in which user details must be entered is downloaded to the default download location on your system. Using Microsoft Excel, enter the user details in the fields in the spreadsheet. The spreadsheet contains the fields FIRST NAME, LAST NAME, NAME, EMAIL, and ROLE.
- You must enter the details in at least one of the fields among FIRST NAME, LAST NAME, and NAME.
- You must enter a valid email address for the user in the EMAIL field.
Make sure that you do not enter:
- an email address already assigned to an existing user in the customer account
- the same email address for different users in the spreadsheet
- You must enter a user role for the user in the ROLEfield. The available user roles are User and Account Admin. If you do not enter a user role, the default role User is assigned to that user.
Save the spreadsheet. Return to the Users page of the customer account, and click Uploadfrom the Import Users panel. A window opens. Navigate to the location where the spreadsheet is saved, select the spreadsheet, and click Open. A Preview window opens.
The Preview window summarizes the user details you entered. The STATUS column for
a user will show an error icon ( ![]() ) if there is an error in the details
you entered. You can proceed to add users to the customer account
by clicking the Upload button. However, if you proceed to
add users when the STATUS shows the error icon:
) if there is an error in the details
you entered. You can proceed to add users to the customer account
by clicking the Upload button. However, if you proceed to
add users when the STATUS shows the error icon:
- The users without errors in the user details are added to the customer account and will be removed from the Preview window.
- The users with errors in the user details will not be added to the customer account. They will continue to remain in the Preview window until you make the required corrections and add them to the customer account or delete them.
Click the fields that have errors and make the required corrections. If there are no errors in the user details, a label at the top of the Preview window displays No errors found.
In the Preview window, you can also:
- change the user role by clicking the down-arrow beside the user role and selecting a user-role from the from the drop-down
- delete a user by clicking the
 icon
icon - add a user by clicking Add Row and entering the required
user details.
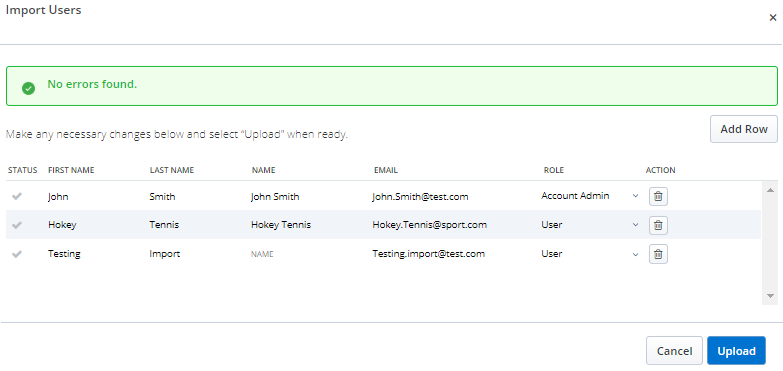
After making all the necessary corrections and modifications, click Upload to add the users to the Accounts Console. The users will now be listed in the Users page of the Accounts Console. If you click Cancelthe bulk import operation is canceled.
After you add users in bulk to a customer account, you must send Welcome emails to these users to register and log in to the various CloudLink applications. To send the Welcome email, do the following:
- In the Users page, select the check box associated with
the users to whom you want to send the Welcome email.
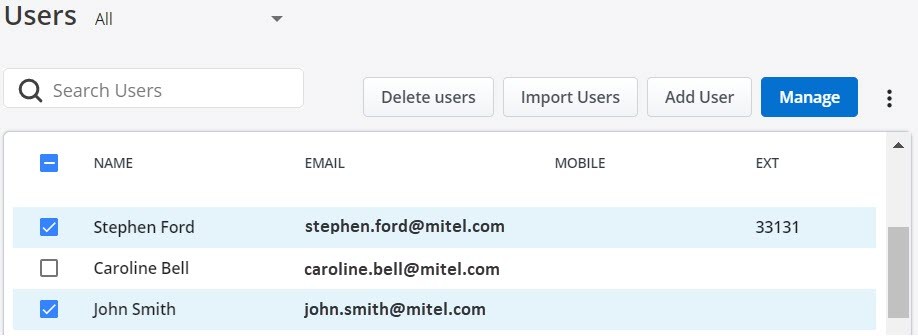
- Click the
 icon and from the panel that opens, click Send welcome
emails.
icon and from the panel that opens, click Send welcome
emails. 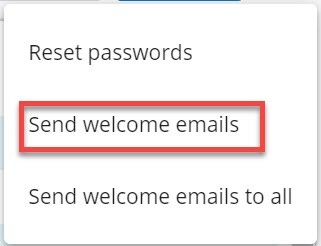
A Welcome email is sent to the selected users.