Error
Possible Cause
Actions
General
Failed to verify the software load:
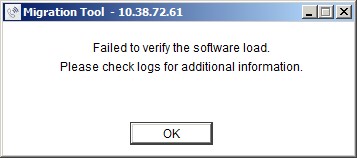
Software load does not exist in the given External or Internal Repository
If the software load does not exist in the given External or Internal Repository, do the following:
Check the correctness of the given repository.
Verify that the software load exists in the given repository.
The PC hosting the MiVoice Business 9.0 software has firewall blocking the transfer of the software load.
If the PC hosting the MiVoice Business 9.0 software has firewall blocking the transfer of the software load, do the following:
In the PC hosting the MiVoice Business 9.0 software, navigate to Control Panel > System and Security > Windows Defender Firewall > Allowed apps, and select the Private check boxes for the following:
BranchCache - Hosted Cache Client (Uses HTTPS)
BranchCache - Hosted Cache Server (Uses HTTPS)
Click OK to abort the migration.
Perform the migration again.
Missing files in the software load
Do one of the following:
Download the software and perform the migration again.
Check the logs for more information and take appropriate action.
Follow these steps:
Click OK to abort the migration.
Perform the migration again.
Poor or no network connection.
Do one of the following:
Follow these steps:
Ensure that there is a strong network connection.
Click Continue to resume the migration.
Follow these steps:
Click Cancel to abort the migration.
Perform the migration again.
FTP file to system aborted.
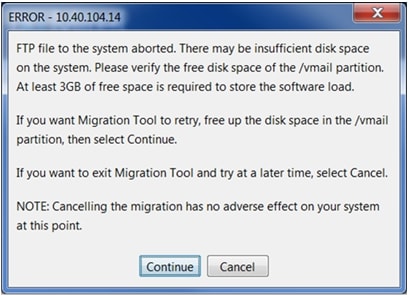
Insufficient disk space on the controller.
Do one of the following:
Ensure that there is at least 3 GB of free disk space on the /vmail partition of the system, and then click Continue.
Follow these steps:
Click Cancel to abort the migration.
Perform the migration again.
Failed to upgrade bootrom.
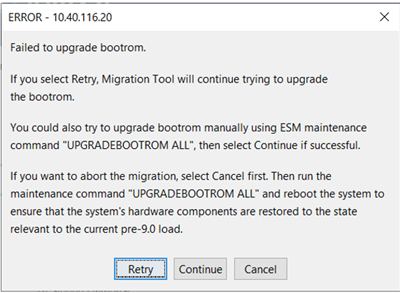
Interruption (power or network outage) during bootrom upgrade.
Do one of the following:
Click Retry to upgrade the bootrom again.
Follow these steps:
Upgrade bootrom manually using UPGRADEBOOTROM ALL maintenance command from the System Administration Tool.
If successful, click Continue to resume the migration.
Follow these steps:
Click Cancel to abort the migration.
Perform the migration again.
Failed to receive result from "UPGRADEBOOTROM ALL" ESM command.
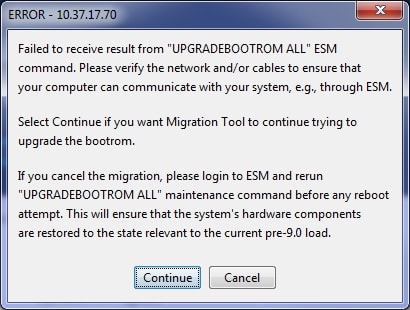
Interruption (power or network outage) during bootrom upgrade.
Follow these steps:
If it is a network issue, resolve the network issue and verify that you can log in to the System Administration Tool. If you can log in, click Continue to continue the migration. The Migration Tool resumes the migration.
If you cannot log in to the System Administration Tool, it is possible that the controller had rebooted unexpectedly (for example, it has experienced power outage). To recover, you must have physical access to the controller. The recovery steps will depend on the stage of the bootloader migration the power went down. Follow these steps:
Access the 3300 ICP controller through its RS-232 port (Maintenance port) from your maintenance PC. For instructions on doing this, see the Access 3300 ICP Controller Through the Maintenance Port section in the Technician's Handbook document.
Check whether power feed is available to the controller. If not, resolve the power issue and ensure that the controller is powered on. Then, press ENTER on your keyboard several times and observe the serial port output.
If there is no output from the serial port, verify that your communication application is working properly by connecting the PC COM port to another working system. The communication application is working properly on another compatible controller, it is possible that the system has experienced a power outage during the bootloader upgrade. As such, the controller is not in usable state and must be sent to Mitel for repair. You can also try powering off and powering on after 30 seconds. If there is no output on the serial port, the system must be sent for repair.
If you observe the output on the serial port, check whether the controller is in constant reboot cycle.
If the controller is not in a constant reboot cycle but rather it completes booting the current installed software and yet you cannot log in to ESM, then from the serial port, try to ping the router and other IP targets on the same subnet, and your PC. For example, ping “10.10.10.1”,3 would ping the router if router’s IP address is 10.10.10.1. Resolve the network issue and ensure that you can log in to the System Administration Tool. If you can log in, click Continue. The Migration Tool resumes the migration.
If the controller is in a constant reboot cycle, stop the autoboot cycle by pressing <SPACE> three or more times consecutively until when you observe the following prompt on the serial port: "Press <SPACE> key 3 times within 7 seconds to stop autoboot". Then, in the bootloader command prompt first confirm the bootloader type. You can do that by finding out whether the prompt is "=>" or "[VxWorks Boot]:".
NOTE: If the prompt is "=>", the controller has upgraded the bootloader and as such it now features UBOOT as bootloader; if the prompt is "[VxWorks Boot]:", the controller could not upgrade the bootloader and still features bootrom as the bootloader.
If the controller still features bootrom as the bootloader and yet it cannot boot, then either the controller’s disk has become faulty or its content is corrupted in some way. In this case, click Cancel to abort the migration. Then, you must potentially replace the disk or reinstall the current software load that the controller was running, relicense the system, and restore the database before you may make another migration attempt.
If the controller does feature UBOOT as the bootloader, at the U-Boot command prompt, run the following commands:
setenv bootcmd run loadvx_ata
saveenv
boot
NOTE: The above commands will configure UBOOT to boot the currently installer pre-9.0 software and initiate software boot process.
After the system boots the currently installed MiVoice Business software, restore the original bootrom as follows:
Delete bootrom.s3 from the /sysro directory, and rename bootrom_orig.s3 to bootrom.s3.
Log in to the System Administration Tool and run the UPGRADEBOOTROM ALL maintenance command.
To confirm whether bootrom has flashed, run the following command from shell on serial port:
d 0xfff00000,32
If you observe the following output, then the bootrom has flashed in successfully:
fff00000: 4d49 5445 4c20 5359 5354 454d 2052 4f4d *MITEL SYSTEM ROM*
fff00010: 2052 332e 312f 3137 2046 6562 2020 3520 * R3.1/17 Feb 5 *
fff00020: 3230 3138 0000 0000 0000 0000 0000 0000 *2018............*
fff00030: 0000 0000 0000 0000 0000 0000 0000 0000 *................*
value = 21 = 0x15
->
Verify that you can log in to ESM. If yes, click Continue. The Migration Tool resumes the migration.
Failed to set boot parameters.

Poor or no network connection.
Do one of the following:
Follow these steps:
Ensure that there is a strong network connection.
Click Retry to attempt setting the boot parameters again.
Ensure that there is a strong network connection. Click Retry to attempt setting the boot parameters again.
Follow these steps:.
Click Cancel to abort the migration. The following dialog box is displayed.

Perform reverse migration to recover the system.
NOTE: See the Reverse Migration appendix in the MiVoice Business Migration Guidelines document.
After reverse migration is complete, perform the migration again.
Failed to reset the system to proceed with the migration.
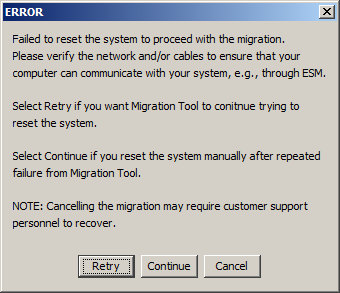
Poor or no network connection.
Do one of the following:
Ensure that there is a strong network connection. Click Retry to reset the system again.
Reset the MiVoice Business system manually. Click Continue to resume the migration.
Follow these steps:
Click Cancel to abort the migration.
Perform reverse migration to recover the system.
NOTE: See the Reverse Migration appendix in the MiVoice Business Migration Guidelines document.
After the reverse migration is complete, perform the migration again.
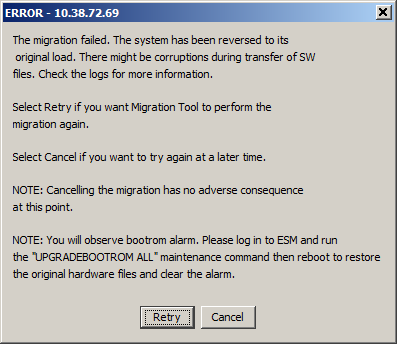
Software files corrupted during migration.
Do one of the following:
Check the logs for more information, and take appropriate action.
Click Retry to resume migration.
NOTE: If the migration fails, a warning dialog box is displayed. See Migration failed and the system has reverted to the VxWorks operating system on how to proceed
Follow these steps:
Click Cancel to abort the migration.
Run the UPGRADEBOOTROM ALL command from the System Administration tool to restore system to the original state.
Perform the migration again.
Migration failed and the system has reverted to VxWorks.
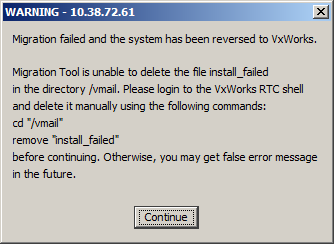
The Migration Tool is unable to delete the install_failed log file.
Delete the install_failed log file manually:
Log in to the VxWorks RTC shell
Run the following command to delete the log file:
rm "/vmail/install_failed"
Run the following command to verify whether the log file has been deleted.
|| "/vmail/install_failed"
If the log file is not deleted, then the output lists the log file. If the log file is deleted, then the output does not list log file.Click Continue to resume migration.
Failed to connect via SSH.
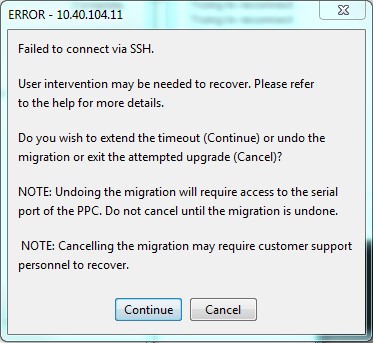
Poor or no network connection.
Do one of the following:
Follow these steps:
Ensure that there is a strong network connection.
Click Continue to resume the migration.
Follow these steps:
Click Cancel to abort the migration.
Perform reverse migration to recover the system.
NOTE: See the Reverse Migration appendix in the MiVoice Business Migration Guidelines document.
After the reverse migration is complete, perform the migration again.
The first attempt at the install failed.
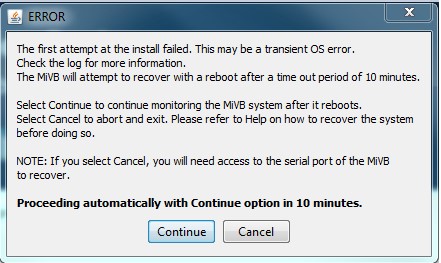
Transient OS error
Do one of the following:
Check the logs for more information, and take appropriate action.
Click Continue. To correct the error, the MiVoice Business system auto-reboots in 10 minutes from the time the error dialog box is displayed. After the reboot, if the error occurs again, an error message is displayed.
Follow these steps:
Click Cancel to abort the migration.
Perform reverse migration to recover the system.
NOTE: See the Reverse Migration appendix in the MiVoice Business Migration Guidelines document.
After the reverse migration is complete, perform the migration again.
NOTE: If you do not click Cancel within 10 minutes from the time the error dialog box is displayed, the MiVoice Business system auto-reboots to correct the error. After the reboot, if the error occurs again, an error message is displayed.
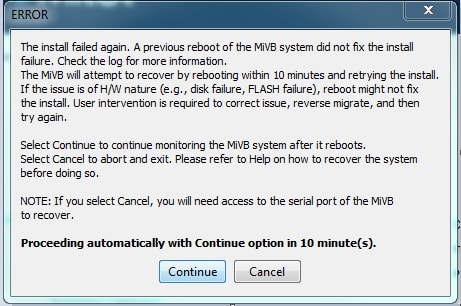
Disk failure or other hardware issue.
Do one of the following:
Check the logs for more information, and take appropriate action.
Determine if it is a hardware issue.
If it is a hardware issue, click Cancel.
Access the system through serial port or SSH, and enter the following command to stop the MiVoice Business system from rebooting:
systemctl stop mlb-installerAfter you repair the system, perform reverse migration.
NOTE: See the Reverse Migration appendix in the MiVoice Business Migration Guidelines document.
After reverse migration is complete, perform the migration again.
Follow these steps:
Click Continue.
To correct the error, the MiVoice Business system auto-reboots in 10 minutes from the time the error dialog box is displayed.
If the error occurs again, click Cancel and perform reverse migration to recover the system.
NOTE: See the Reverse Migration appendix in the MiVoice Business Migration Guidelines document.
After reverse migration is complete, perform the migration again.
Follow these steps:
Click Cancel to abort the migration.
Perform reverse migration to recover the system.
NOTE: See the Reverse Migration appendix in the MiVoice Business Migration Guidelines document
After the reverse migration is complete, perform the migration again.
NOTE: If you do not click Cancel within 10 minutes from the time the error dialog box is displayed, the MiVoice Business system auto-reboots to correct the error. If the error occurs again, click Cancel and perform reverse migration to recover the system (See the Reverse Migration appendix in the MiVoice Business Migration Guidelines document). After reverse migration is complete, perform the migration again.
Migration Tool is unable to connect to the system.
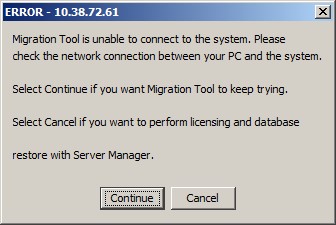
Poor or no network connection.
Do one of the following:
Ensure that there is a strong network connection. Click Continue to attempt connection to the system again.
Click Cancel to abort the migration. License the system and restore the database manually from the Server Manager.
NOTE: For more information, log in to the Server Manager and see the pages, ServiceLink > Status > Help and Administration > Restore > Help.
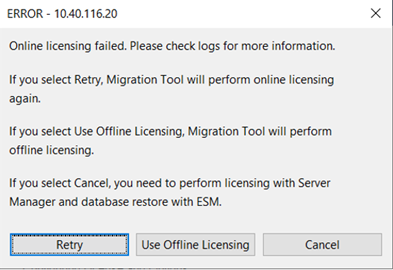
Failure to sync with the AMC server.
Incorrect or invalid ARID.
Do one of the following:
Check the logs for more information, and take appropriate action.
Click Retry to attempt online licensing again.
Click Use Offline Licensing to perform offline licensing. The tool proceeds with the migration and performs offline licensing.
If offline licensing fails, the following dialog box is displayed.
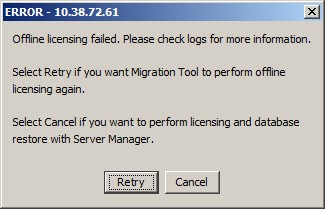
Click Retry if you want the tool to attempt offline licensing again.
If offline licensing fails again, click Cancel to perform manual licensing using the Server Manager after the migration.
After the migration, log in to the Server Manager. The following error is displayed:
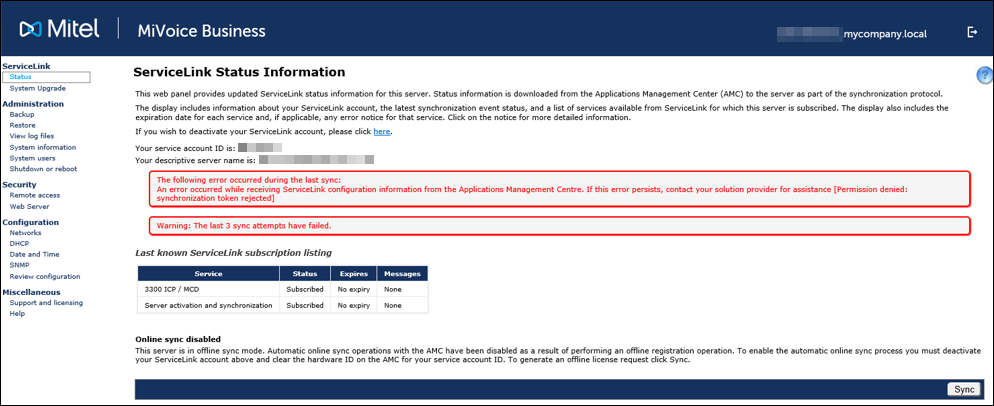
Clear the hardware ID is the AMC server and then click Sync to activate the license.
Click Cancel to abort the migration.
A bootrom alarm is raised on the MiVoice Business system, after a successful migration.
Hard disk or processor card
replacement.
Run the maintenance command UPGRADEBOOTROM ALL, from the Maintenance Commands page of the System Administration Tool.
The AMC cannot be contacted to retrieve ARID or GARID licenses, or GARID licenses are missing.
This error may occur when either Migration with Media Replacement or Full Migration option is selected.
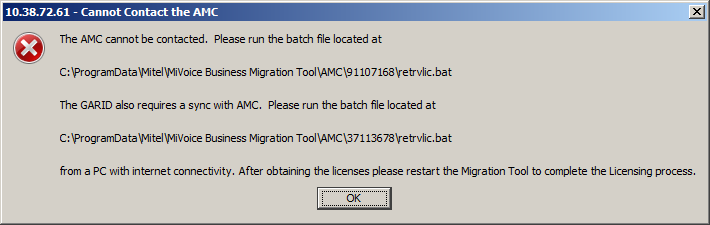
Or

Or

Unable to connect to the AMC server through internet.
Note the location of the ARID licensing request batch file. The folder shown is hidden by default and you have to unhide using the Windows Control Panel (Folder Options > View tab) before proceeding to the next step.
Click OK.
Copy the \AMC\... folder and its contents from the location indicated in the message box to a PC with internet connectivity.
Run the retrvlic.bat file either by double-clicking it from Windows Explorer or using the Windows Command Prompt.
Copy the \AMC\...folder and its contents from the PC with internet connectivity to a PC on the controller network, replacing its existing AMC folder.
Start the Migration Tool and connect to the MiVoice Business system.
Select the Migration option you want to perform in Step 1 dialog.
Select the Pre-Migration Audit, Backup, License, and Restore options that you want to perform in Step 2 dialog.
Click Next.
The following dialog box is displayed.
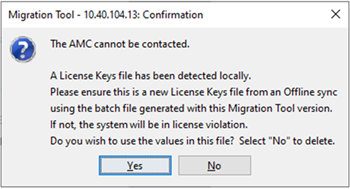
Click Yes.
Click Next.
The in progress window is displayed.Click Start to start the full migration.
To select the controller as DLM while disconnected from the AMC:
Relaunch the Migration Tool and navigate to the License and Options Selection window.
Enter the Group Application Record ID (GARID) and click Retrieve Licenses.
A dialog box is displayed with the location of the retrvlic.bat file .
Note the location of the GARID licensing request batch file.
Copy the \AMC\... folder and its contents from the location indicated in the message box to a PC with internet connectivity. Make sure the copy the folder containing the GARID licensing request file.
Run the retrvlic.bat file either by double-clicking it from Windows Explorer or using the Windows Command Prompt.
Copy the \AMC\...folder and its contents from the PC with internet connectivity to a PC on the controller network, replacing its existing AMC folder.
Start the Migration Tool and connect to the MiVoice Business system.
Select the Migration option you want to perform in Step 1 dialog.
Select the Pre-Migration Audit, Backup, License, and Restore options that you want to perform in Step 2 dialog.
Click Next.
A dialog box is displayed for you to confirm that you want to use the values in the batch file or delete the values.Click Yes.
Click Next.
The in progress window is displayed.Click Start to start the full migration.
Migration Tool failed to connect to system during Software Activation
Poor or no network connection.
Do one of the following:
Ensure that there is a strong network connection. Click Continue to resume the migration.
Click Cancel and perform licensing with Server Manager and database restore with ESM after the system is up.

Failed to receive upgrade bootloader result.
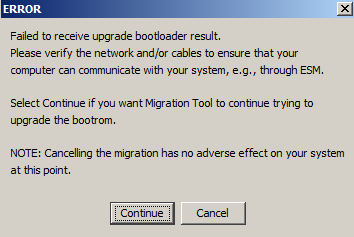
Interruption (power or network outage) during booloader upgrade.
Do one of the following:
Follow these steps:
Resolve the interruption.
Click Continue to resume migration.
Follow these steps:
Click Cancel.
Resolve the interruption, and then restart migration.
System
is not licensed.

Your system is unlicensed.
Click OK, and do one of the following:
Click Cancel in the License and Option Selection screen. License the system and restart the migration.
Follow these steps:
Click Back in the License and Option Selection screen to navigate to the Defining the migration with media replacement options screen and clear License and Option Configuration - AMC sync required check box, and proceed with the migration.
After the migration, you must manually license the system from Server Manager and restore the database using the System Administration Tool.
CX Controller
Voicemail size exceeds the supported limit on the platform.

The voice mail size on the CX controller exceeds 848 MB.
Delete voice mail messages from /vmail/d/vm/grp and /vmail/d/vm/msg directories such that the total voice mail size is less than 864 MB.
Voicemail backup size exceeds the supported capacity on this platform.
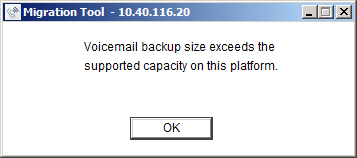
The voice mail size in the backup file exceeds 848 MB.
Delete voice mail messages from 0200.tar and 0300.tar files in the backup file located at vmail\temp\db\backup\vmail such that the total voice mail size is less than 864 MB.
AX Controller
Migration tool failed to back up Voicemail messages.
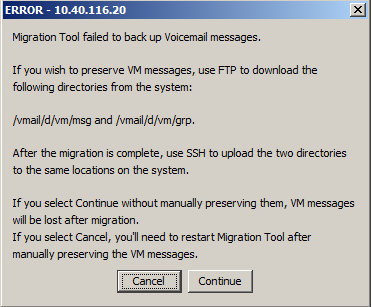
The Migration Tool failed to download voice mail messages.
Manually transfer (FTP) the voice mail messages from /vmail/d/vm/msg and /vmail/d/vm/grp directories on the MiVoice Business system to your PC using an application (for example, FileZilla).
Click Continue.
The tool continues with the migration.
WARNING: Voice mail messages will be lost if you click Continue before manually backing up voice mail messages.
After the migration is complete, using a communication application (for example, PuTTy), transfer (SSH) the voice mail messages from your PC to the /vmail/d/vm/msg and /vmail/d/vm/grp directories on the MiVoice Business system.
NOTE: If you want to abort the migration and manually back up voice mail messages (as indicated in step 1), click Cancel. The tool aborts the migration.
NOTE: After you have backed up the voice mail messages, start the migration, and manually restore the voice mail messages (as indicates in step 3) after the migration.
Migration Tool failed to restore Voicemail messages

The Migration Tool failed to download voice mail messages.
Manually transfer (SSH) voice mail messages from the C:\ProgramData\Mitel\MiVoice Business Migration Tool\Ftp\<IP address of the MiVoice Business system>\vmail\d\ directory on your PC to the /vmail/d/ directory on the MiVoice Business system using a communication application (for example, PuTTy).
Click Continue.
The tool continues with the migration.
WARNING: Voice mail messages might be lost if you click Continue before manually transferring the voice mail messages to your MiVoice Business system.
The switch is still running pre MIVB 9.0 media.
Clicked the Continue option by mistake before performing the required actions.
Follow these steps:
Ensure that you have valid compact flashes installed as described in the pop-up window and click Continue.
Click Abort if you want to perform reverse migration restore the system to its original state as described in the pop-up window.
Failed to connect via SSH.
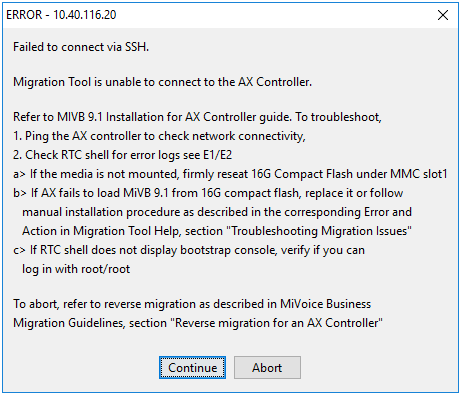
The system software in the CF is pre-9.0.
Follow these steps:
Click Abort to abort the migration and perform reverse migration.
Click Continue to re-attempt to reconnect via SSH
NOTE: See Software > Migration > Reverse Migration of an AX Controller if the 16 GB CF is unavailable or corrupt in the Troubleshooting Guide.
If the user attempts to move from the Step 1 dialog to the next one when one or more firmware files are missing or invalid, the Migration Tool displays the following error message dialog.
Media replacement is invalid or missing
Perform the following:
Restore the files before proceeding.
Run setup.exe with the Repair option to re-install the missing or invalid files.
Migration Tool fails to contact AMC during licensing to obtain a compatible license.
Unable to connect to the AMC server through the internet
Perform the following:
Note the location of the ARID licensing request batch file. The folder shown is hidden by default and you must unhide it by using the Windows Control Panel (Folder Options > View tab) before proceeding to the next step.
Copy the \AMC\... folder and its contents from the location indicated in the message box to a PC with internet connectivity.
Run the retrvlic.bat file either by double-clicking it from Windows Explorer or using the Windows Command Prompt.
Copy the \AMC\...folder and its contents from the PC with internet connectivity to the original PC that is running the migration, replacing its existing AMC folder.
Press OK to proceed with the migration.
Press Confirm to ensure that you have obtained a new license.
NOTE: If you press the Back option, it will take you to the previous dialog.
If you proceed without obtaining a new license or if AMC returns an unhandled error, restoration of License and Option fail resulting in a premature stoppage of the migration without restoration of the database voice messages.
NOTE: The first line of this error message might vary, depending on the error type returned.
AMC returns an unhandled error
Perform the following:
Manually Restore the Database.
NOTE: See the sections Defining the migration with media replacement options and Performing a full migration for more information about manually restoring the database.
The communication application displays -> prompt after pressing the Spacebar key.
The controller did not power down completely to replace the CF.
Do one of the following:
Ensure that the controller is fully shut down before you replace the media.
Abort the migration and perform reverse migration.
NOTE: See the Reverse Migration appendix in the MiVoice Business Migration Guidelines document.
The AX controller continuously boots displaying the following error in the communication application:
ataDrv: ataDriveInit failed on Channel 0 Device 0
The 16 GB CF is not firmly installed in the Compact Flash Slot 2 of the AX controller.
Do one of the following:
Ensure that the 16 GB CF is firmly installed in the Compact Flash Slot 2.
Abort the migration and perform reverse migration.
NOTE: See the Reverse Migration appendix in the MiVoice Business Migration Guidelines document.
The AX controller continuously boots displaying the following error in the communication application:
Loading /partition4/RTC8260...usrFdiskPartLib: warning: invalid partition entry encountered block 0, entry 1, sys type 83, Skipped
..
0x1ecd6028 (tBootn/a): dosFsLib.c : ERROR reading the device boot sector
Error loading fil0xe: errno = 0x1ecd6028c0006 (tBoot): dosFsLib.c : media not formatted or not present
.
Can't load boot file!!
The RTC8260 image is not found in the correct partition, the RTC8260 image is corrupt, or the 16 GB CF does not have the RTC8260 image.
Do one of the following:
Update the bootrom file name to /partition1/RTC8260:
From the communication application, stop the auto-boot sequence by pressing the Space key three times at the following prompt: (See Maintenance > Access 3300 ICP Controller Through the Maintenance Port in the Technician's Handbook)
Press <SPACE> key 3 times within 7 seconds to stop autoboot
At the [VxWorks] prompt, type p and verify whether File Name is /partition4/RTC8260.
Sample bootline parameters:
boot device : ata=0
unit number : 0
processor number : 0
file name : /partition1/RTC8260 ## 16G CF flash has RTC image in partiion1
inet on ethernet (e) : 10.37.20.99:ffffff00
host inet (h) : 192.168.1.4
gateway inet (g) : 10.37.20.1
user (u) : ftp
ftp password (pw) : @
flags (f) : 0x0
If yes, then type c to navigate to File Name and type /partition1/RTC8260.
Type @ to reboot the controller.
If the RTC8260 image does not exist in the 16 GB CF, then replace current 16 BG CF with a brand new 16 GB CF from factory.
Abort the migration and perform reverse migration.
NOTE: See the Reverse Migration appendix in the MiVoice Business Migration Guidelines document.
Unable to log in with the default root user and password at the login prompt in the communication application.
The 16 GB CF was previously configured with a different user name.
Do one of the following:
Manually reset the both root and system users to default credentials:
From the communication application, log in as root and the corresponding password. See Maintenance > Access 3300 ICP Controller Through the Maintenance Port in the Technician's Handbook.
To reset root password to root, type passwd.
Follow prompt and enter the default password as root.
Note: If you do not know the password, see Password Recovery for 3300 ICP Controller in the Troubleshooting Guide.
To access MCD debug to reset system password, type mcdDebug.
Run the command; ResetAllLoginPasswords
Continue with migration or manually upgrade license and restore the database.
Replace current 16 BG CF with a brand new 16 GB CF from factory.
Abort the migration and perform reverse migration.
NOTE: See the Reverse Migration appendix in the MiVoice Business Migration Guidelines document.
Unable to set up the AMC (Error 73). Check your Internet connection.
Your network firewall is blocking the connection to AMC.
Perform the following:
Delete your browser cookies.
Ping register.mitel-amc.com and sync.mitel-amc.com from the controller and verify whether you get a response.
Verify that the System IP Properties form in the MiVoice Business System Administration Tool is configured with the correct DNS server.
Verify that the ports, 80, 22, 443, and 8222 between AMC and the MiVoice Business system are not blocked.


