Call Forwarding Management
Configuring Call Forwarding Settings
- Click User Management > Users. The list of users is displayed.
- Select the user whose phone requires call forwarding.
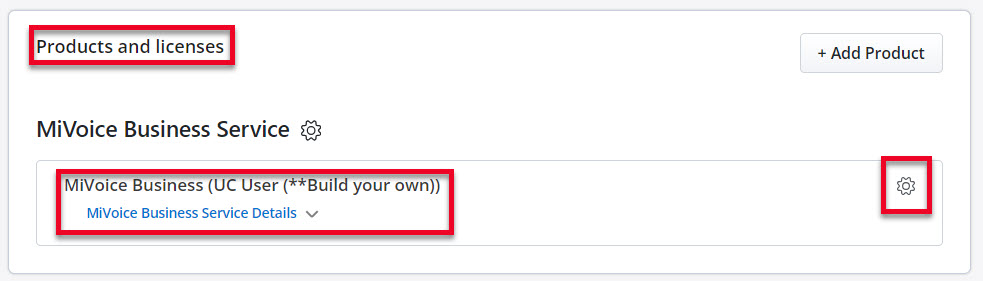
- Under Products and licenses
section, click the Settings icon for MiVoice Business
Service.
- On the User Configuration page, scroll to the Phones section and expand the Phone for which you want to enable call
forwarding.
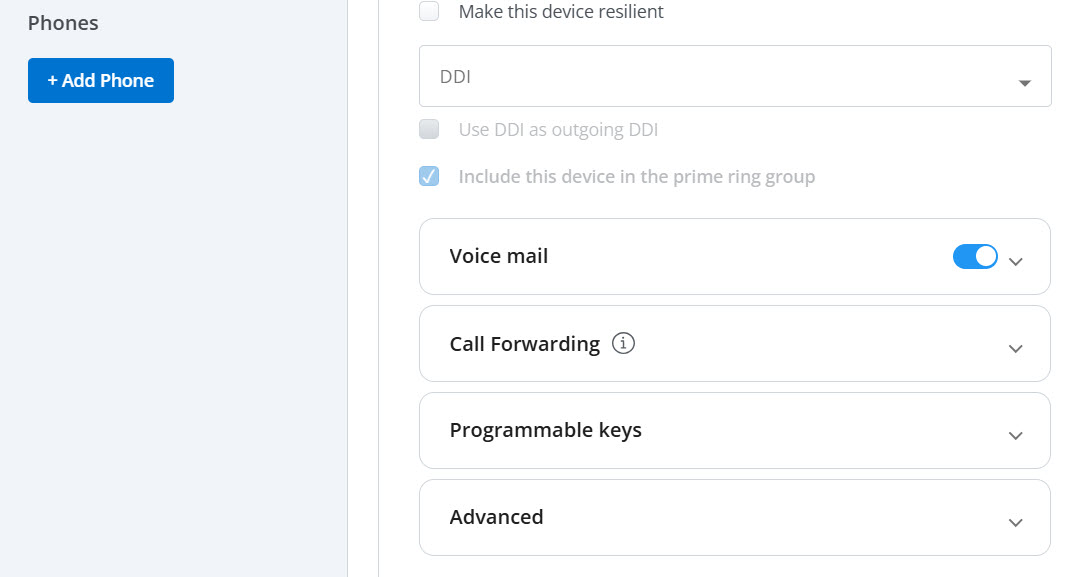
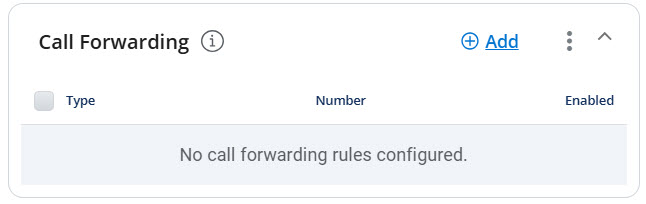
- Expand the Call Forwarding and click Add.
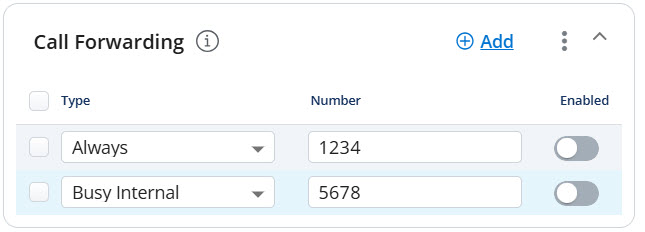
- From the Select type drop-down list, select the call forwarding type. The
available options are:
- Always: Forwards all incoming calls directly to the configured destination number.
- Busy Internal: Forwards internal calls to the destination number when the user is already on another call.
- Busy External: Forwards external calls to the destination number when the user is already on another call.
- No Answer Internal: Forwards an unanswered internal call to the configured destination number.
- No Answer External: Forwards an unanswered external call to the configured destination number.
 Note:
Note:- You can select only one of each call forwarding type for your phone. For example, you cannot select the Always forwarding type more than once with different destination numbers.
- Click Add again to add more call forwarding types.
- The Add button will no longer be displayed after all five types have been added.
- Enter the destination Number where the call will be transferred.Note: You can enter digits from 0 to 9. The supported special characters are * and #.
- Turn the toggle on to enable the call forwarding setting.
- Click Save to save the configuration. Call forwarding is enabled on the phone.
Enable or Disable Multiple Call Forwarding Types
- Click User Management > Users. The list of users is displayed.
- Select the user whose phone call forwarding you want to enable or disable.
- Under Products and licenses section, click the Settings icon for MiVoice Business Service.
- On the User Configuration page, scroll to the Phones section and expand the Phone for which you want to enable or disable call
forwarding types.
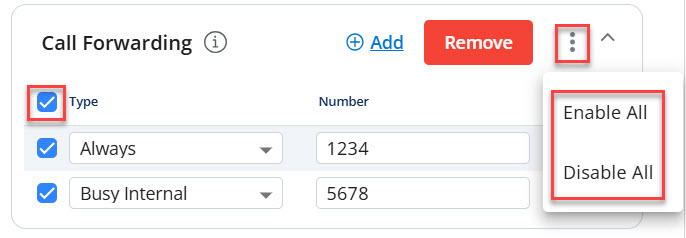
- Select the required call forwarding type(s).
- Click the More options
 icon and select
Enable All. The selected type(s) are enabled on the phone.
icon and select
Enable All. The selected type(s) are enabled on the phone.Similarly, to disable all selected types, select Disable All, which disables the selected types on the phone.
Note: If you do not select All, the Enable Selected and Disable Selected options are displayed under More options instead of Enable
All and Disable All.
Edit Call Forwarding
- Click User Management > Users. The list of users is displayed.
- Select the user whose phone call forwarding you want to edit.
- Under Products and licenses section, click the Settings icon for MiVoice Business Service.
- On the User Configuration page, scroll to the Phones section and expand the Phone for which you want to edit call forwarding.
- Expand the Call Forwarding and select the required call forwarding type.
- Modify the destination Number.
- Enable or disable the selected call forwarding type.
- Click Save to apply the changes.Note:
- In Multi-device User Group (MDUG) and Multi-device External Twin (MDET), call forwarding rules are shared among all members and can be edited only on the group’s prime member.
- When a user’s group is changed from MDUG to PRG, the existing call forwarding rules on the prime phone are cleared. Reconfigure the call forwarding rules after changing the group type.
Remove Call Forwarding
- Click User Management > Users. The list of users is displayed.
- Select the user whose phone call forwarding you want to remove.
- Under Products and licenses section, click the Settings icon for MiVoice Business Service.
- On the User Configuration page, scroll to the Phones section and expand the Phone for which you want to remove call forwarding.
- Expand the Call Forwarding and select the required call forwarding
type.Note: The Remove button is enabled only after you select a call forwarding type.
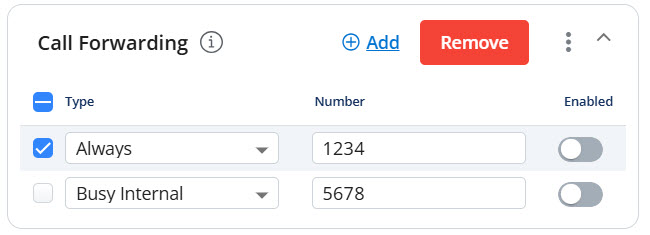
- Click Remove.
- Click Save to apply the changes. The selected call forwarding type(s) are removed from the phone.
Bulk User Settings - Call Forwarding
- On the Users page, select the users whose call forwarding settings you want to update.
- Click Manage. The Manage page is displayed.
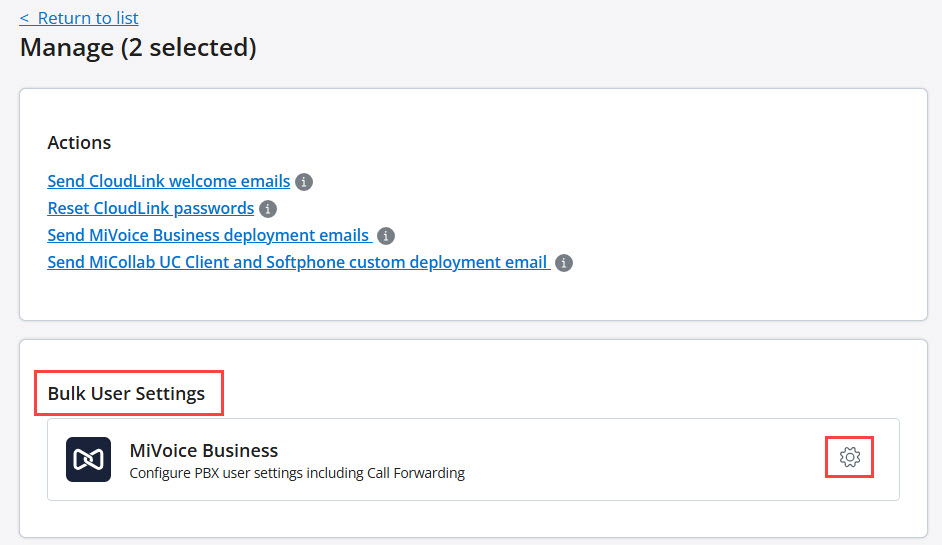 Note: You can edit a maximum of 10 users at a time.
 - In Bulk User Settings, click the Settings icon associated with MiVoice
Business. The MiVoice Business window is displayed.
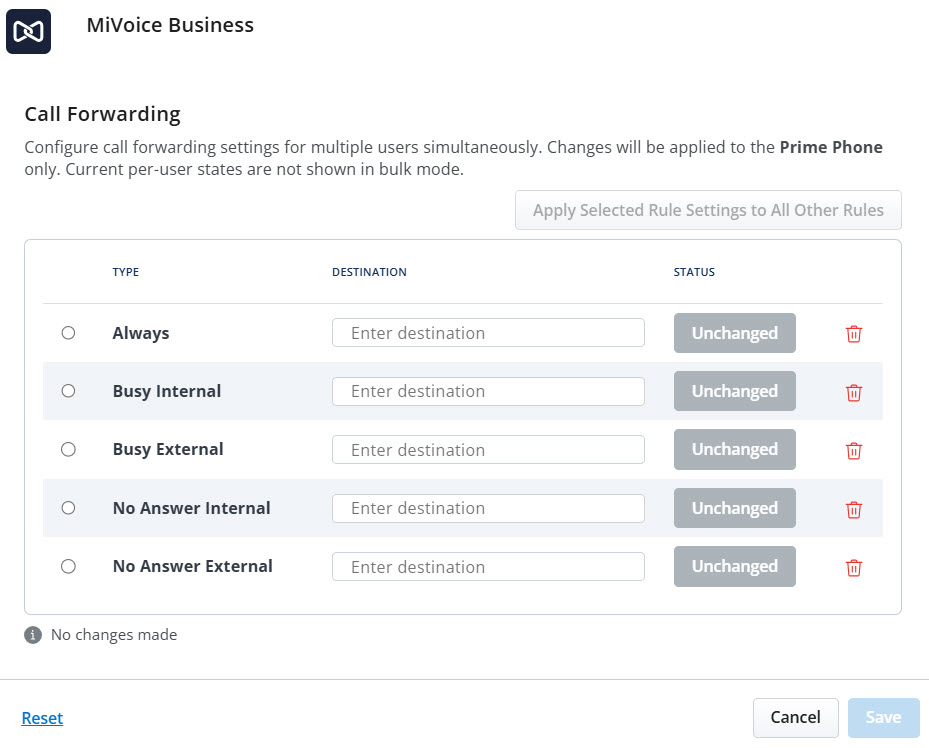
- Select the required Type.
- Enter the Destination number.Note: You can enter digits from 0 to 9. The supported special characters are * and #.
- Click Status to update your preferred status. The available statuses are
Unchanged, Enabled, and Disabled.Note: For more information about the status and its associated type and destination, see Sample Configuration.
- Review all changes.
- Select the I have reviewed the changes to the call forwarding rules and would like to proceed check box.
- Click Save to apply the changes. The Configure Call Forwarding Rules
dialog displays the updated rules.Note:
- To delete a selected call forwarding type, click the Delete icon. After deletion, you cannot configure that type.
- To configure a deleted type again, click the Redo icon.
- To apply the same settings to all call forwarding types, configure one type and then click Apply Selected Rule Settings to All Other Rules.
- Click Reset to revert all changes made in the current bulk edit session and restore the previously configured call forwarding rules for the selected users.
Sample Configuration
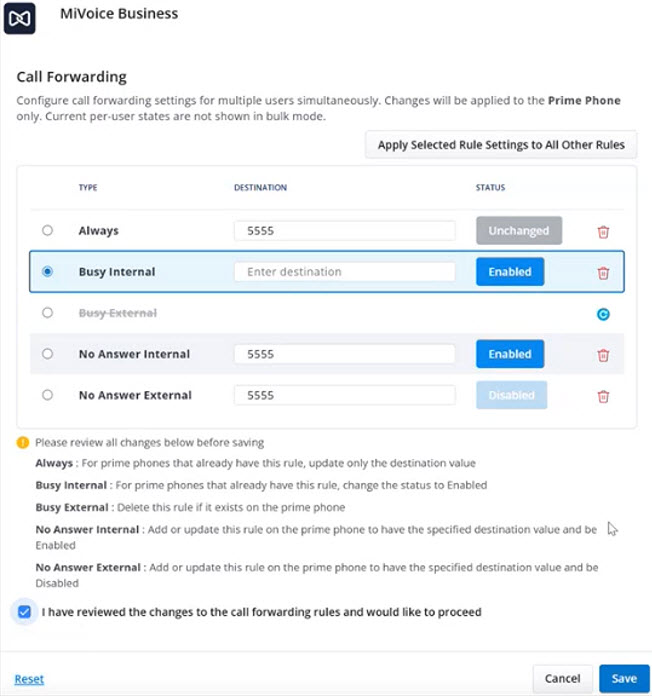
The following table shows sample call forwarding configurations for multiple users simultaneously.
|
Type |
Destination |
Status |
Rules Information |
|---|---|---|---|
|
Always |
5555 |
Unchanged |
For prime phones that already have this rule, update only the destination value |
|
Busy Internal |
No Value |
Enabled |
For prime phones that already have this rule, change the status to Enabled |
|
Busy External |
N/A |
N/A |
Delete this rule if it exists on the prime phone |
|
No Answer Internal |
5555 |
Enabled |
Add or update this rule on the prime phone to have the specified destination value and be Enabled |
|
No Answer External |
5555 |
Disabled |
Add or update this rule on the prime phone to have the specified destination value and be Disabled |