Sync MiVoice Business PBX data to CloudLink
In a MiVoice Business solution where the CloudLink Daemon is enabled and the CloudLink Gateway is deployed on all MiVoice Business nodes acting as primary user controllers, secondary failover user controllers, or those with a CloudLink SIP trunk, PBX data is automatically synchronized to CloudLink once the following tunnels are started:
- CloudLink Gateway CLGW REST Interface
- MiVoice Business CLGW REST Interface
These tunnels are automatically started upon the successful completion of the CloudLink Gateway deployment. Afterward, Account Administrators can initiate a synchronization process at any time to ensure that user, group, and contact information in CloudLink accurately reflects the configuration of the connected PBX systems (MiVoice Business nodes).
When the synchronization starts, the system performs preparatory checks to verify the status of the PBX systems and retrieve key data such as users, groups, and contacts.
- If critical issues are detected—indicating problems accessing a PBX system or CloudLink—the synchronization pauses.
- If non-critical issues are detected, Account Administrators have the option to proceed with a partial synchronization.
- If no issues are detected, Account Administrators can proceed with the synchronization seamlessly.
Throughout the process, the Mitel Administration interface provides clear indicators of success or failure, helping Account Administrators easily monitor and manage the synchronization.
Before starting the synchronization process, ensure the following conditions are met:
- CloudLink Gateway Deployment: The CloudLink Gateway must be deployed, and the CloudLink Daemon must be enabled on all MiVoice Business nodes that serve as primary user controllers, secondary resilient failover user controllers, or those with a CloudLink SIP trunk.
- MiVoice Business nodes accessible: The MiVoice Business nodes you wish to sync must be properly configured and accessible. The synchronization will only work if these PBX systems are available and online.
- Account Administrator Permissions: Only Account Administrators can initiate synchronization. Ensure that you have the necessary permissions to access the Sync the system option.
To sync the system, perform the following steps:
-
Click
 and select
Sync the system.
and select
Sync the system.
The System Sync – Data Retrieval window appears, displaying a table that lists CloudLink and all PBXs linked to the customer account (essentially, all applications in with the mivoice-business application type).
The table includes the following columns:Name
Description
SOURCE
Displays either CloudLink or the IP of a PBX linked to the customer account.
STATUS
Indicates the status of the source (e.g., online, offline).
USERS
Indicates whether user information has been successfully retrieved.
GROUPS
Indicates whether group information has been successfully retrieved.
CONTACT
Indicates whether contact information has been successfully retrieved.
-
Wait for the data retrieval process to complete.
As the system retrieves data, the table is updated with visual indicators reflecting the status of each check.
Initially, the system checks the status of CloudLink and each PBX (for example, online or offline):
 Online: If the status is online, the system proceeds to retrieve
data from the source.
Online: If the status is online, the system proceeds to retrieve
data from the source. Offline: If the status indicates offline, data retrieval does not
proceed from that source. This is considered a critical issue, and
synchronization cannot proceed.
Offline: If the status indicates offline, data retrieval does not
proceed from that source. This is considered a critical issue, and
synchronization cannot proceed.
Once the source’s status is confirmed as Online, the system will attempt to retrieve the following data in this order:- Users: Information about users in the source.
- Groups: Information about groups associated with users in the source.
- Contacts: Contact data from the source.
If data retrieval fails for any category (users, groups, or contacts), an error icon will appear, indicating which data type could not be retrieved. If user data retrieval fails, group data retrieval for that source will also be marked as failed, and no further attempts will be made to retrieve group data. However, the system will still attempt to retrieve contact data for the source.
Visual indicators in the table show: Successful retrieval
 Failed retrieval.
-
Review the data retrieval results.
An overall data retrieval status icon and message below the table indicate whether synchronization can proceed. If issues are encountered, additional links will appear, providing more detailed information.
Data retrieval status icons represent whether synchronization can proceed: Successful: Data retrieval
was successful, and synchronization can proceed.
Successful: Data retrieval
was successful, and synchronization can proceed. Warnings: Some issues were encountered, but partial synchronization
can still proceed.
Warnings: Some issues were encountered, but partial synchronization
can still proceed. Failure: Critical issues were detected,
and synchronization cannot proceed.
Failure: Critical issues were detected,
and synchronization cannot proceed.
The images below illustrate the different data retrieval scenarios:
Figure 1. Successful: Data retrieval was successful, and synchronization can proceed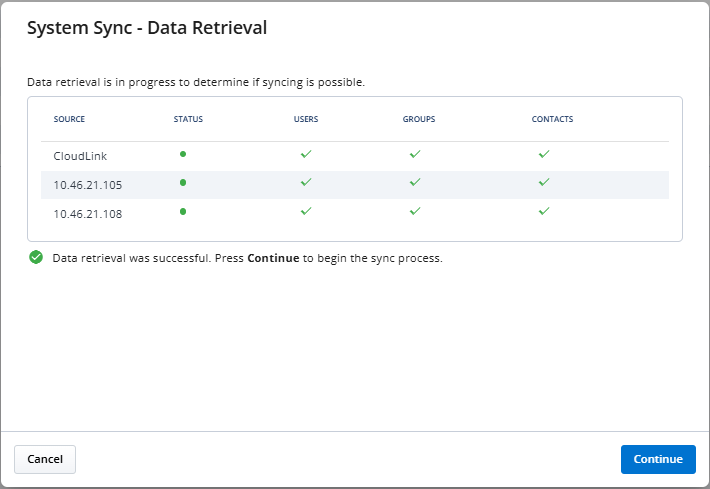
Figure 2. Warnings: Some issues were encountered, but partial synchronization can still proceed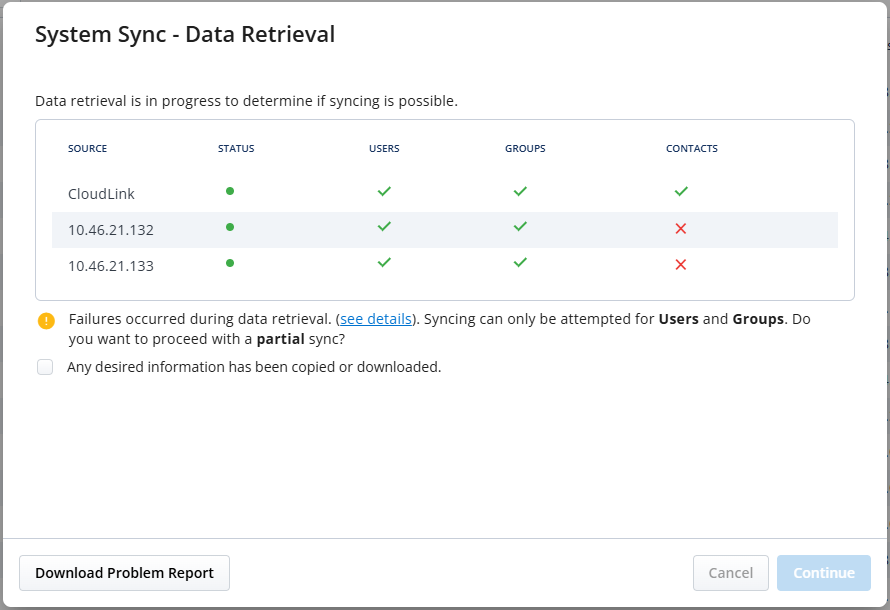
Figure 3. Failure: Critical issues were detected, and synchronization cannot proceed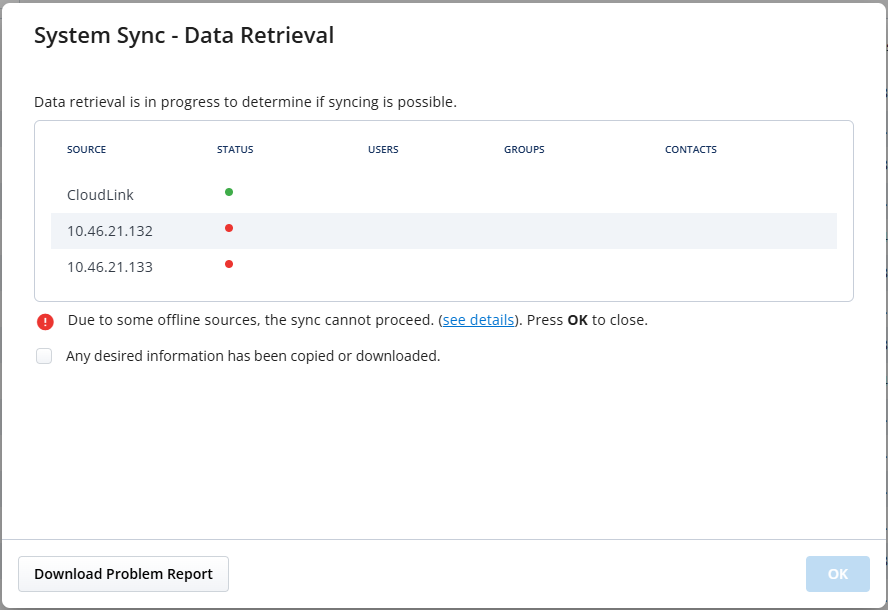
Source status Offline, which appears in the above example, is considered a critical issue; therefore, the synchronization cannot proceed.
-
Wait for the synchronization process to complete.
Once synchronization is complete, the System Sync – Results Summary window appears, displaying a summary of the synchronization results for each entity involved in the synchronization process: Users, Groups, Contacts. Each entity has its section in the summary with an icon indicating if the sync was completed with warnings, failures, or neither. If no data was synced for an entity, a message indicating "Skipped" will appear.Figure 4. System Sync - Results Summary - Users sync completed with failures, groups sync completed successfully, and contacts sync was skipped
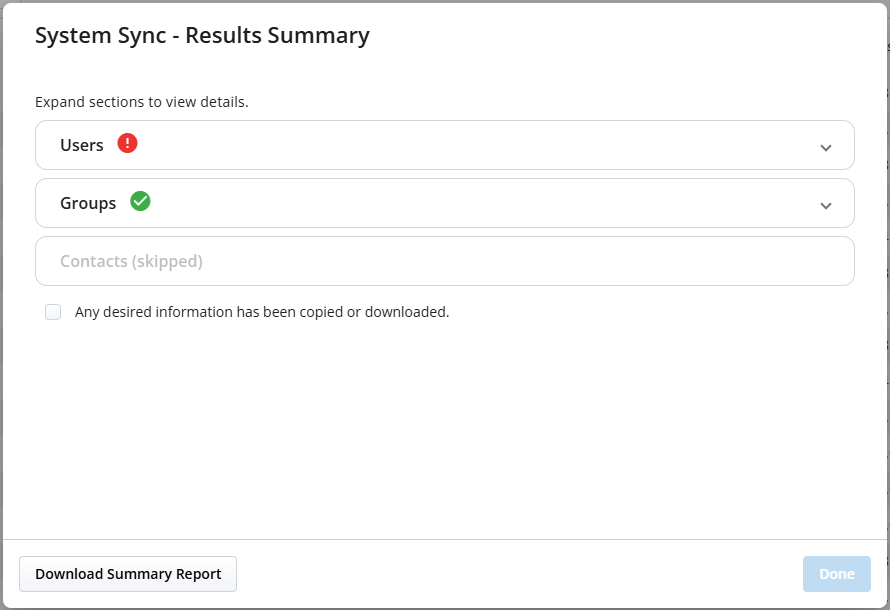
Figure 5. System Sync - Results Summary - Users sync completed with warnings, while groups and contacts sync completed successfully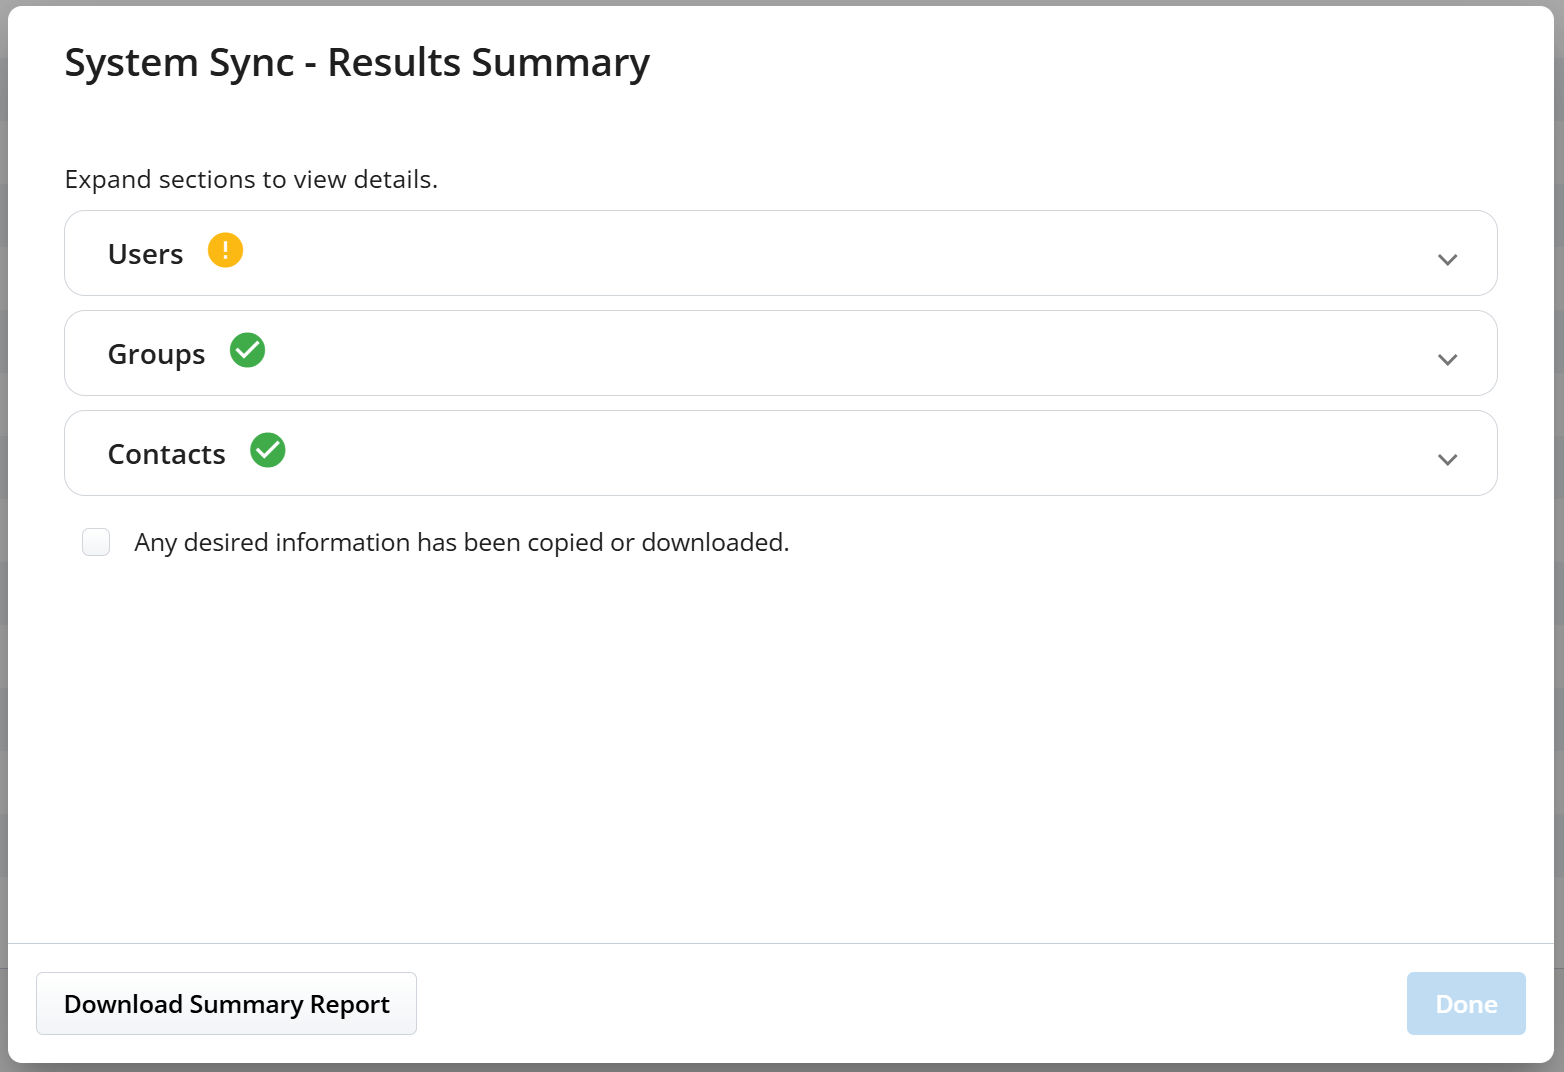
-
Click on a section to expand it and view detailed information,
including:
- Number of users/groups/contacts found on PBXs, and a link to view them.
- Final users/groups/contacts count in CloudLink and a link to view them.
- Failures and a link to details if failures exist.
Example: Email address not unique in account.
- Warnings and a link to details if warnings exist.
Example: Users with duplicated email addresses.
Figure 6. System Sync - Results Summary - Users sync completed with failures, while groups and contacts sync completed successfully. The Users section has been expanded.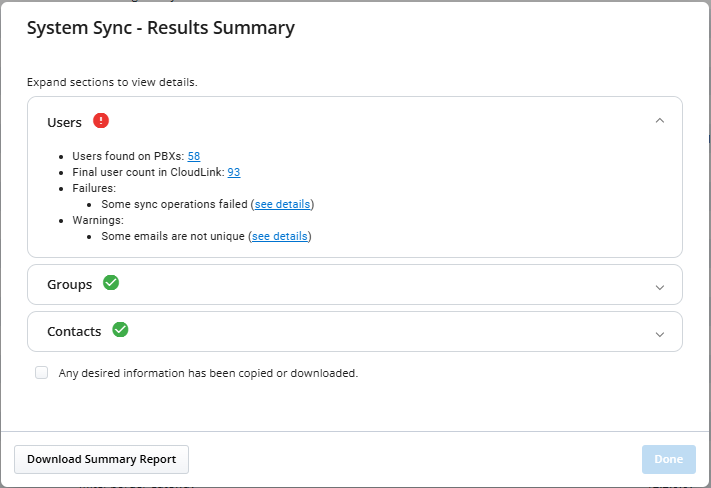
-
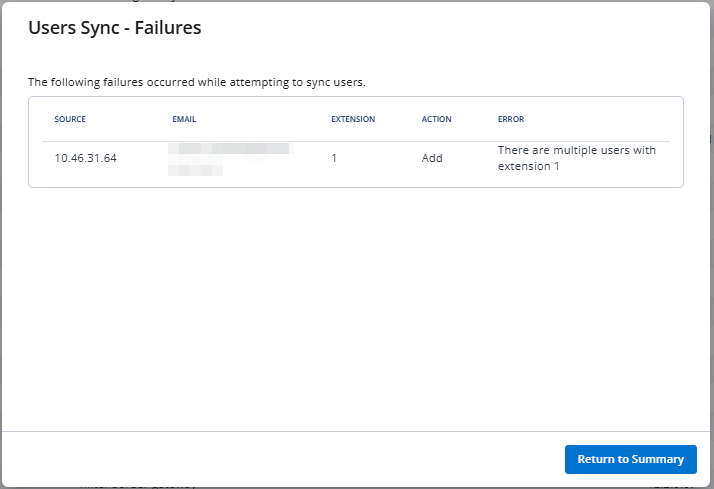
Click any link within a section to view more detailed information. Once
you have reviewed the details, click Return to
Summary to go back.
Figure 7. Users Sync - Failures
-
Click on a section to expand it and view detailed information,
including: