MS Teams Integration
Following are the instructions for integrating Microsoft Teams with CloudLink Accounts.
Prerequisites
- Gateway integration enabled. Depending on the PBX type, see the following documents for more information:
MiVoice Office 400: Configure MiVoice Office 400 PBX
MiVoice Office 5000: CloudLink Deployment Guide with MiVoice 5000
MiVoice Business: CloudLink Integration with MiVoice Business Deployment Guide
- MX-ONE: Deployment Guide with MX-ONENote: The email address of a user configured in the selected PBX must match the primary email address or the user principal name of the user in Azure AD.
Integrating Microsoft Teams with a Customer Account
Access the Integrations panel from Accounts Information page or from Integrations & Apps option. For more information about accessing Integrations panel and adding integration to a customer account see, Adding an integration to a customer account.
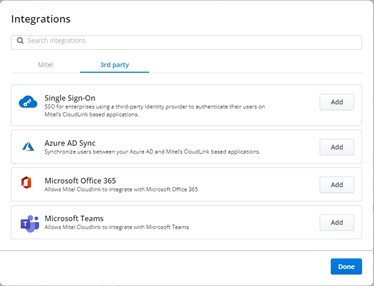
- In the Integrations panel, click + Add new. A pop-up screen displays teh available integrations.
- Click the 3rd party tab. A list
of supported third-party applications is displayed. Click the Add button
associated with Microsoft Teams, and click Done.
The Microsoft Teams integration is added to the customer account and is displayed in the Integrations section of the Account Information page.

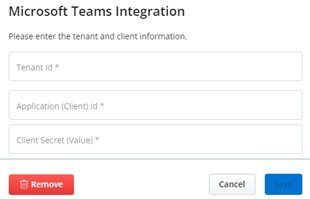
Click Complete setup. The Microsoft Teams Integrations dialog box is displayed.
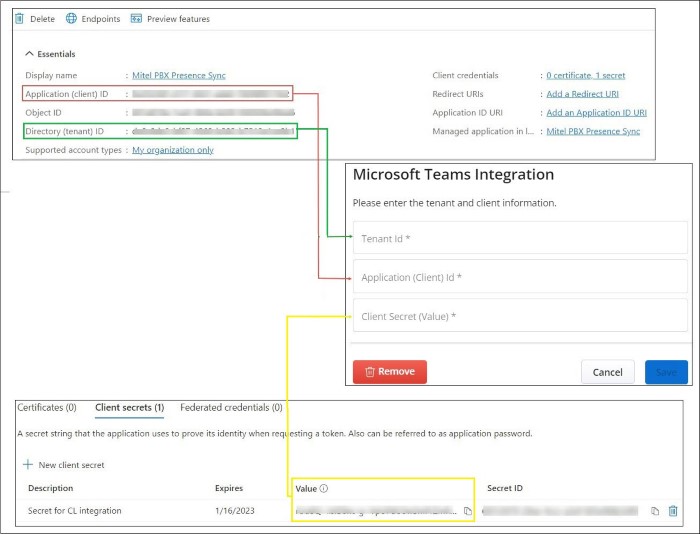
To create Tenant Id, Application (Client) Id, and the Client Secret (Value), you must create an Enterprise application. To create an Enterprise application, log in to Azure portal and click App registration > New registration. The Register an application page is displayed.
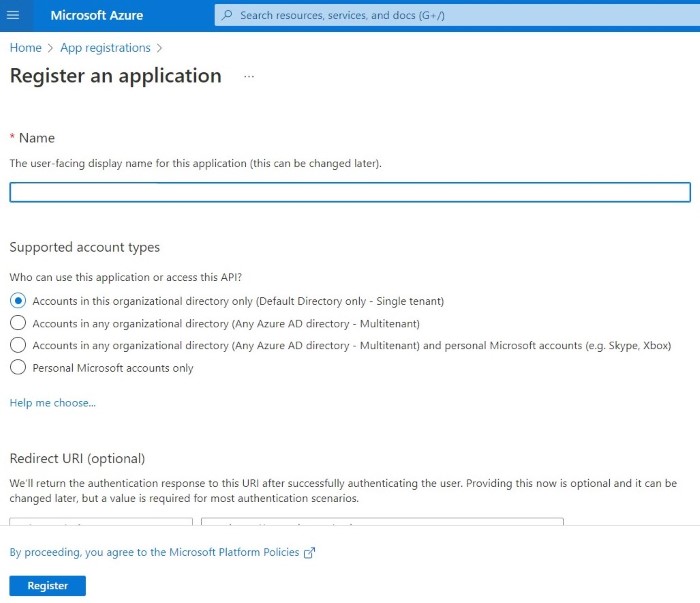
Enter the name for the application and select the Accounts in this organizational directory only (Default Directory only – Single tenant) option under Supported account types.
Click Register to register the application.
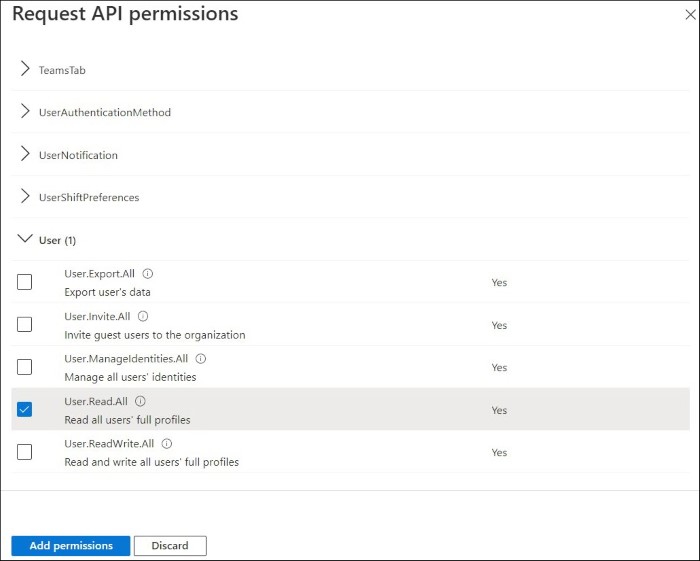
Navigate to API permissions in the left navigation panel and click +Add a permission. The Request API permissions page is displayed.
Click Microsoft Graph and then select Application permissions.
Enable the User.Read.All, and Presence.ReadWrite.All permissions as shown in the following images.
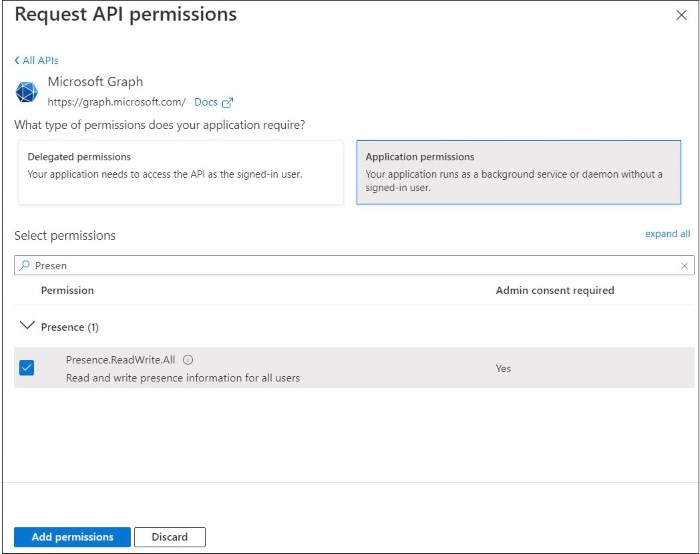
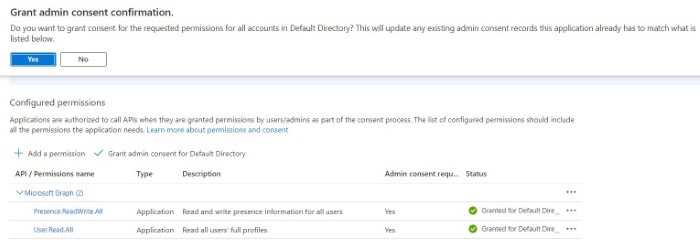
Click Grant admin consent for XXXX (directory name) and click Yes to grant consent.
Navigate to Certificate & secrets in the left navigation panel and click the Client secrets tab. The Add a client secret dialog box is displayed.
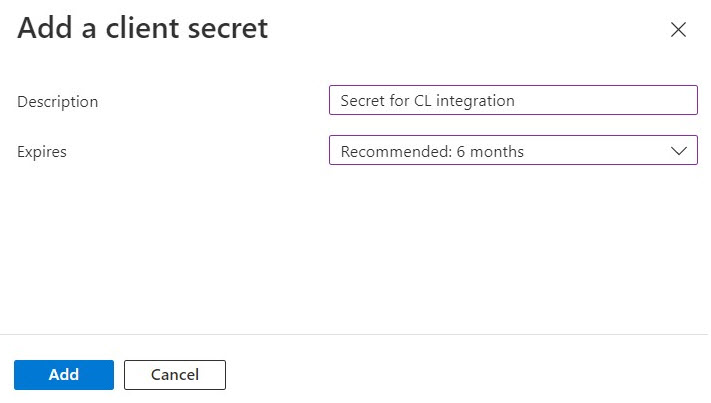
Enter the Description and select the expiry duration. You can select the expiry duration from a specific date till a specific date. Click Add to create the Client secrets.
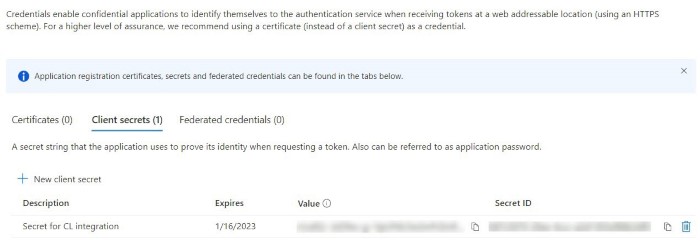
Copy the value under the Value column.
Navigate to the Enterprise application that you created in Step 5 and copy the Application (client) ID and the Directory (tenant) ID values.

In the CloudLink Accounts portal, enter the Tenant Id, Application (Client) Id, and the Client Secret (Value).
Click Save to save the information. Clicking Cancel cancels the operation and clicking Remove removes the Microsoft Teams integration.
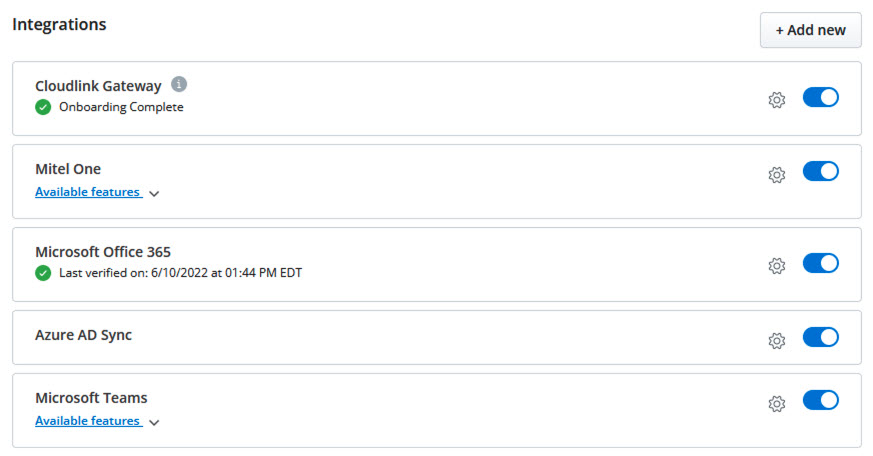
After you have added Microsoft Teams integration to the customer account, Microsoft Teams will be listed in the Integrations panel.
Enabling the Presence Feature
After integrating Microsoft Teams with a customer account, you can enable the Presence feature for that customer account. The Presence feature syncs the presence status of the user from CloudLink with MS Teams.
In the Integrations panel, click the drop-down arrow associated with Available features under Microsoft Teams.

Slide the toggle button to the right that is associated with Sync presence from CloudLink to MS Teams.
 The Presence feature is now enabled for the customer account.Note:
After enabling Presence feature, it takes few minutes for presence to reflect in MS Teams.
Mitel is aware of an issue with MDUG and PRG users experiencing a stuck presence in MS Teams and working to resolve this issue. Currently, presence sync is supported only for single device users with MiVoice Business.
For more information about MS Teams Solution Guide see, MS Teams Solution Guide.