Working with the WebAdmin
To operate the WebAdmin tool, enter your communication server URL in a browser. We recommend the browser Firefox 4 onwards or Internet Explorer 10 onwards or Chrome.
Two users may access the system configuration at any given time and modify the data.
After you have logged on as Administrator or System Assistant, you access the home page.
The navigation tree with the entries of the main menus is situated on the left-hand side.
The right-hand side displays the sub menu, the overview or the edit view.
Menu |
Description |
|
Search searches the views, parameters and parameter values according to searched word or word part. More information about the search function is contained in the online help of the search window |
User language |
Lets you select the language you want. To add to the languages, see "Adapt the language for the user interface and the online help." |
Mode |
In standard mode WebAdmin only displays a subset of the configuration parameters. The hidden parameters are set automatically in the background. The standard mode is ideal for administering simple systems. In expert mode WebAdmin provides all the configuration parameters. The export mode is ideally suited for systems with more demanding configuration requirements. The switchover from one of the modes to the other is available only at the Administrator authorization level. |
|
Clicking the question mark opens the online
help for the current view in a separate browser. If you leave the
window open and change to another menu item on the navigation tree,
the content of the help window is automatically adjusted. You can
find out more about the online help here Note about the online help |
 |
Clicking this symbol closes WebAdmin. |
Welcome <User name> |
Clicking <User name> opens your user account in the access control. |
|
SWA state. SWA stands for Software Assurance. Placing the mouse over the pictogram displays a short description of the current status. Clicking the pictogram opens the Licensing view. You can find more information about SWAS there in the online help. |
|
This symbol only appears if there are some actual configurations, which are insecure. This may be general settings or insecure passwords of user accounts, users or terminals. Clicking the symbol takes you to the Security view, where you find detailed information about the security status. |
|
This symbol only appears if you have changed something in the configuration which requires restarting the communication server. Clicking the symbol takes you to the Reset system maintenance view where you can carry out the restart. |
|
This symbol only appears if active event messages are available. Clicking the symbol takes you to the Active event messages maintenance view in which active event messages are listed. |


Sub menu
Directory of topics available in this menu. Clicking a list entry takes you to the overview for the topic you have selected.
The graphical overview
Elements relating to the selected graphical topic.
Double-click an element to open a edit view of that element.
To open an element's context menu, click it with the mouse context key.
Overview in list form
List of data records on the selected topic.
Click a column heading to sort the list according to the entries in the column.
Click a data record to access the edit view of the selected data record.
Edit view
List of parameters on the topic and their values
To accept the changes, click the Apply button.
To reset the changes you have made without exiting the edit view, click the Undo button.
To exit the edit view, click the Cancel button. Unsaved changes will be lost.
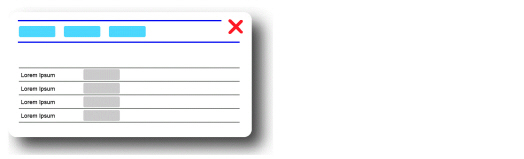
Many edit views are presented in overlay format. You can move an overlay view on the screen with the mouse.
To close an overlay view, click the red cross in the upper right corner.
To move an overlay view, click the head part, press and hold down the mouse key then move the mouse.
Assistant for the Administrator
The assistant helps you to configure a communication system in sequence, from scratch. To activate the Assistant follow the entries one by one from top to bottom.
Search in WebAdmin
You are searching for a specific parameter or view in WebAdmin.
WebAdmin search searches the views, parameter and parameter values according to searched word or word part. The hits are listed and evaluated according to hit quality. Field values entered manually, for instance names as well as the online help, are not searched.
Enter the word
or part of the word searched for in the search field ![]() then press enter.
then press enter.
Opening views directly with the help of navigation codes
You
will find in an MiVoice Office 400 manual a reference to WebAdmin
with a search icon ![]() , followed by a two-digit
navigation code, or you wish to quickly switch between frequently used
views.
, followed by a two-digit
navigation code, or you wish to quickly switch between frequently used
views.
Many views and overlay views in WebAdmin can be opened directly with a two-digit navigation code. You can find each navigation code of a view on the help page for this view.
In the search
field ![]() , enter an equal sign followed by the
navigation code of the view you want then press Enter.
, enter an equal sign followed by the
navigation code of the view you want then press Enter.
The view you want is opened immediately. For example, to open the overview view enter “=0k” in the search field.
The navigation code of a view is also displayed in the online help. Clicking this code opens this view in WebAdmin.
Filters in lists
You wish to display only some specific entries in long lists ( for example only users whose names start with "S").
The filter function of WebAdmin displays only list entries that meet the filter criterion. All list columns are taken into consideration. If, for instance, you filter by “Mi” in the user list, all users are displayed whose names contain the character string “mi”, but also all users who have assigned a Mitel phone.
Enter the filter criterion in the input field near the Filter button then click the Filter button.
To
delete a filter criterion, click the delete icon ![]() between the input field
for the filter criterion and Filter button.
between the input field
for the filter criterion and Filter button.
Modifying list inputs at the same time with Multi edit
The Edit multiple button is available in some lists (example: users, terminals, mail box). You can use it to edit an entry and then to apply the configuration to several other entries.
Sample user list: Click the Edit multiple button, select several users and click the Edit multiple button again. Then modify for a user, representing the other users, the settings you want, and click apply. The modified settings (marked with yellow) are applied to the configuration of all selected users. You can find detailed instructions and more information in the online help for the corresponding lists.