Use this option if you want the tool to perform complete migration and you have procured a new replacement 16 GB CF from Mitel. After the bootloader migration, you must manually replace the current drive with a drive containing the MiVoice Business 9.1 or a later software. After replacing the drive, the tool proceeds with licensing the system and restoring the database.
Do one of the following:
If you want to perform a pre-migration audit of your MiVoice Business system, then select the Perform Pre-Migration Audit check box, and proceed with step 2.
If you have already audited
your system's database and a compatible database is available
for restore, clear the Perform
Pre-Migration Audit check box, and proceed with either
step 2 or step 3.
By default, the check box is selected (recommended).
IMPORTANT: You must run the pre-migration audit for all MiVoice Business systems before migration to ensure your database is compatible with MiVoice Business Release 9.0 or later. An attempt to restore an incompatible database will result in a default database.
(Mandatory if the Perform
Pre-Migration Audit check box is selected) Click Browse
and then select a directory to store the database file, and then enter
a filename for the database backup file.
By default, the check box is selected (recommended).
NOTE: It is recommended to back up the database. If not, the current database is lost.
If you want to back up call history records, select the Backup Call History records check box.
(Applies only to CX II, CXi
II, and MXE III controllers) If you do not want to back up voice
mail messages, clear the Backup
Voice mail messages check box.
By default, the check box is selected.
NOTE: If you want to back up voice mail messages, ensure that the voice mail message capacity is not more than 30 hours.
In the Bootloader Network Settings area, do one of the following:
If you want to use the current
system's network configuration after the bootloader migration,
then select the Use current network
configuration option.
By default, this option is selected.
If you want to reset to factory configuration after the bootloader migration, then select the Reset to factory configuration option. If you select this option, licensing and database restore options are skipped and the tool proceeds to the In Progress window.
By default, the License and Option Configuration - AMC sync required check box is selected. Clear the check box if you want to exclude the license information during the migration. For more information, see Performing migration of an unlicensed system.
If you have selected the Perform
Pre-Migration Audit check box or the Database
Backup check box, then by default the tool selects the Restore from Database Backup option.
The tool restores the database created during the pre-migration audit
or database backup.
If both the Perform Pre-Migration
Audit and the Database Backup
check boxes are cleared, then by default the tool selects the Restore from the following file (ESM Database
Only) option. Click Browse
to select the database file.
The tool restores the database file saved on your PC .
NOTES:
Ensure that the database is audited and compatible.
Ensure that the user credentials in the database is current and valid.
Ensure that the voice mail capacity in the database file is not more than 30 hours.
To restore your guest room information, select the Restore Guest Room Information option.
(Applies only to an AX controller) If you want
to save the voice mail messages, select the Preserve
Voice mail messages check box.
The system saves voice mail messages in the directories; %\ProgramData%\Mitel\MiVoice
Business Migration Tool\Ftp\<ipAddress>\vmail\d\vm\grp
and %ProgramData%\Mitel\MiVoice
Business Migration Tool\Ftp\<ipAddress>\vmail\d\vm\msg
on the local PC and restores the voice mail messages during the migration.
WARNING! If you do not select the check box, voice mail messages will be lost after the migration.
Specify the dimension selections to use in case of conflicting data during the data restore:
Use Dimension Selections from the software load to be installed
Use Dimension Selections from the backup file
Click Next.
The License and Option Selection
screen is displayed.
If you have selected the License
and Option Configuration - AMC sync required check box, then
the tool retrieves and displays the license data.
If the system is not licensed, then the License
and Option Selection window is blank. You can enter the Application Record ID, and click
Retrieve Licenses.
Click Next.
The Configuration Options window in displayed.
Click Start
to start the migration.Click Start
to start the migration.
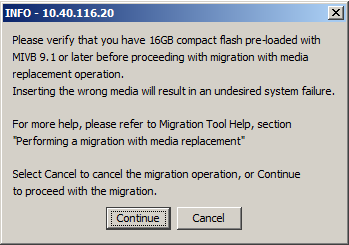
The following dialog box is displayed.
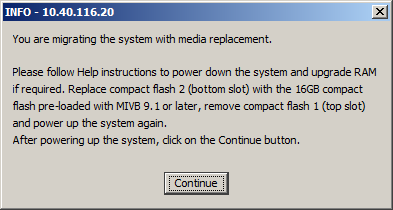
When the following dialog box is displayed, continue with replacing the CF (for an AX controller) or HDD (for CX II, CXi II, and MXe III controllers).
NOTES:
If you do not have a 16 GB CF handy, then abort the migration and perform reverse migration. See Software > Migration > Reverse Migration of an AX Controller if the 16 GB CF is unavailable or corrupt in the Troubleshooting Guide.
If you do not have a 16 GB CF handy, and the 2/4 GB CFs are blank, then abort the migration and manually install the pre-9.0 software:
From the communication application, type reboot.
Stop the auto-boot sequence by pressing the Space key three times at the following prompt:
Press <SPACE> key 3 times within 7 seconds to stop autoboot
At the -> prompt, type run upd_bootrom_fromdisk
Power down the AX controller and install the 2/4 GB CF. See Install and Replace Units > Flash Cards (AX) in the Technician's Handbook, pre-9.0 release.
Perform manual installation of pre-90 software. See Software Installation > Install System Software Manually in the Technician's Handbook, pre-9.0 release.