Partner Dashboard
The home page of the CloudLink Gateway Portal, which is also known as the Partner Dashboard, can be used to do the following:
- Create customers in the CloudLink platform.
- Associate a CloudLink Gateway with a customer.
- Connect a CloudLink Gateway to a PBX.
- View and manage previously created CloudLink customers.
After you create a customer in the CloudLink Platform, that customer is listed in the Partner Dashboard.
Follow these instructions to log into the CloudLink Gateway Portal.
Welcome to CloudLink
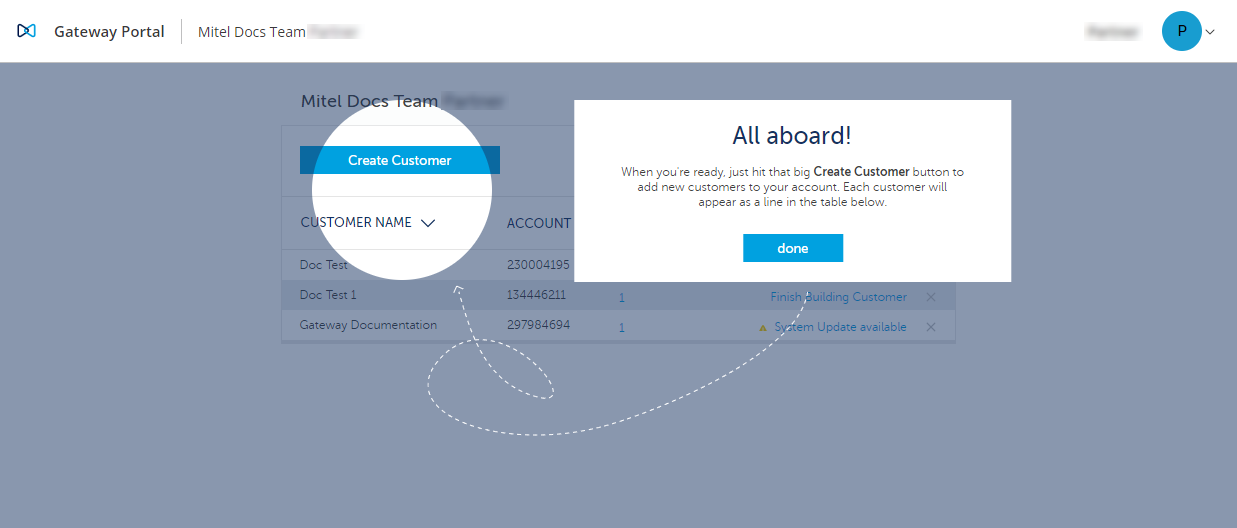
The following image shows an example of the Partner Dashboard the first time a partner logs into the CloudLink Gateway Portal:
When you log into the CloudLink Gateway Portal via the Mitel MiAccess Portal, your MiAccess account is created as a customer in the CloudLink Platform.
If you have a CloudLink Gateway and a PBX on your LAN, you can onboard your own MiAccess account into CloudLink to become familiar with the process. Doing this also enables your account to use CloudLink applications such as Mitel One, and MiVoice Office.
User Interface Elements
The following diagram shows the user interface elements of the Partner Dashboard:
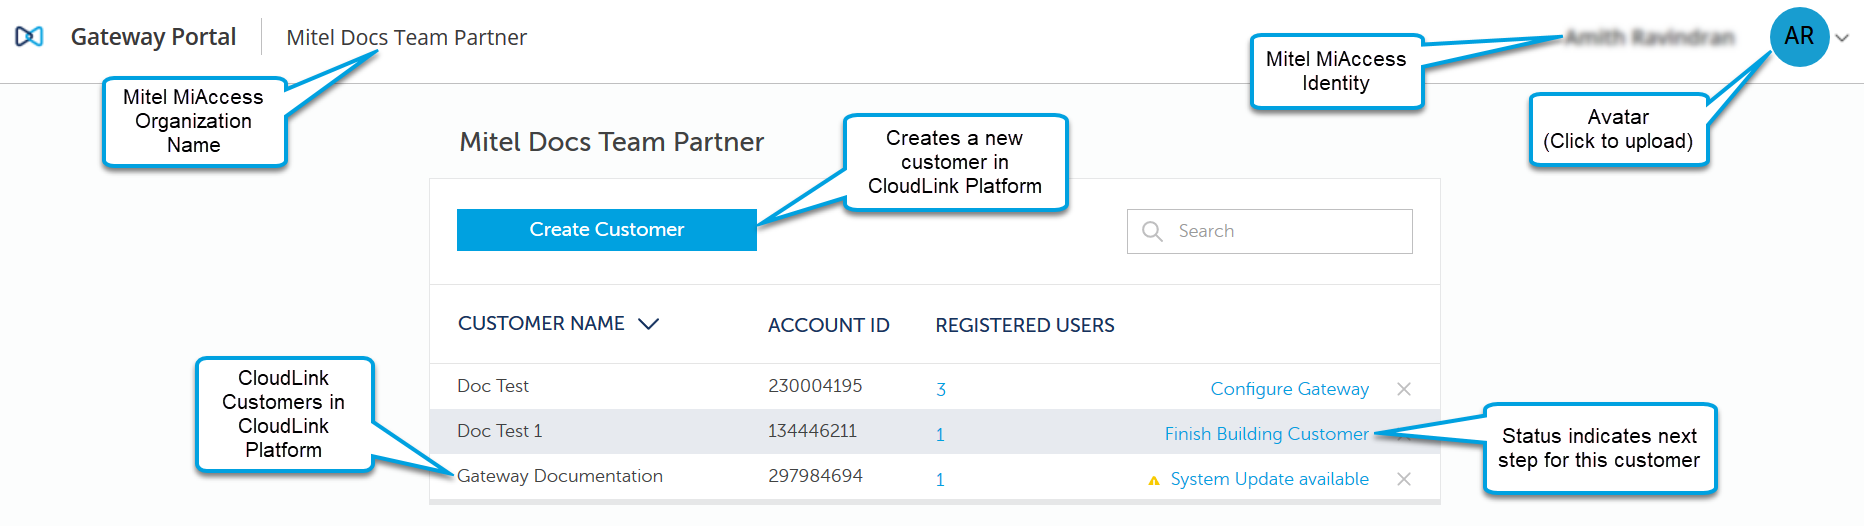
The following table describes the user interface elements of the Partner Dashboard:
|
User Interface Element |
Function |
|---|---|
|
Mitel MiAccess Identity |
This is your name as provisioned in the Mitel MiAccess system. To change this name, update your MiAccess profile. |
|
Mitel MiAccess Organization Name |
This is the name of your organization as provisioned in the Mitel MiAccess system. To change this, an administrator can update your organization. |
|
Avatar |
You can click this control and choose a photo or image to represent you. This image will be present in CloudLink applications (e.g. Mitel One, and MiVoice Office). |
|
Create Customer |
Use the Create Customer button to create a new customer in the CloudLink platform. |
|
Customer List |
A table appears below the Create Customer button displaying one row with the following four columns of data for each of your customer accounts.
|
|
Links |
At the bottom of the Gateway Portal are the following links:
|
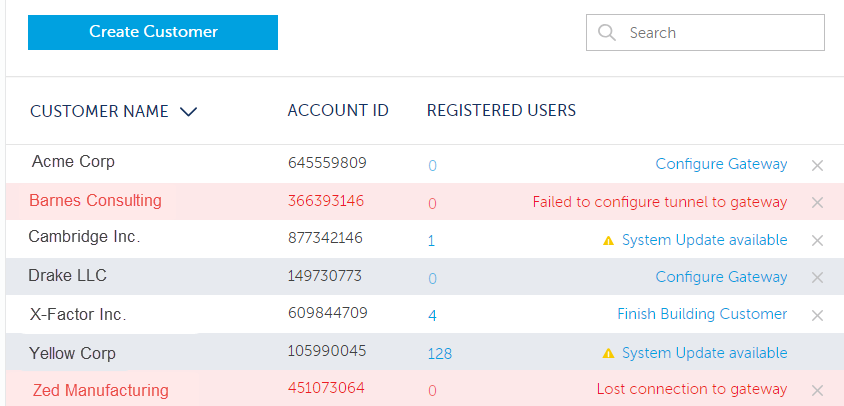
Customer List Status Messages
The current status of each customer is shown as a link on the right side of your list of customers. Click anywhere in the list to navigate to an existing customer account. If there is a problem with a customer's account, that information is displayed in red with a brief explanation to help troubleshoot the issue. Click the linked error message to learn more. When the status displays Overview this indicates a successful customer deployment. The following shows typical status messages for a customer account.
Creating a New Customer
Click the Create Customer button to create a new customer in the CloudLink Platform then follow the instructions in Enter Customer Information. From here you can proceed to associate the customer with a CloudLink Gateway and connect or sync the CloudLink Gateway to the PBX.
Modifying an Existing Customer
Click anywhere in the row of an existing customer to navigate to the customer and modify the existing connection to the CloudLink Platform or the PBX. You can also do this to perform troubleshooting.
The CloudLink Gateway Portal can be accessed from anywhere with an Internet connection to modify or delete an existing customer.