The Directory in the MiVoice Office app provides access to your business and personal contacts. Whenever your business contacts are added, changed or deleted in the Mitel Cloud, the Directory in the app is automatically updated. Optionally, you can allow the app to access the personal contacts on your mobile phone. To learn more, see Find a Contact.
Your contacts are represented by the different types of avatars listed below:
- If a business contact has uploaded an image, it is displayed as that person's avatar.
- If a business contact has not uploaded an image, the avatar defaults to that person's initials.
- If a contact is a personal contact, the avatar always displays that person's initials.
- If a business contact does not have the MiVoice Office app, the avatar displays a
 icon, which means you can call this person (at their Mitel desk phone), but you cannot chat with them.
 - If a business contact represents a "hunt group," the avatar displays a
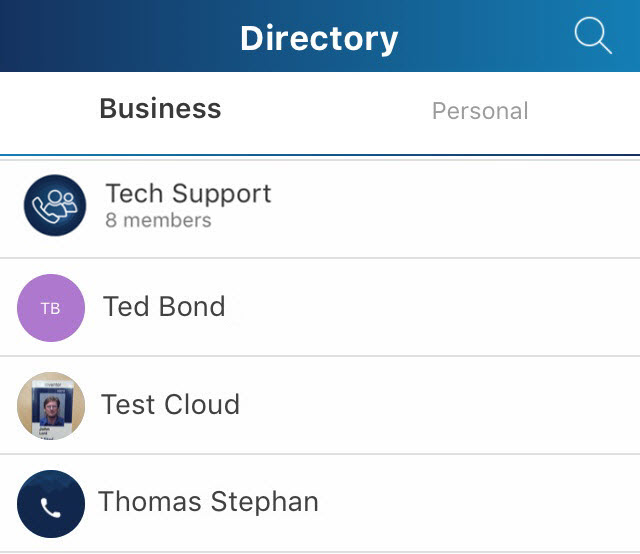
 icon followed by the name of the group and number of members. Calling a hunt group rings the phones of each person in the group until someone answers. In the Contacts example below, tapping Tech Support opens a screen listing each of the 8 hunt group members and tapping a member displays the contact's Details. Note that each Hunt Group is configured as a "User Group" in the MiVO400 PBX for your company's Mitel CloudLink account.
The Directory screen enables you to search the contact list and filter the results so you can quickly find who you want to communicate with. For help, see Find a Contact.
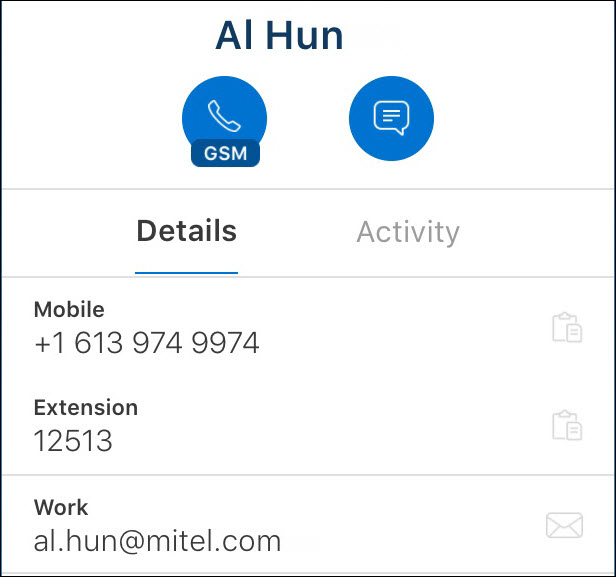
When you tap a contact on the Directory or Home screen, that person’s contact information appears under Details. You can tap Activity to the right to view your recent call history with this person. The following explains how to use the icons and contact information shown above.
-
 - Tap the phone icon to call the contact’s MiVoice Office app (and Mitel desk phone if configured in CloudLink). When "GSM" appears with the phone icon, the call is placed over the closest GSM network, otherwise a Wi-Fi or LTE network is used. To change the type of network, see"Use GSM" in MiVoice Office Settings.
 -
 - Tap the chat icon to open the chat screen where you can send this contact a message.
 - Mobile - Tap the
 icon on the right to copy the contact's mobile phone number to your phone's clipboard (if you want to paste it someplace else).
 - Extension - Tap the icon on the right to copy the contact's desk phone extension to your phone's clipboard (if you want to paste it someplace else).
- Work - Displays the contact's email address.
Adding Contacts as Tiles on the Home Screen
To add a contact to display as a Tile on the Home screen, access the Directory screen, tap the desired contact, and tap Add to Home at the bottom of the screen.
To add multiple contacts to display as Tiles on the Home screen, you can also do the following:
- Tap the
 icon, on the Home screen. An Add to Home options panel appears at the bottom of the mobile screen.
 - Tap Add contact. The Search Contact List screen is displayed.
- Tap each contact you want to add (a check mark appears beside each selected contact).
- Tap Add to Home at the bottom of the screen.
- Tap Save at the bottom of the Home screen.
There are three Home screens where you can add Tiles. Swipe left on the main Home screen to access the others. For details, see Tour of the Home Screen.
Each Tile added to the Home screen displays that contact’s live presence. To learn more, see View Contact's Status.
Tap any Tile on the Home screen to access options to call, chat, or view that contact.
Adding Contacts to Group Tiles
You can combine individual contact Tiles into a Group Tile. For help, see Create and Edit a Group and Add Contacts to a Group.
You can start a conference call with all members of a Group, but only when all members of a Group are Business contacts. If you add a Personal contact to a Group tile, the phone icon is disabled and calling this Group is not possible. Note that the "Use GSM" feature must be disabled in the Settings screen to place a Group call, which requires a Wi-Fi or LTE network (not a GSM network).
Remove Contacts from Home Screen
To remove an individual contact that you previously added as a Tile on the Home screen:
- Touch and hold the Home screen until the icon appears.
- Tap the
 icon in the top-right corner of the desired contact Tile.
 - Tap Save.
You can also go the Directory screen to tap the name of a contact you added as a Tile and tap Remove from Home at the bottom of the screen.